Laura’s Van Build Notes:
This site contains affiliate links, including those from Amazon. As an Amazon Associate, we earn from qualifying purchases. This means that if you click on an Amazon link and make a purchase, we may receive a small commission at no extra cost to you.
These commissions help support the content on this site, allowing us to continue providing valuable information and recommendations. We only link to products we genuinely trust and believe will add value to your experience.
Floors, Walls, Ceiling
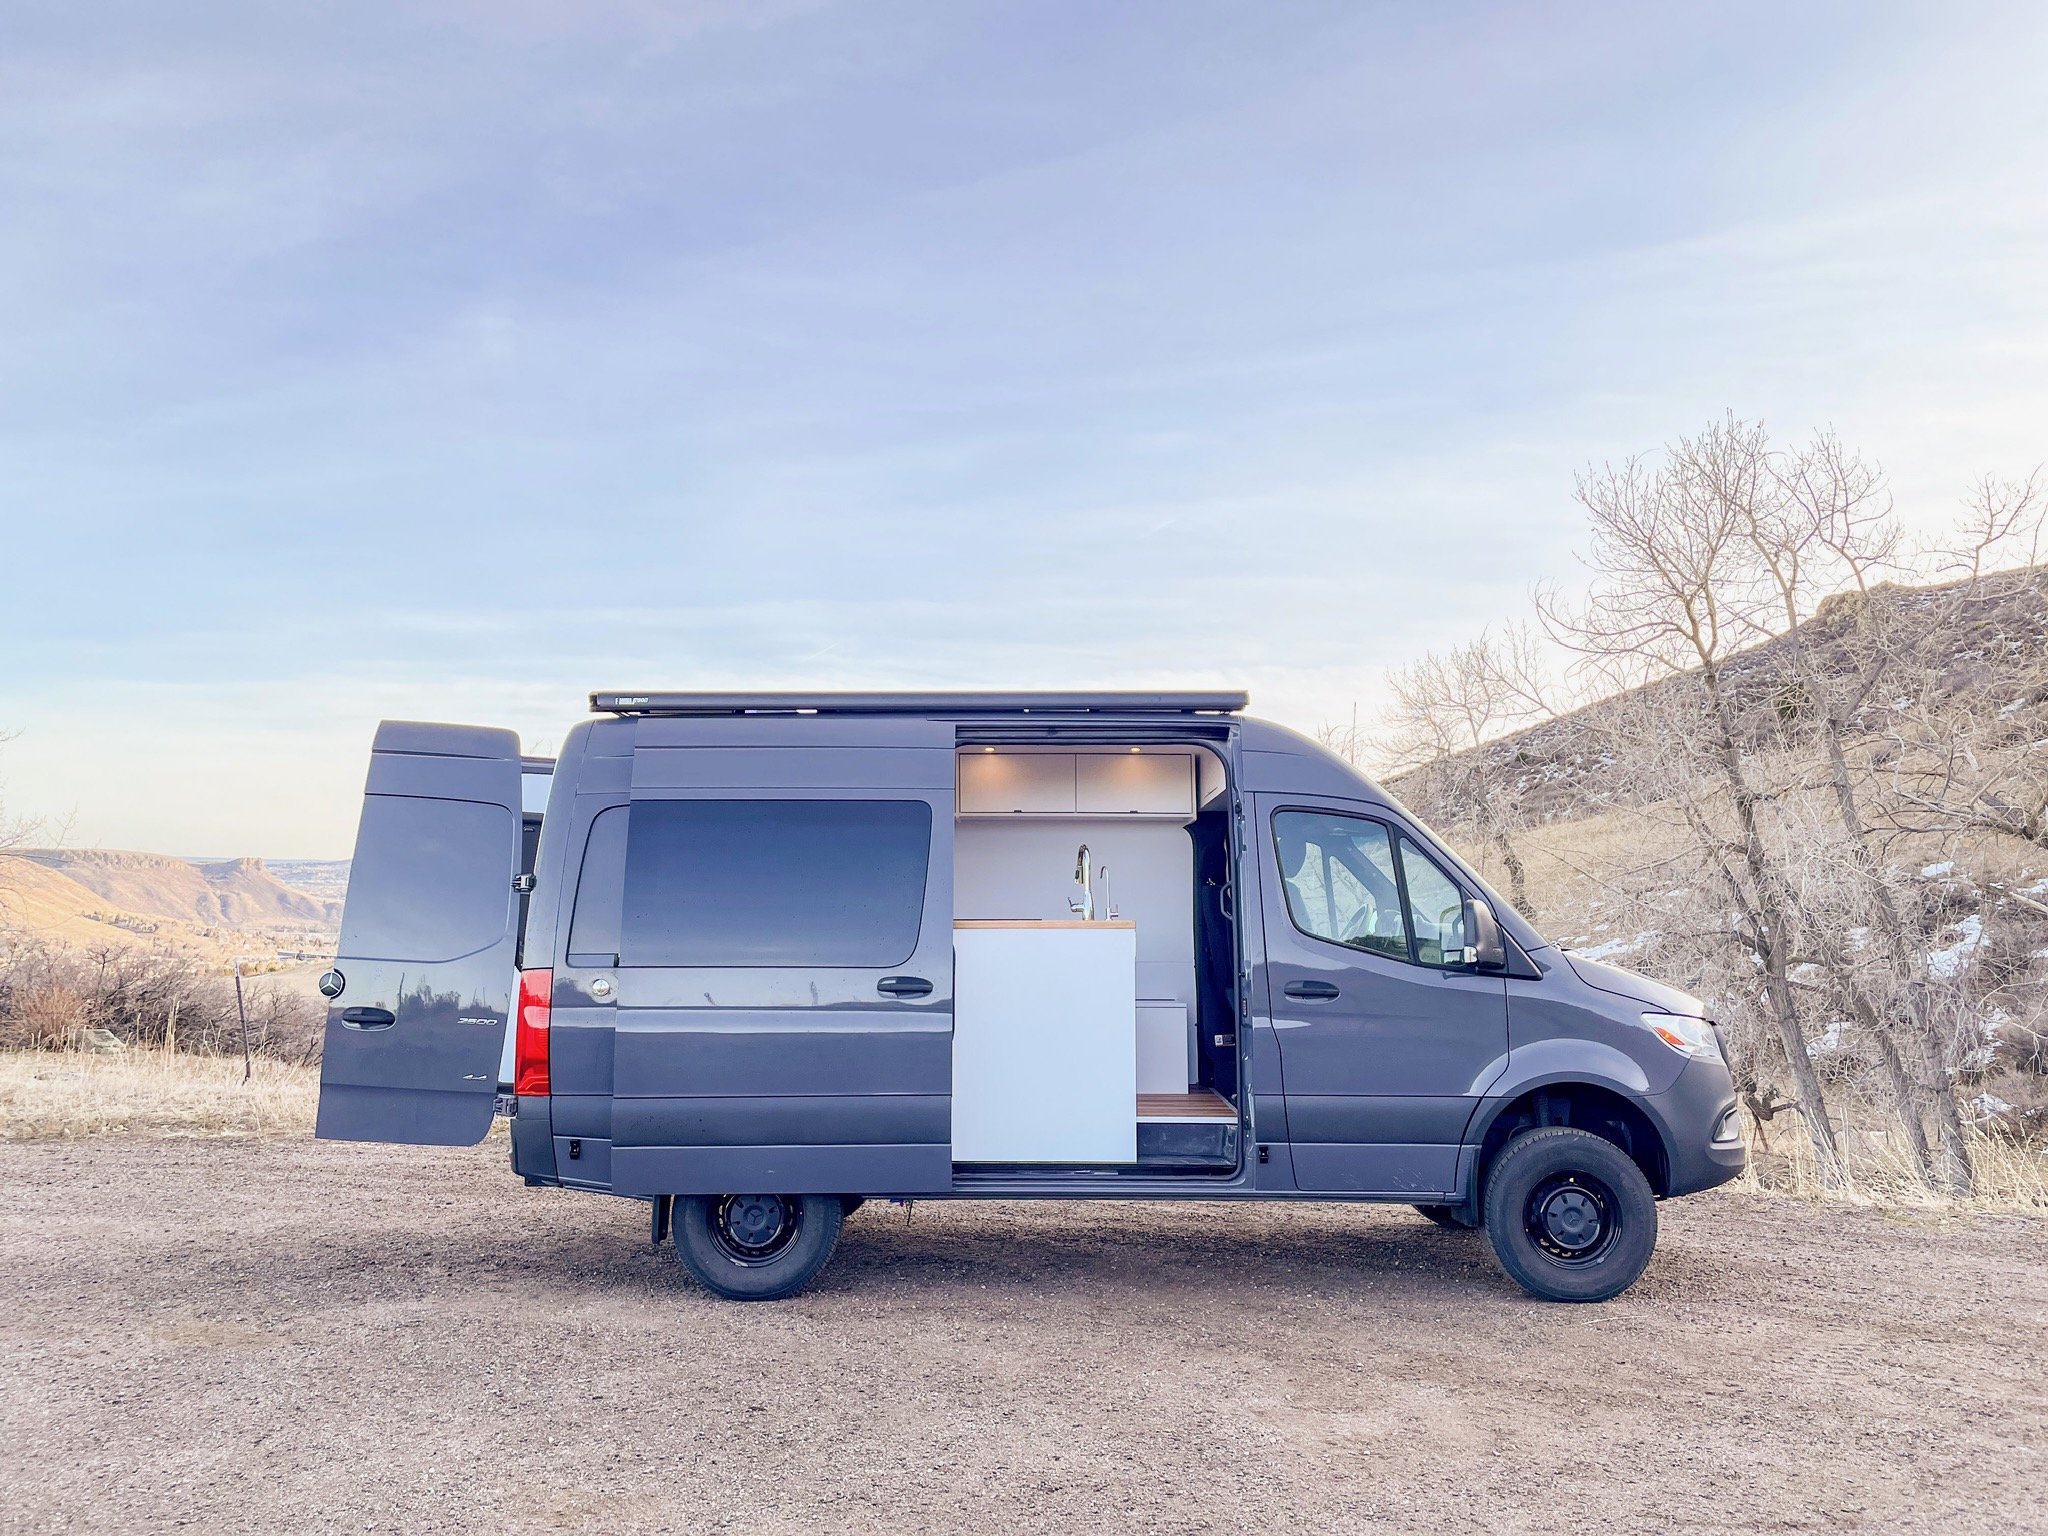
Like a lot of our projects, this rig started as an empty vehicle. We start with what we call the shell - floor, walls, and ceiling, but there are a lot of steps and parts that go into those 3 words.
Floor: We start with 3/4” marine grade plywood sourced from National Wood Products for our subfloor.
For this project, we framed out the floor with 3/4 plywood strips so that we could insulate under the subfloor with 3M Thinsulate. We used Sikaflex-252 to stick the plywood strips to the van floor and then installed our standard 3/4 marine grade subfloor on top after insulating between the flooring frame.
Like many of the vans we work on, this client opted for a Lifeproof Pinecrest Place Oak luxury vinyl plank flooring. We like the comfort, durability, and easy cleaning of waterproof LVP options.
The final step on the floor is trim. We used a 1.5” wide, 1/8” wall aluminum angle that we source from Alreco Aluminum in Henderson, CO to cover up the plywood and floor edges where they are exposed.
Walls: First step on the walls is to pack everything with insulation.
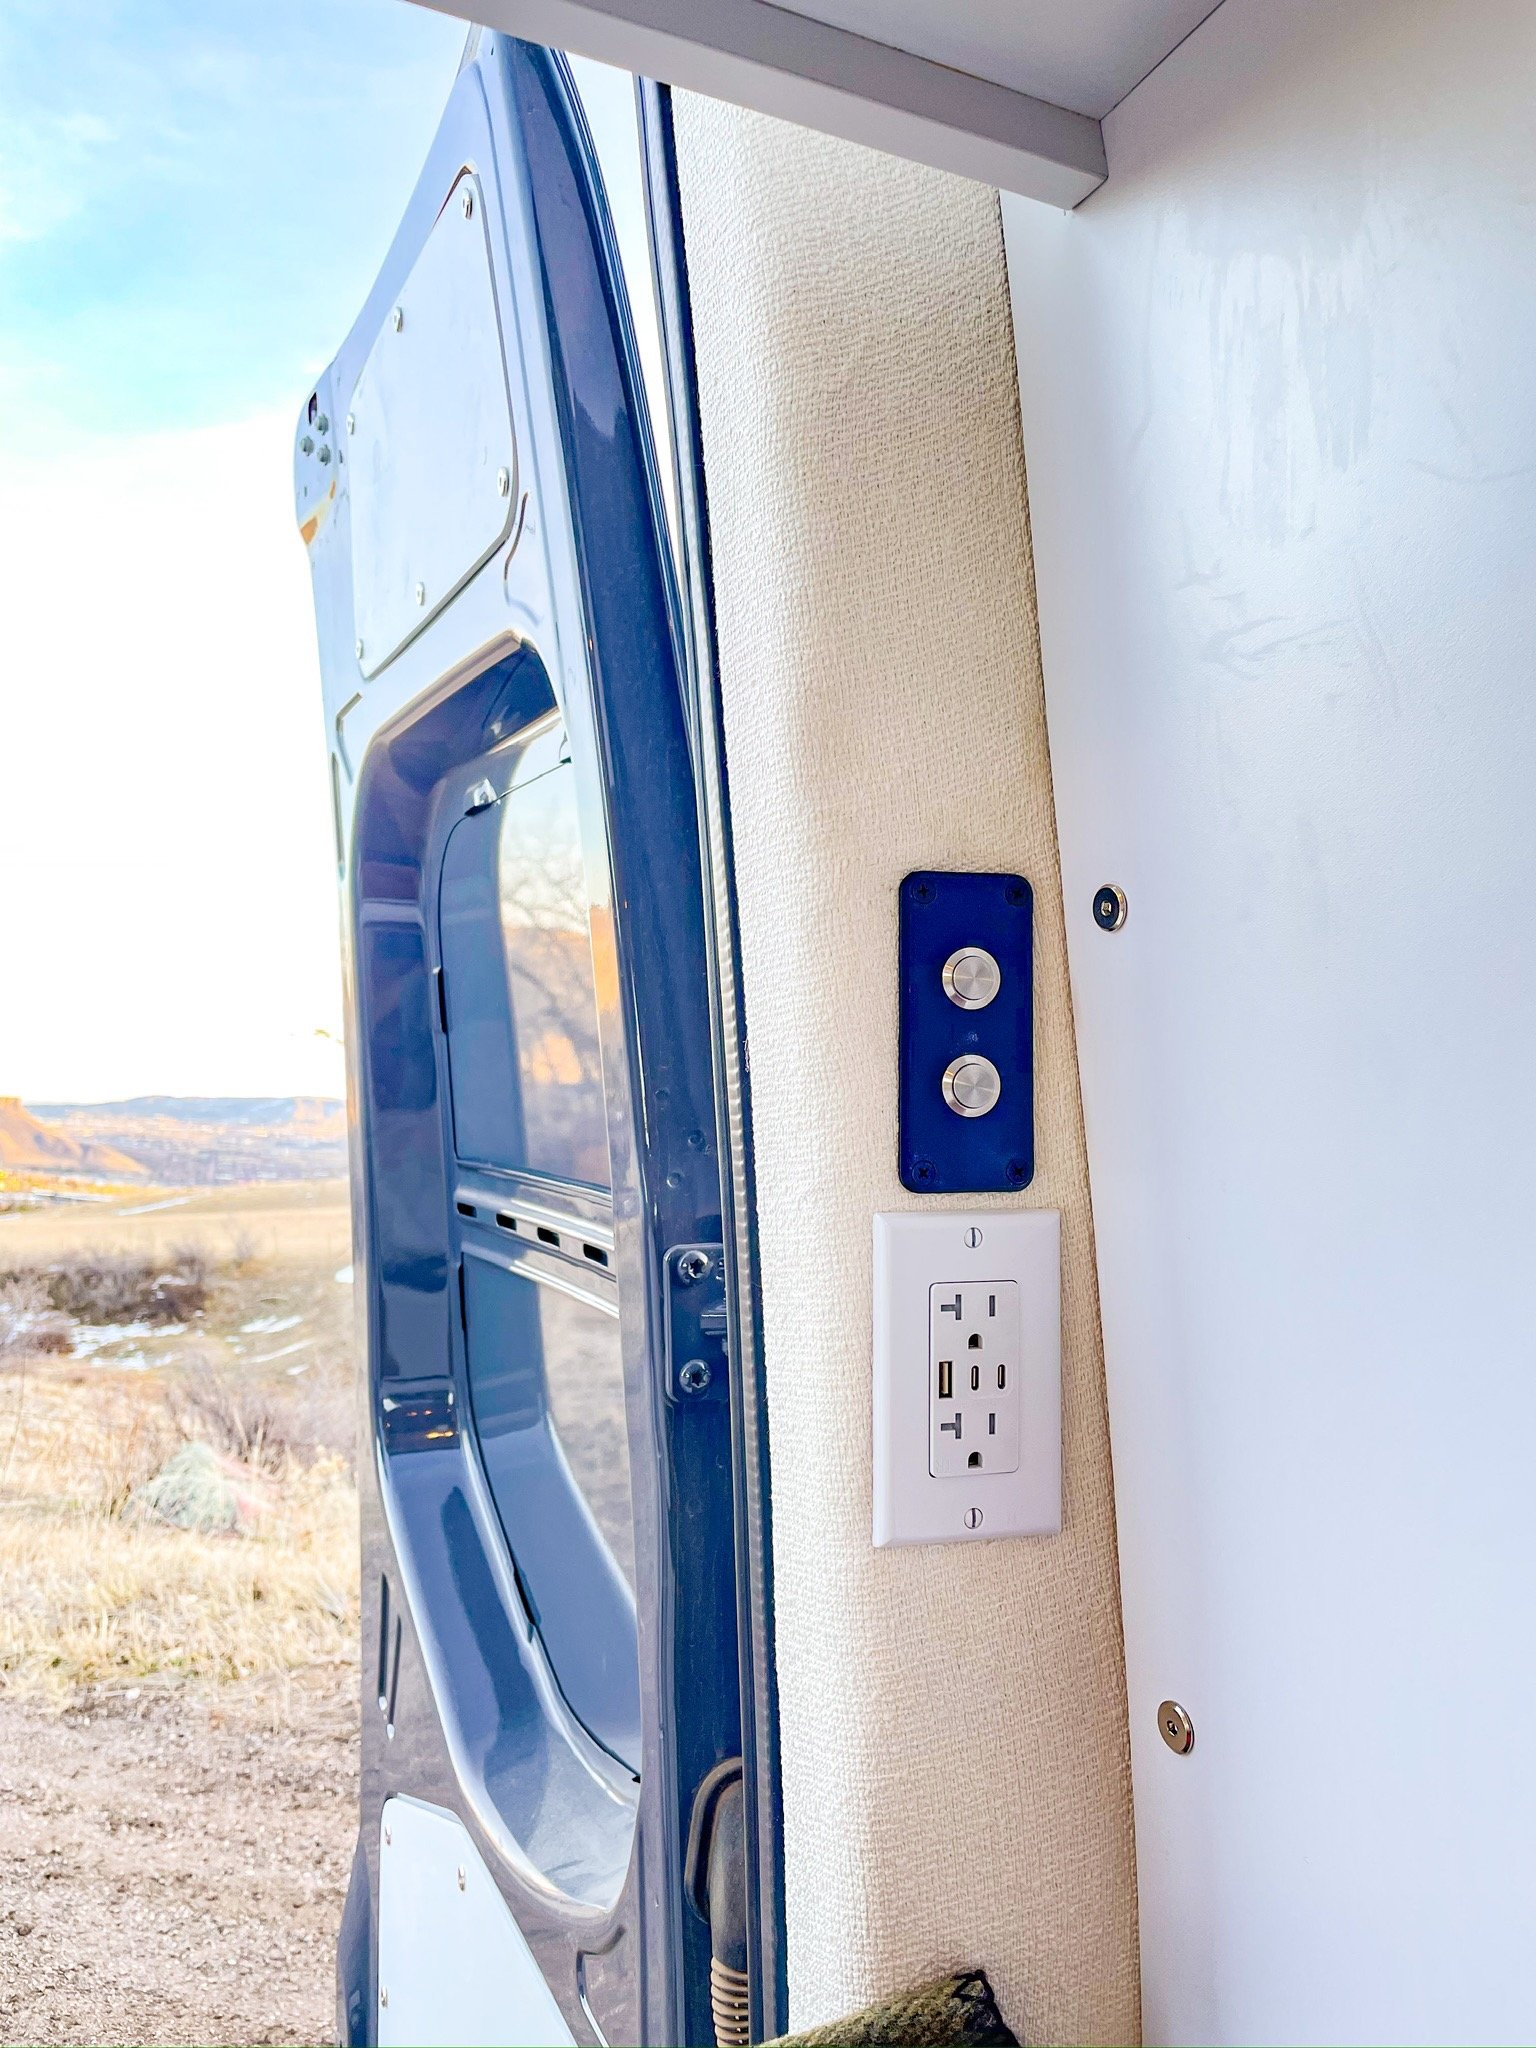
We used the DEI Precut Insulation Kit for 144” Sprinters on this van to help keep things warm/cool in the van. Once insulation is in and cable has been pulled behind the walls where it is needed, we install our wall panels with 35mm panel bolts and 1/4-20 Rivnuts set in the van sheet metal.
Our wall panels on this van were made of 1/4” plywood (again sourced from National Wood Products). Laura wanted her panels to match the rest of her cabinetry, so instead of fabric, this van got Formica Brite White laminated wall panels.
We upholstered the metal thresholds with Crypton Hyde Snow fabric to cover up all the exposed sheet metal and maintain a cozy feel.
Ceiling: Sticking with the white theme, we installed shiplap pine from Home Depot and painted it with Behr Premium ceiling paint.
For our hardwood ceiling installations, we add wooden framing to either side of the metal roof frame and then install the ceiling with brads and the same Sikaflex 252 that we use on the floor for a nice seamless look with no fasteners. Our standard interior lighting package includes 8 of these puck lights installed into the ceiling in two zones of 4 lights.
Electrical
The heart of every modern camper van is the electrical system.
Check out our Amazon List for a full list of products that went into this van and don’t hesitate to reach out for help with your system if you need it!

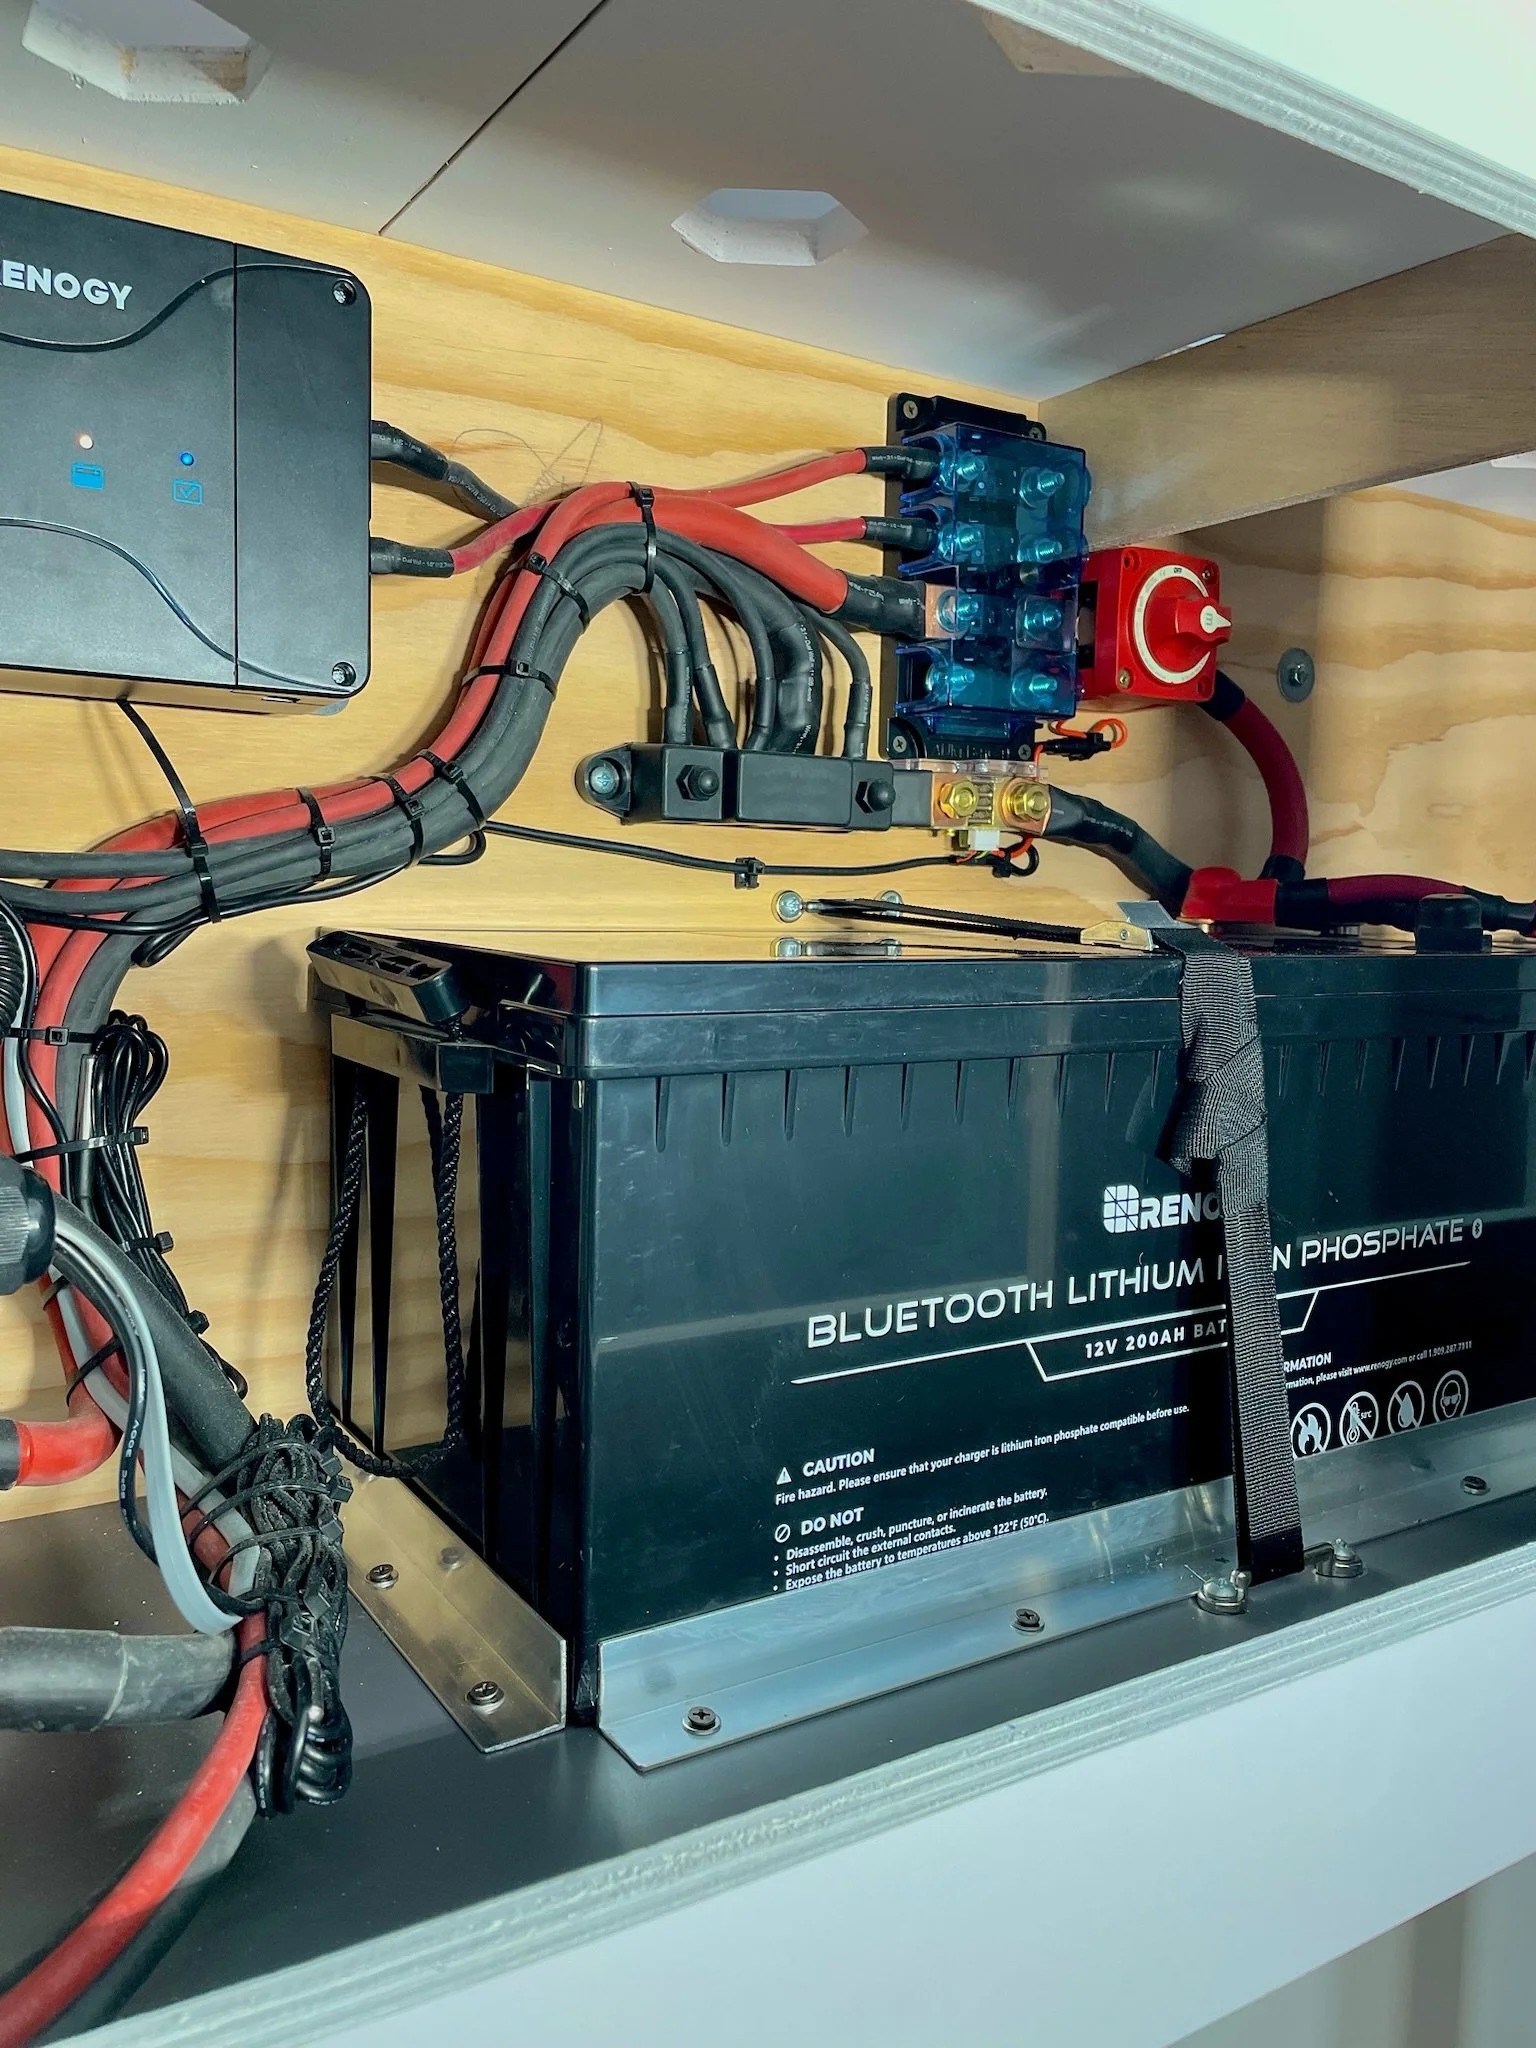
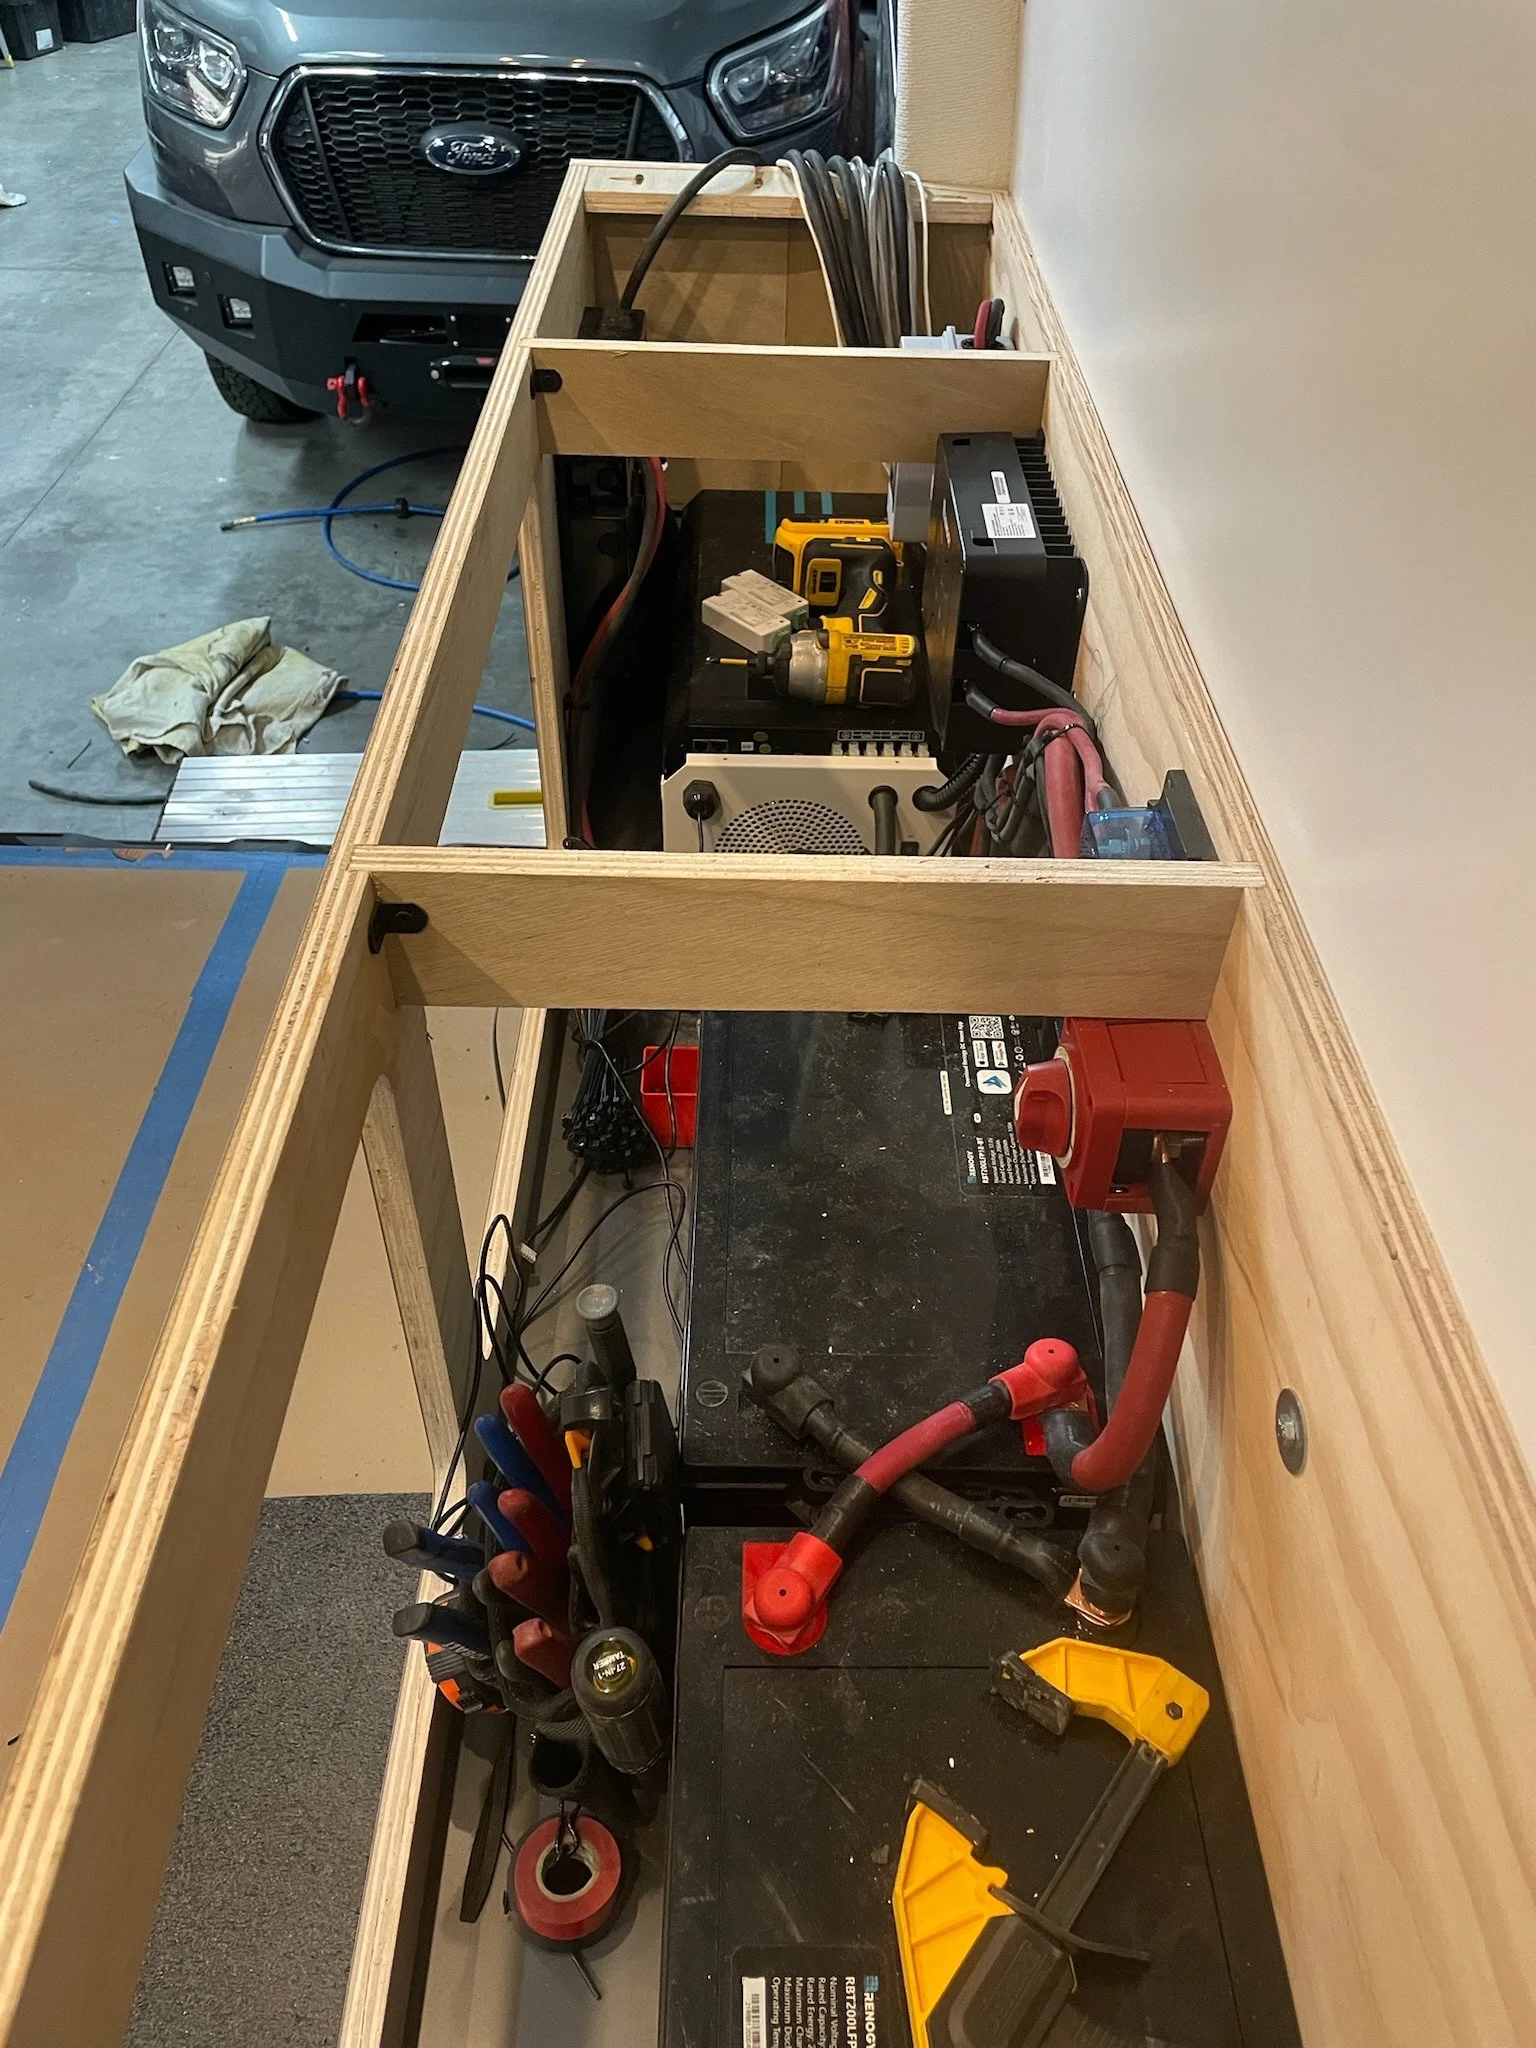
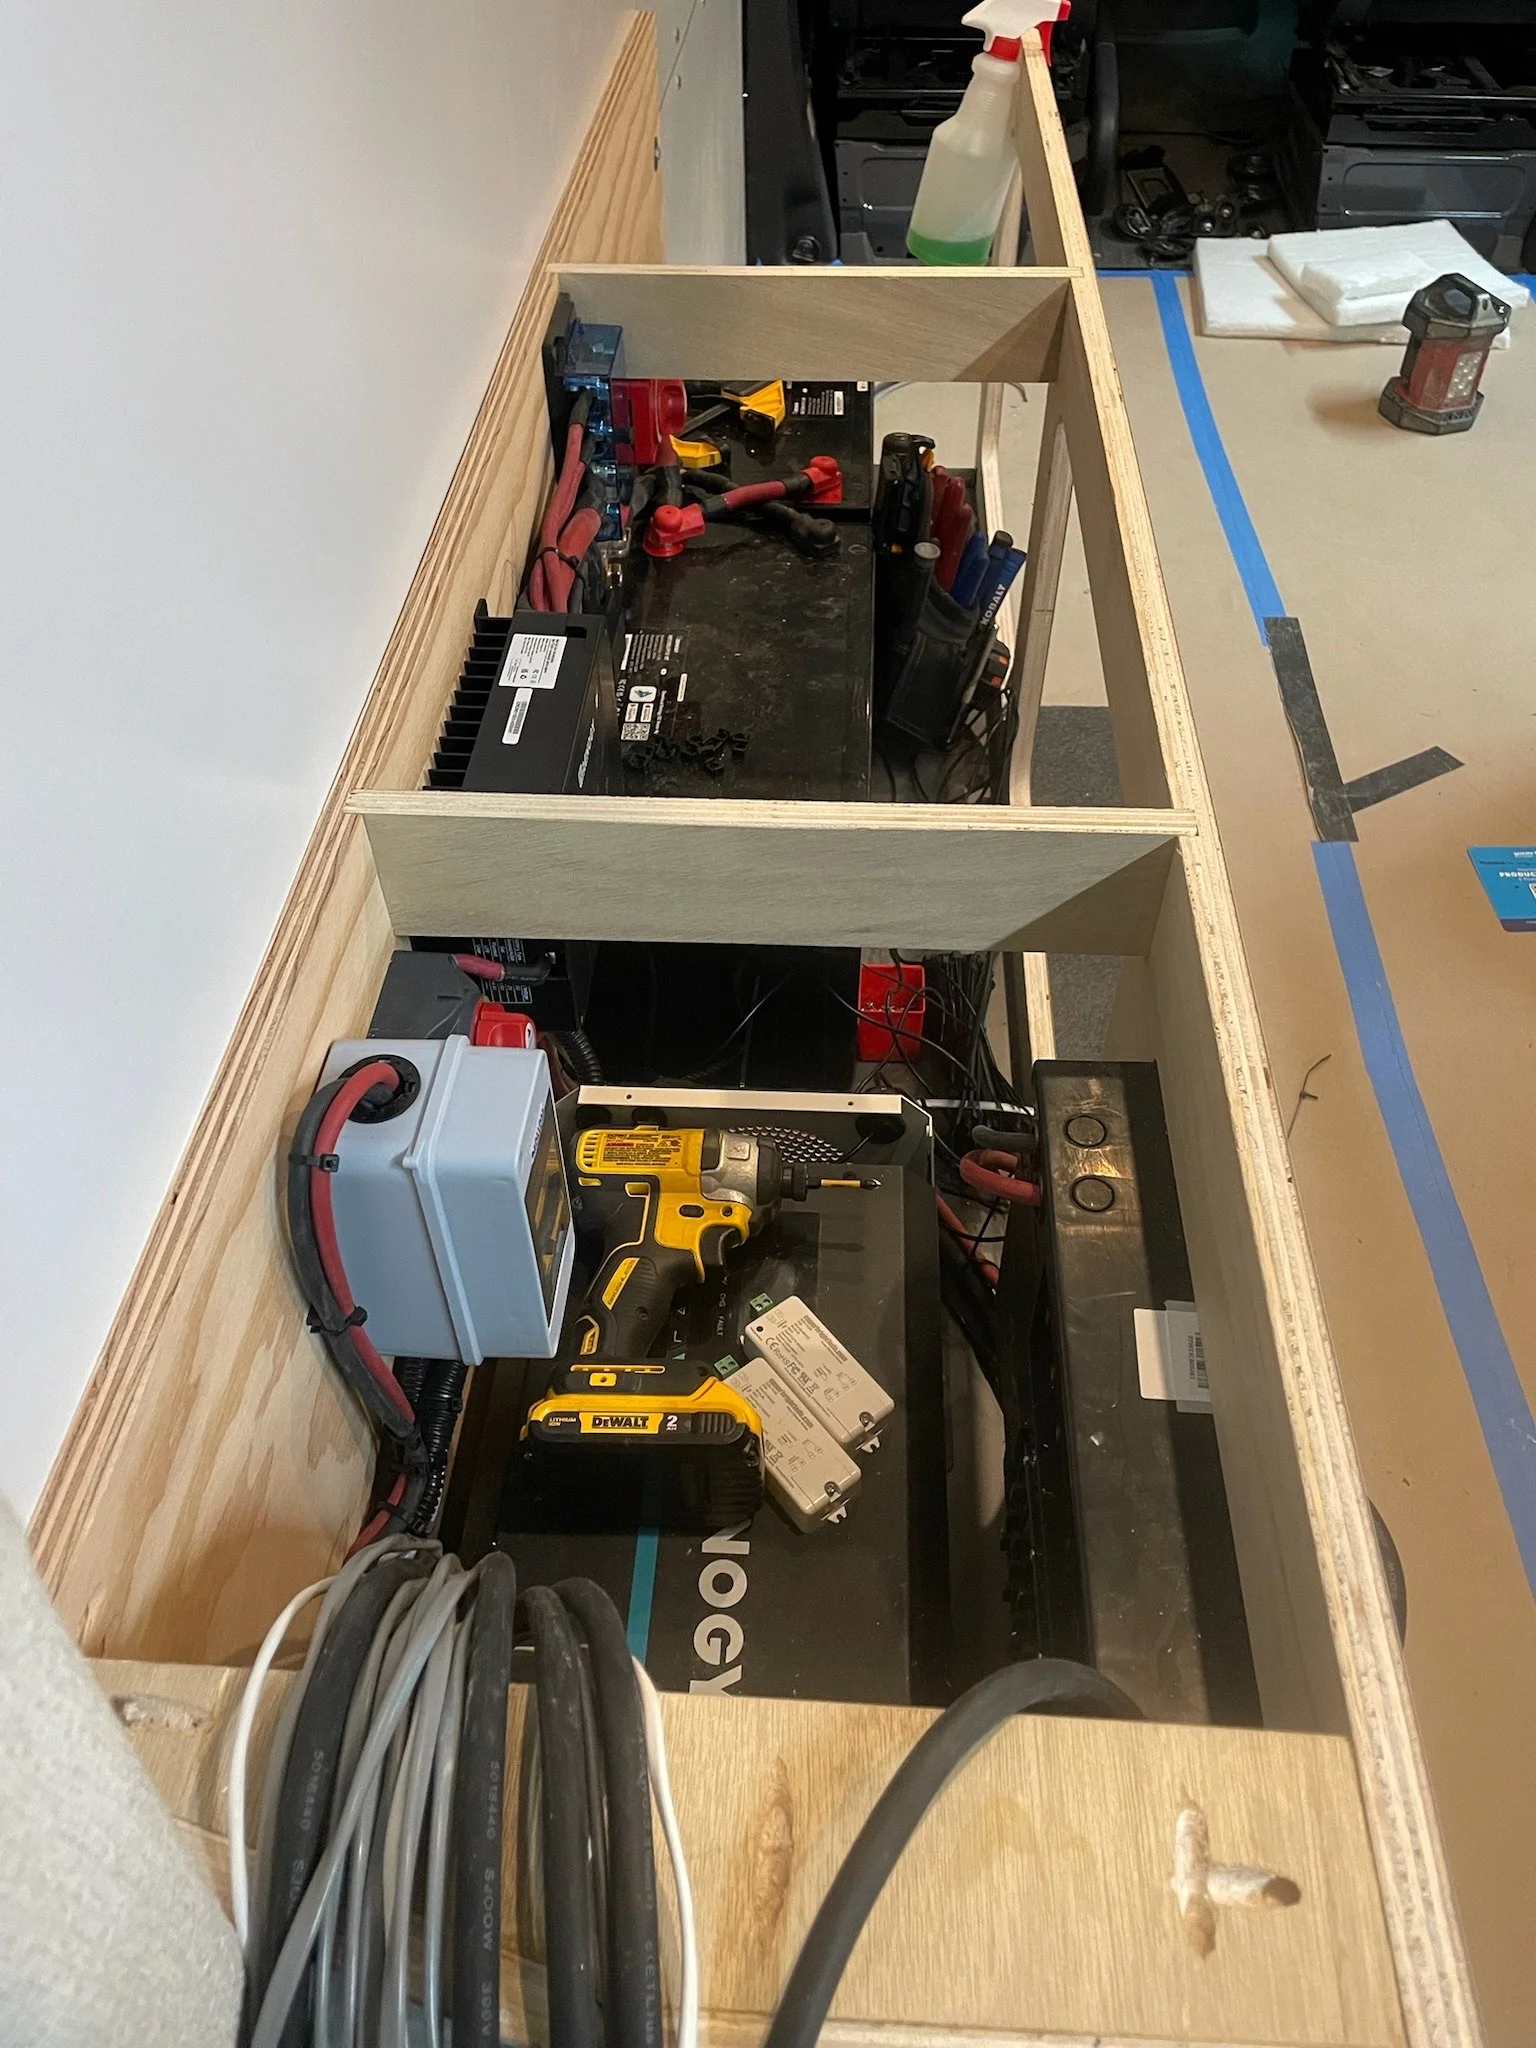
Since this van doesn’t have an air conditioner, the 400Ah of LiFePO4 batteries will keep Laura powered up and able to use all her appliances wherever her van takes her.
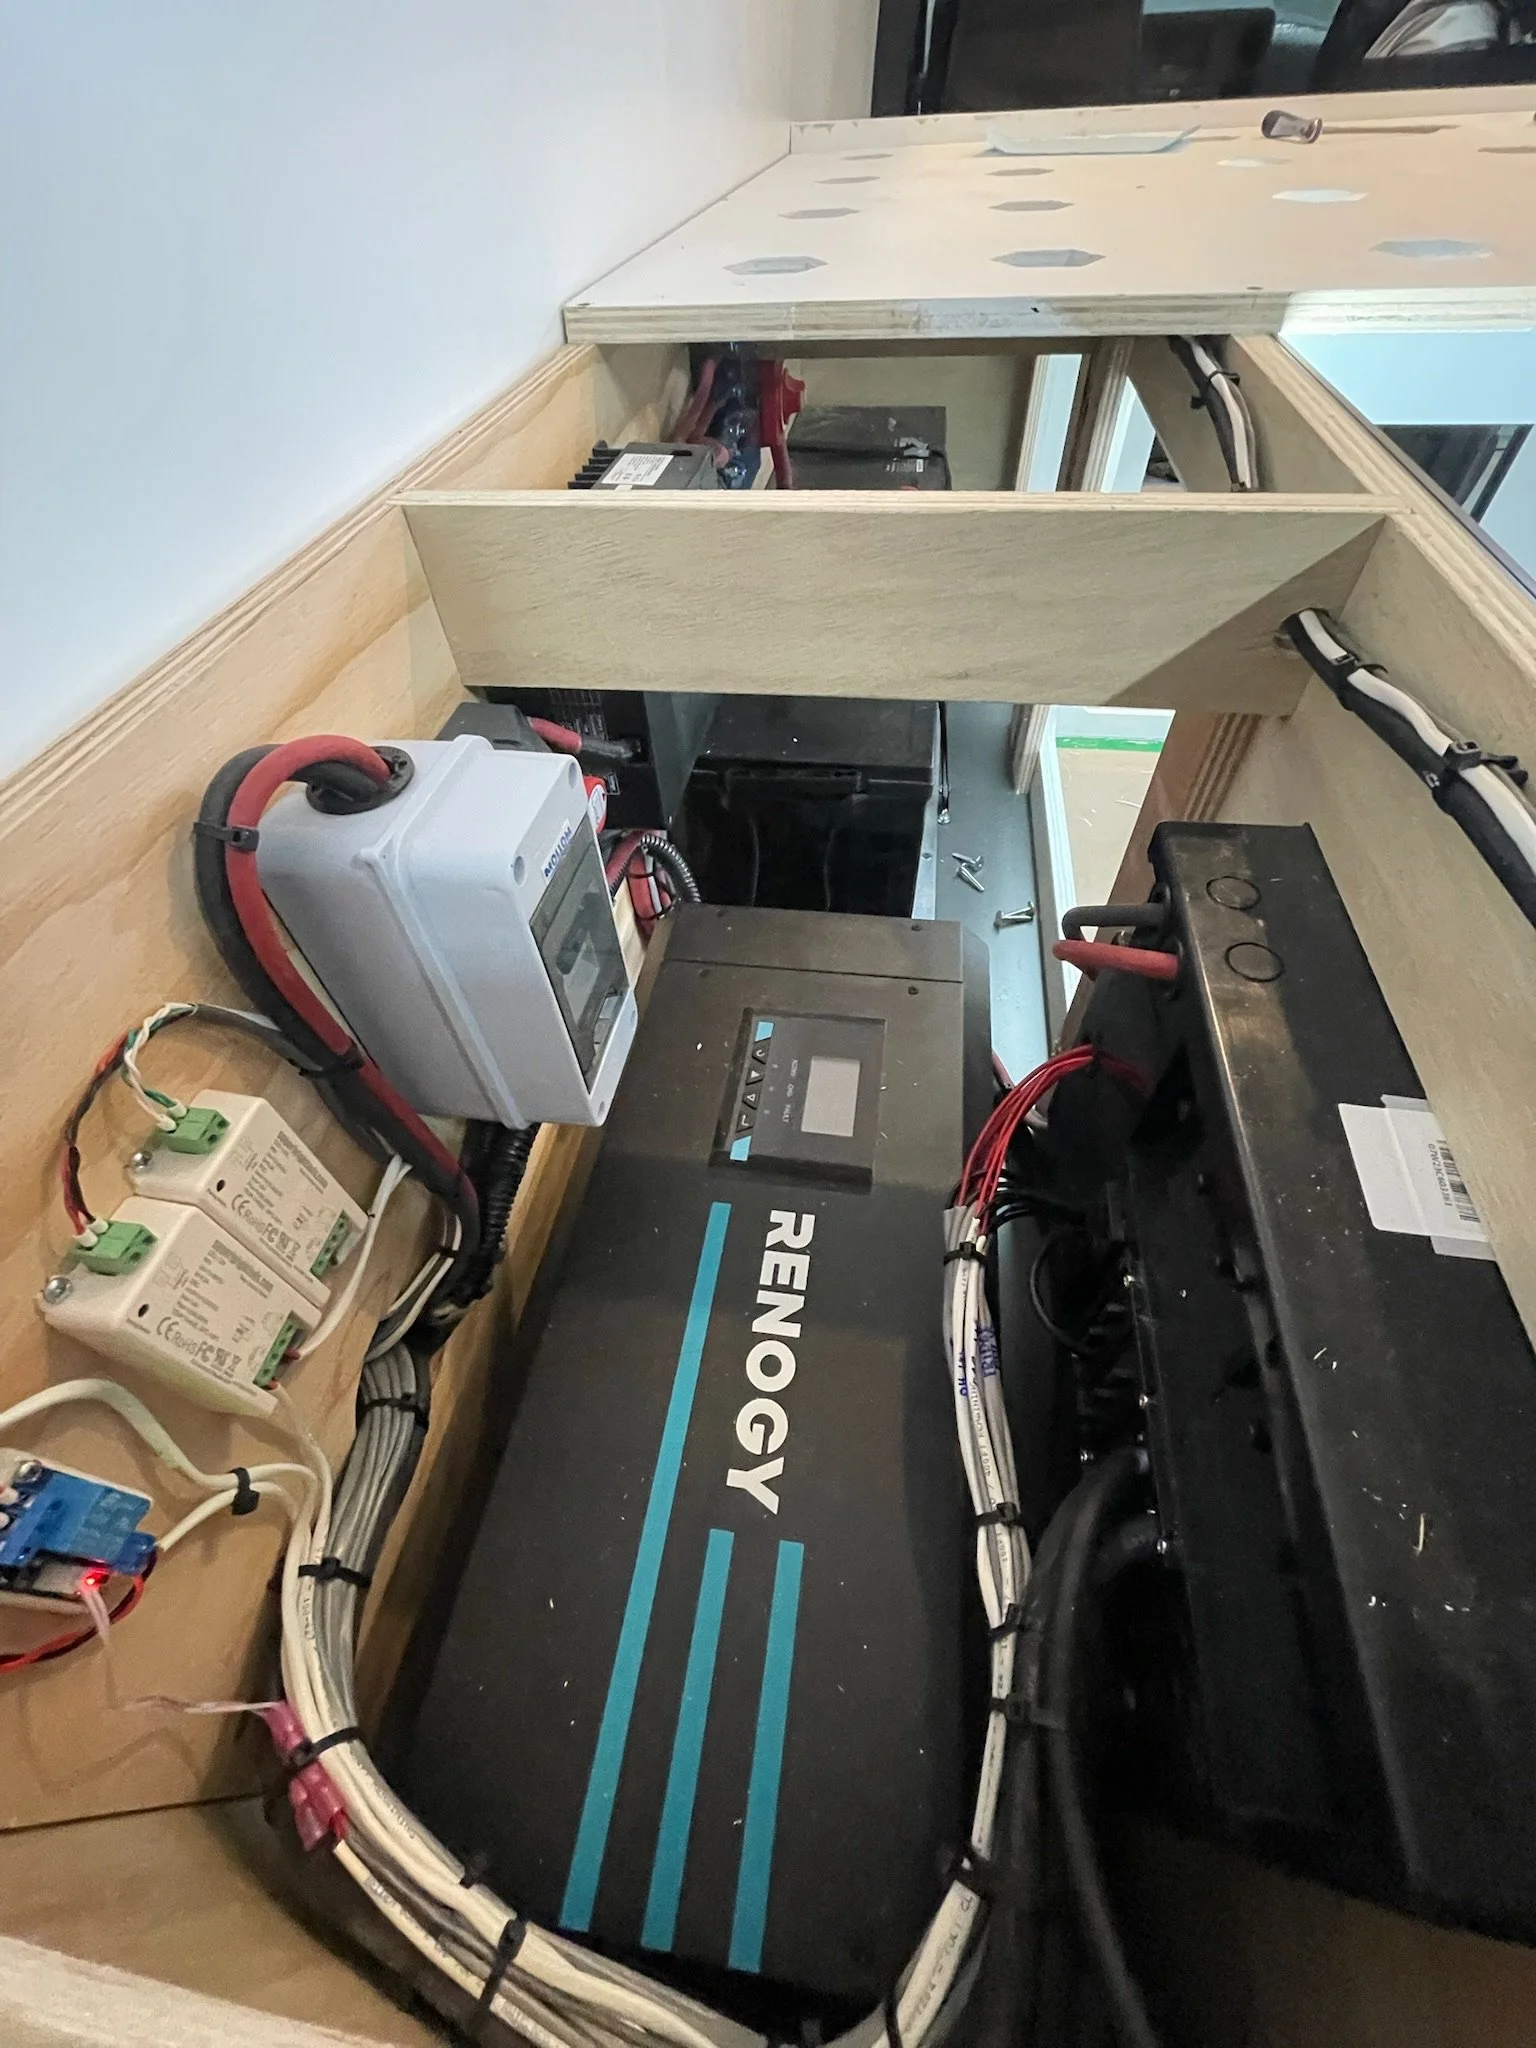
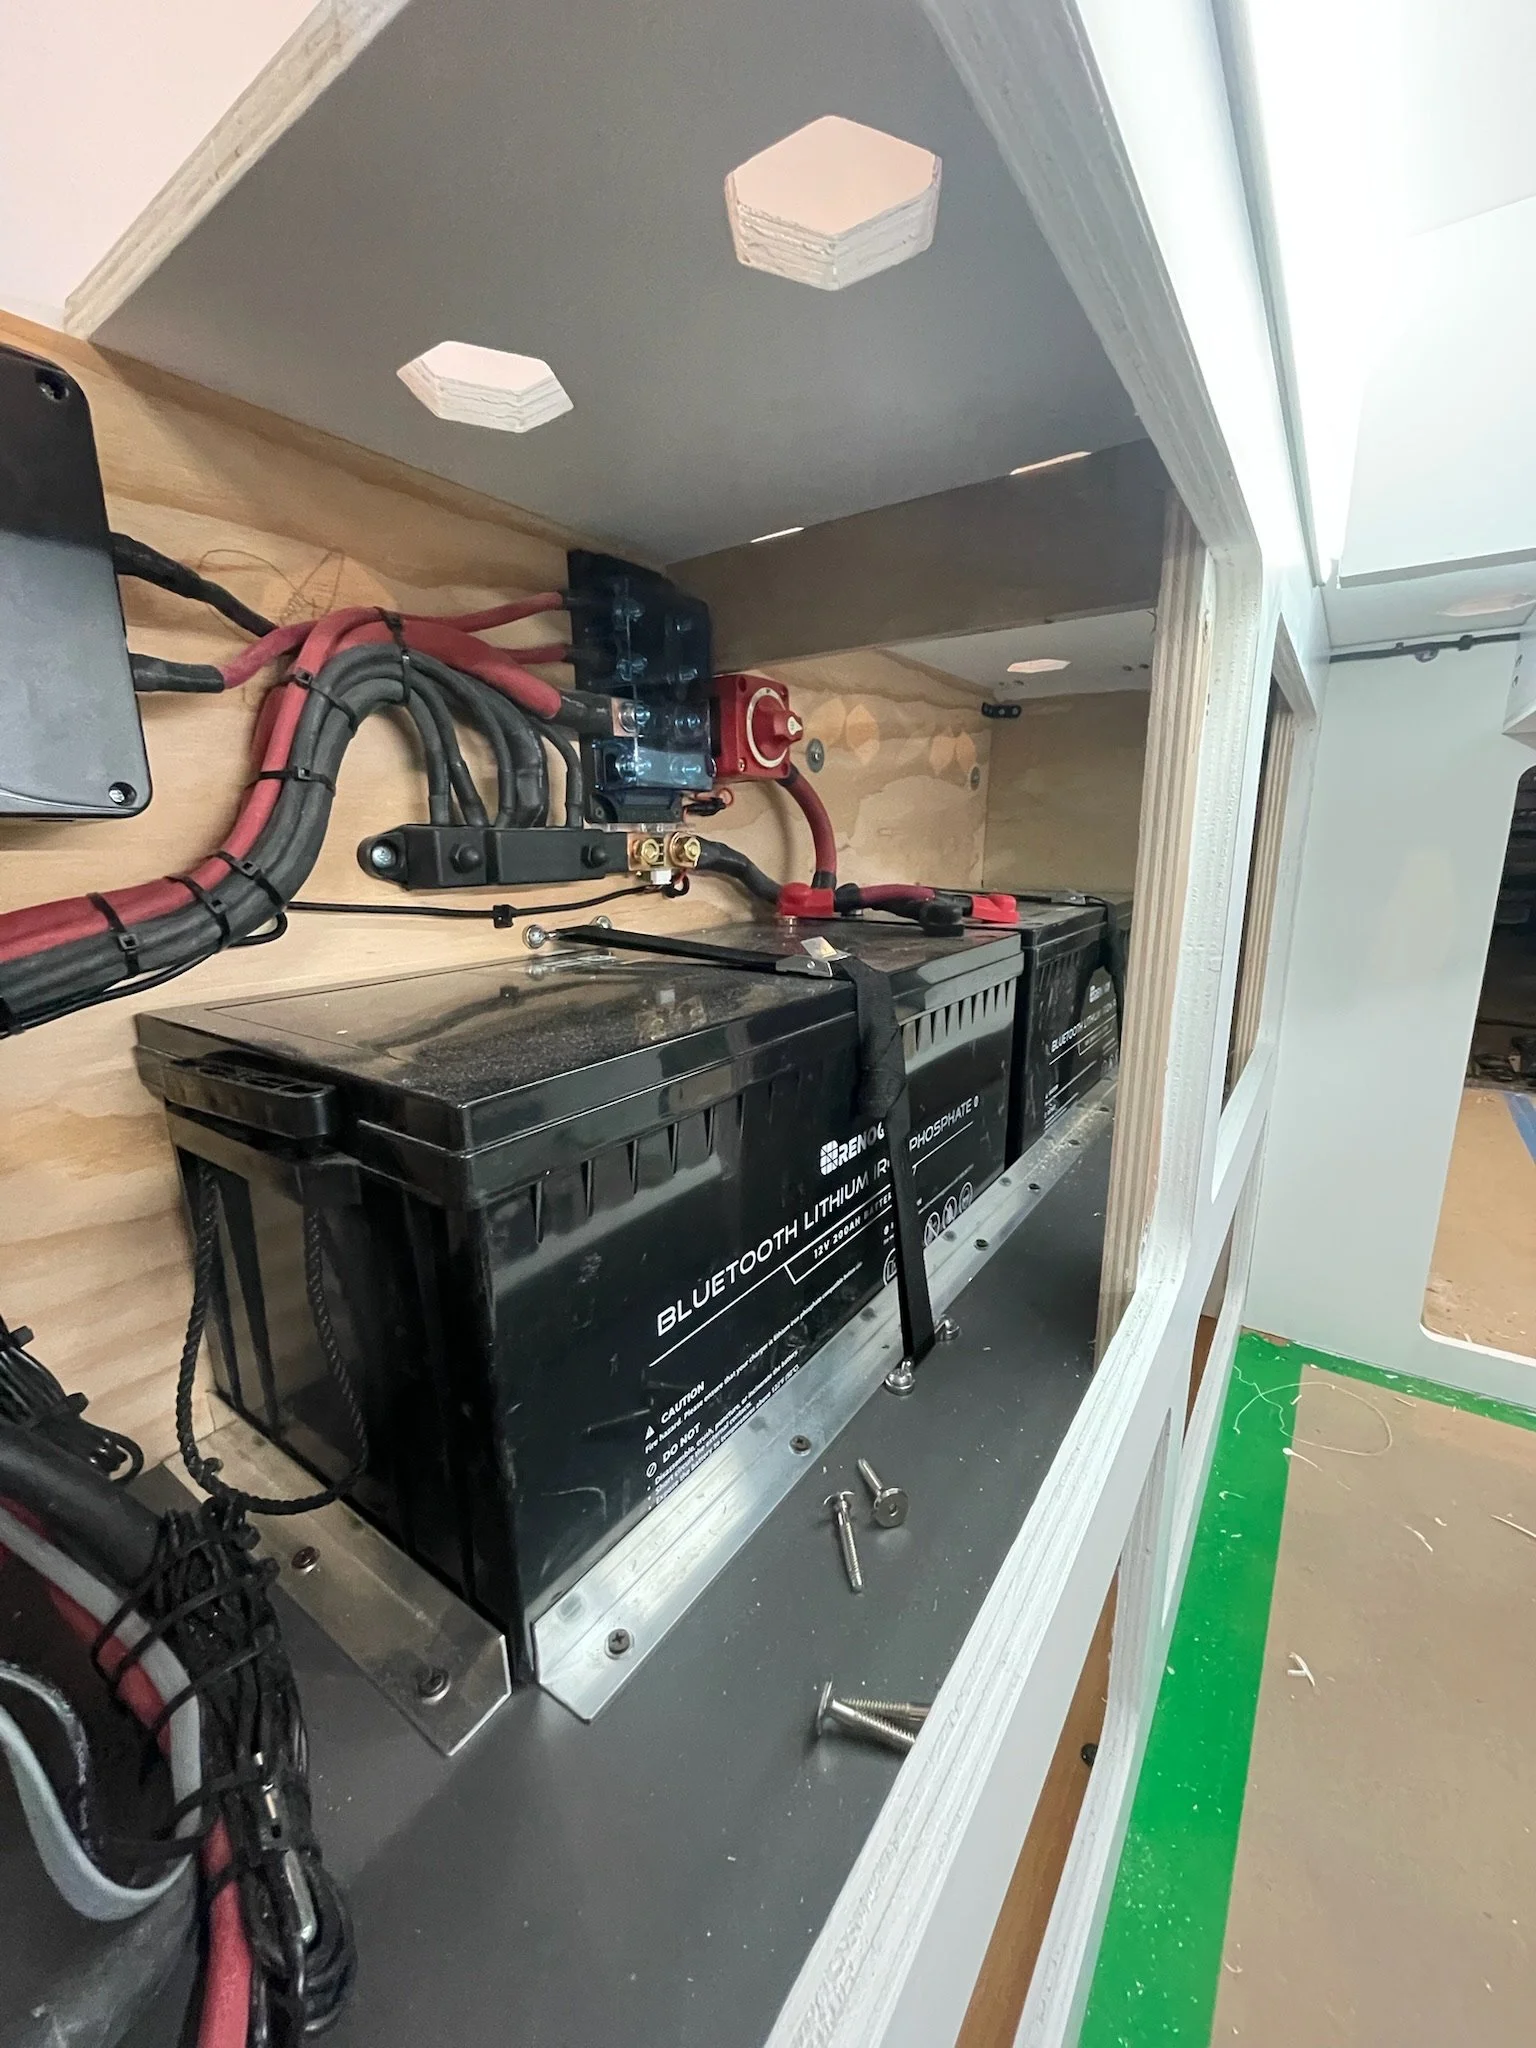
Battery: Renogy 200Ah LiFePO4 battery (2) - plenty of power to keep all the appliances in this van running on the road and off the grid. Laura brought us these batteries that she had bought when she first got the van and we gladly built the system around the components she provided.
Inverter: Renogy 3000W Inverter/Charger - we opted for a 3000W inverter for plenty of capacity for anything Laura can plug into her 120V outlets.
DC-DC: Renogy 50A DC-DC plus MPPT - 50A of charging while driving as well as a charge controller for the 300W of solar we installed on the roof. We always install a battery disconnect switch in line so that we can safely service the system if needed.
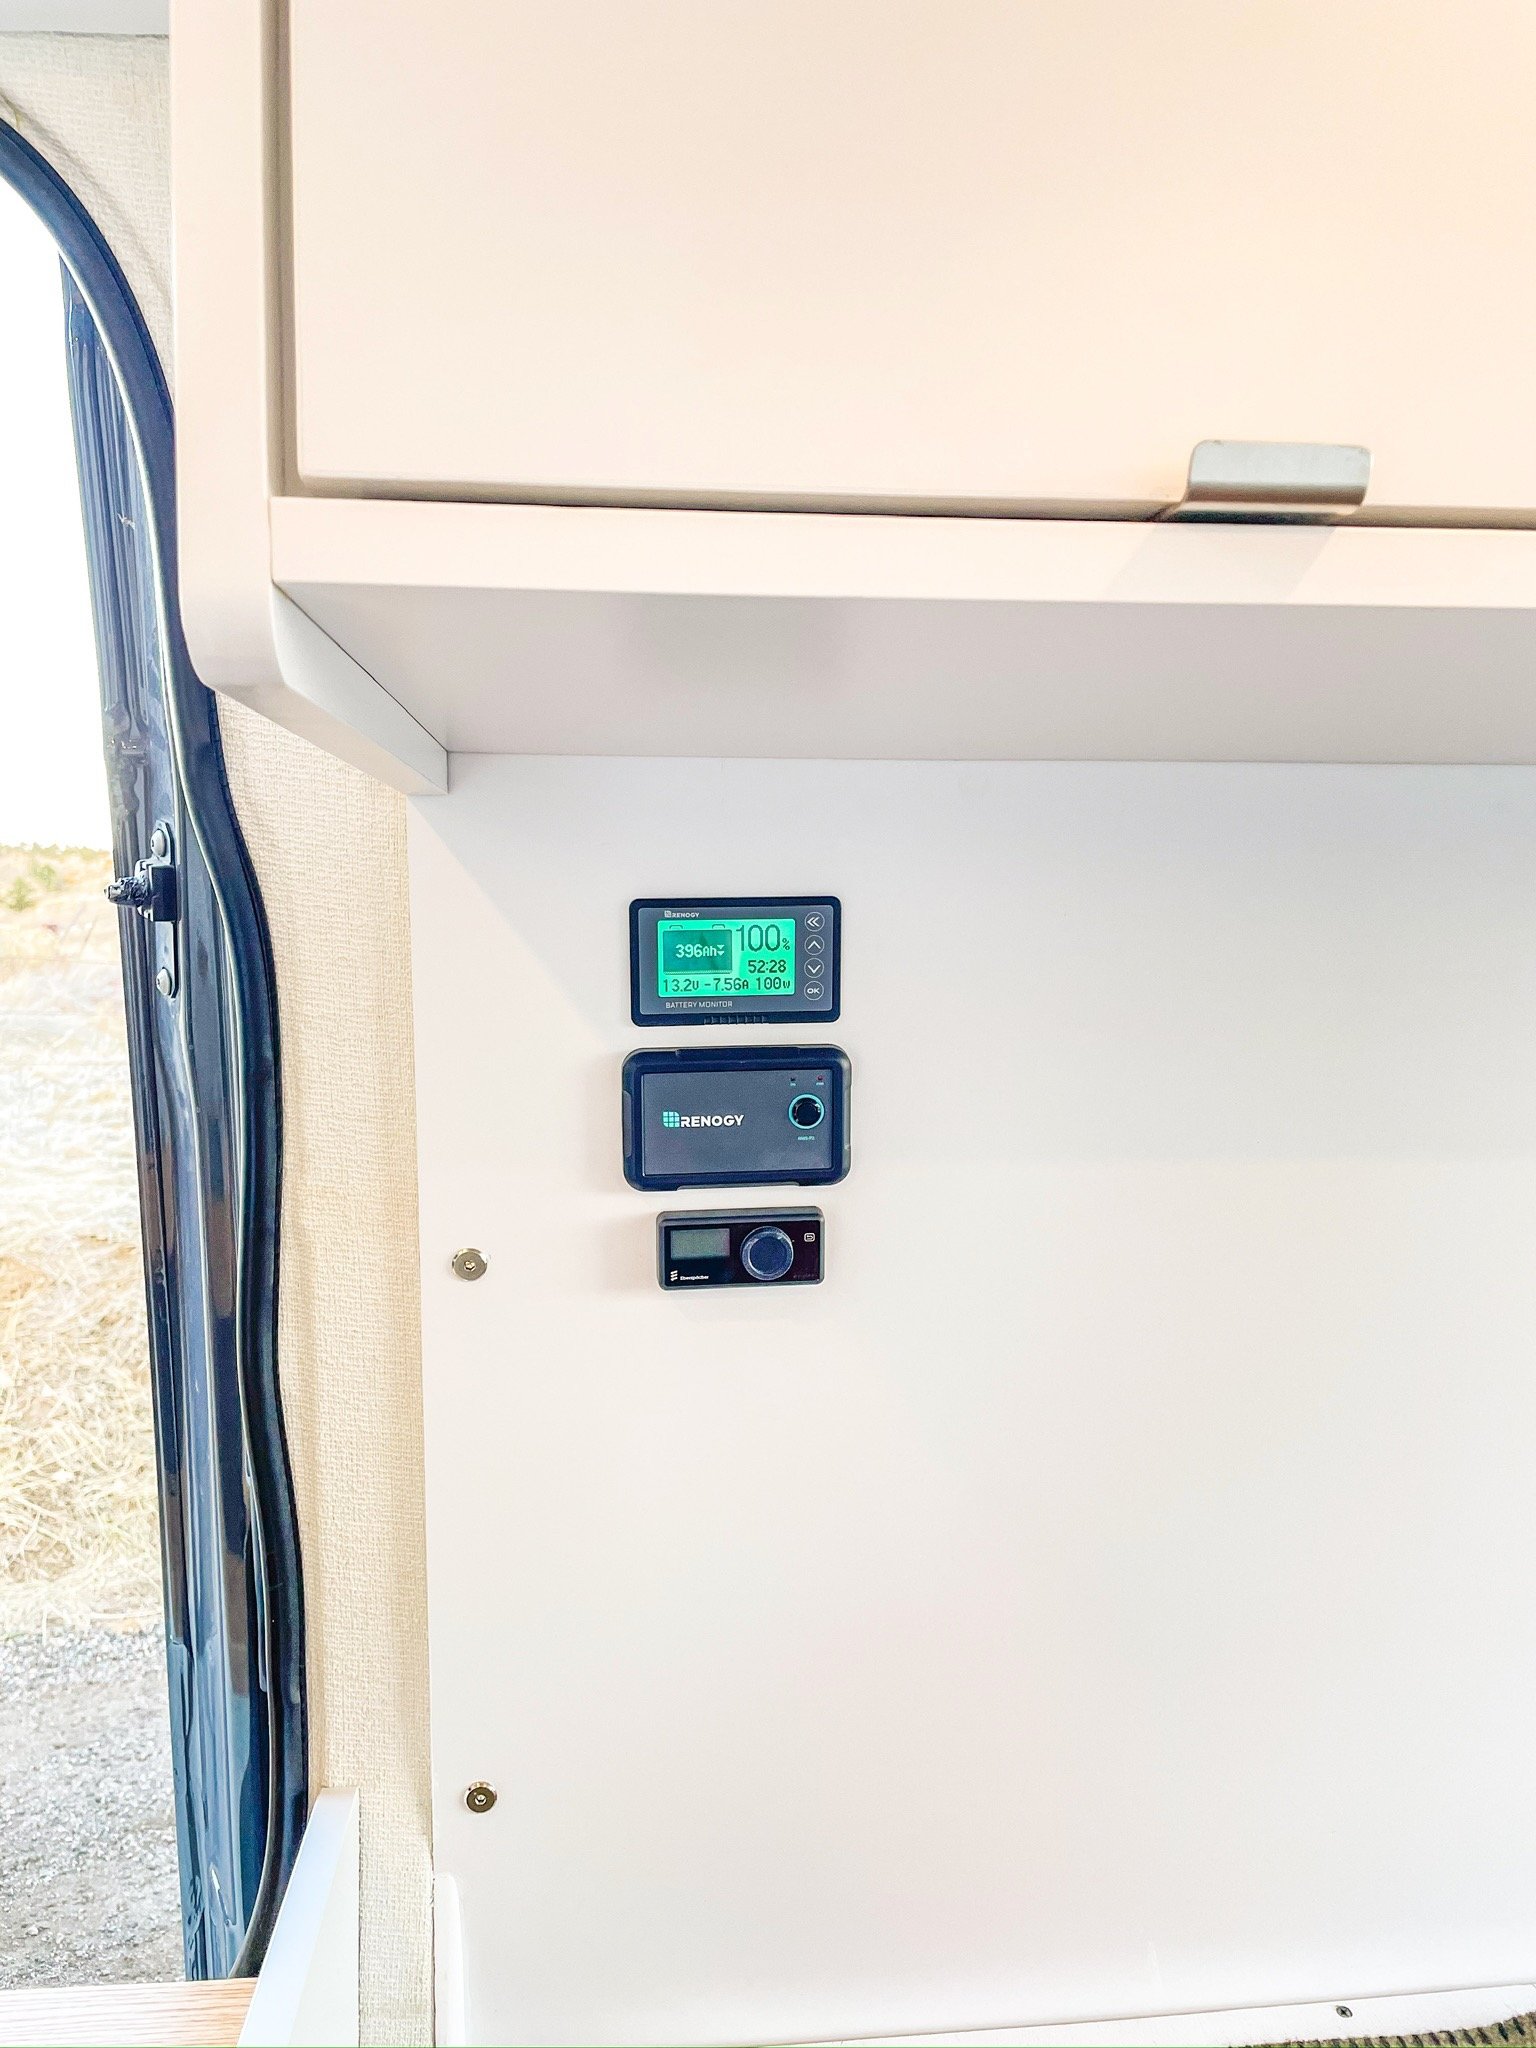
Battery Monitor: Renogy 500A Battery Monitor with Shunt - It’s only two components, a basic monitor screen and a shunt rated at 500A. It monitors voltage, calculates battery percentage, shows hours of energy remaining, and is super easy to program. It’s a simple and effective system that makes the job of monitoring your battery system and health easy.
Solar Panels: We installed (3) 100W Newpowa solar panels onto the Flatline Low Pro Sprinter 144 Roof Rack to keep the system charged up off the grid.
Power Distribution: Power distribution always starts with a main battery MRBF fuse and a master disconnect switch. After that, power is distributed at the 12 VDC MEGA fuse center to all 12 VDC components and/or loads. Further downstream 12 VDC along with 120 VAC from the inverter is then further distributed into branch circuits at the WFCO WF-8930 Power distribution center to all 12 VDC and 120 VAC appliances and devices.
Miscellaneous: Some of the small parts we used constructing our system
Furrion Shore Power Inlet and 32A Mini Circuit Breaker
We get most of our cable from Windy Nation
The main system components for this van are compiled in our Amazon Storefront.
Send an email to off_grid@coadventurevans.com if you’re interested in our help building or consulting for your electrical project


Plumbing

This van has enough fresh water on board to last for long weekends of clean dishes and fresh drinking water.
See what we used in this van below or click this link to visit our Amazon van plumbing list:
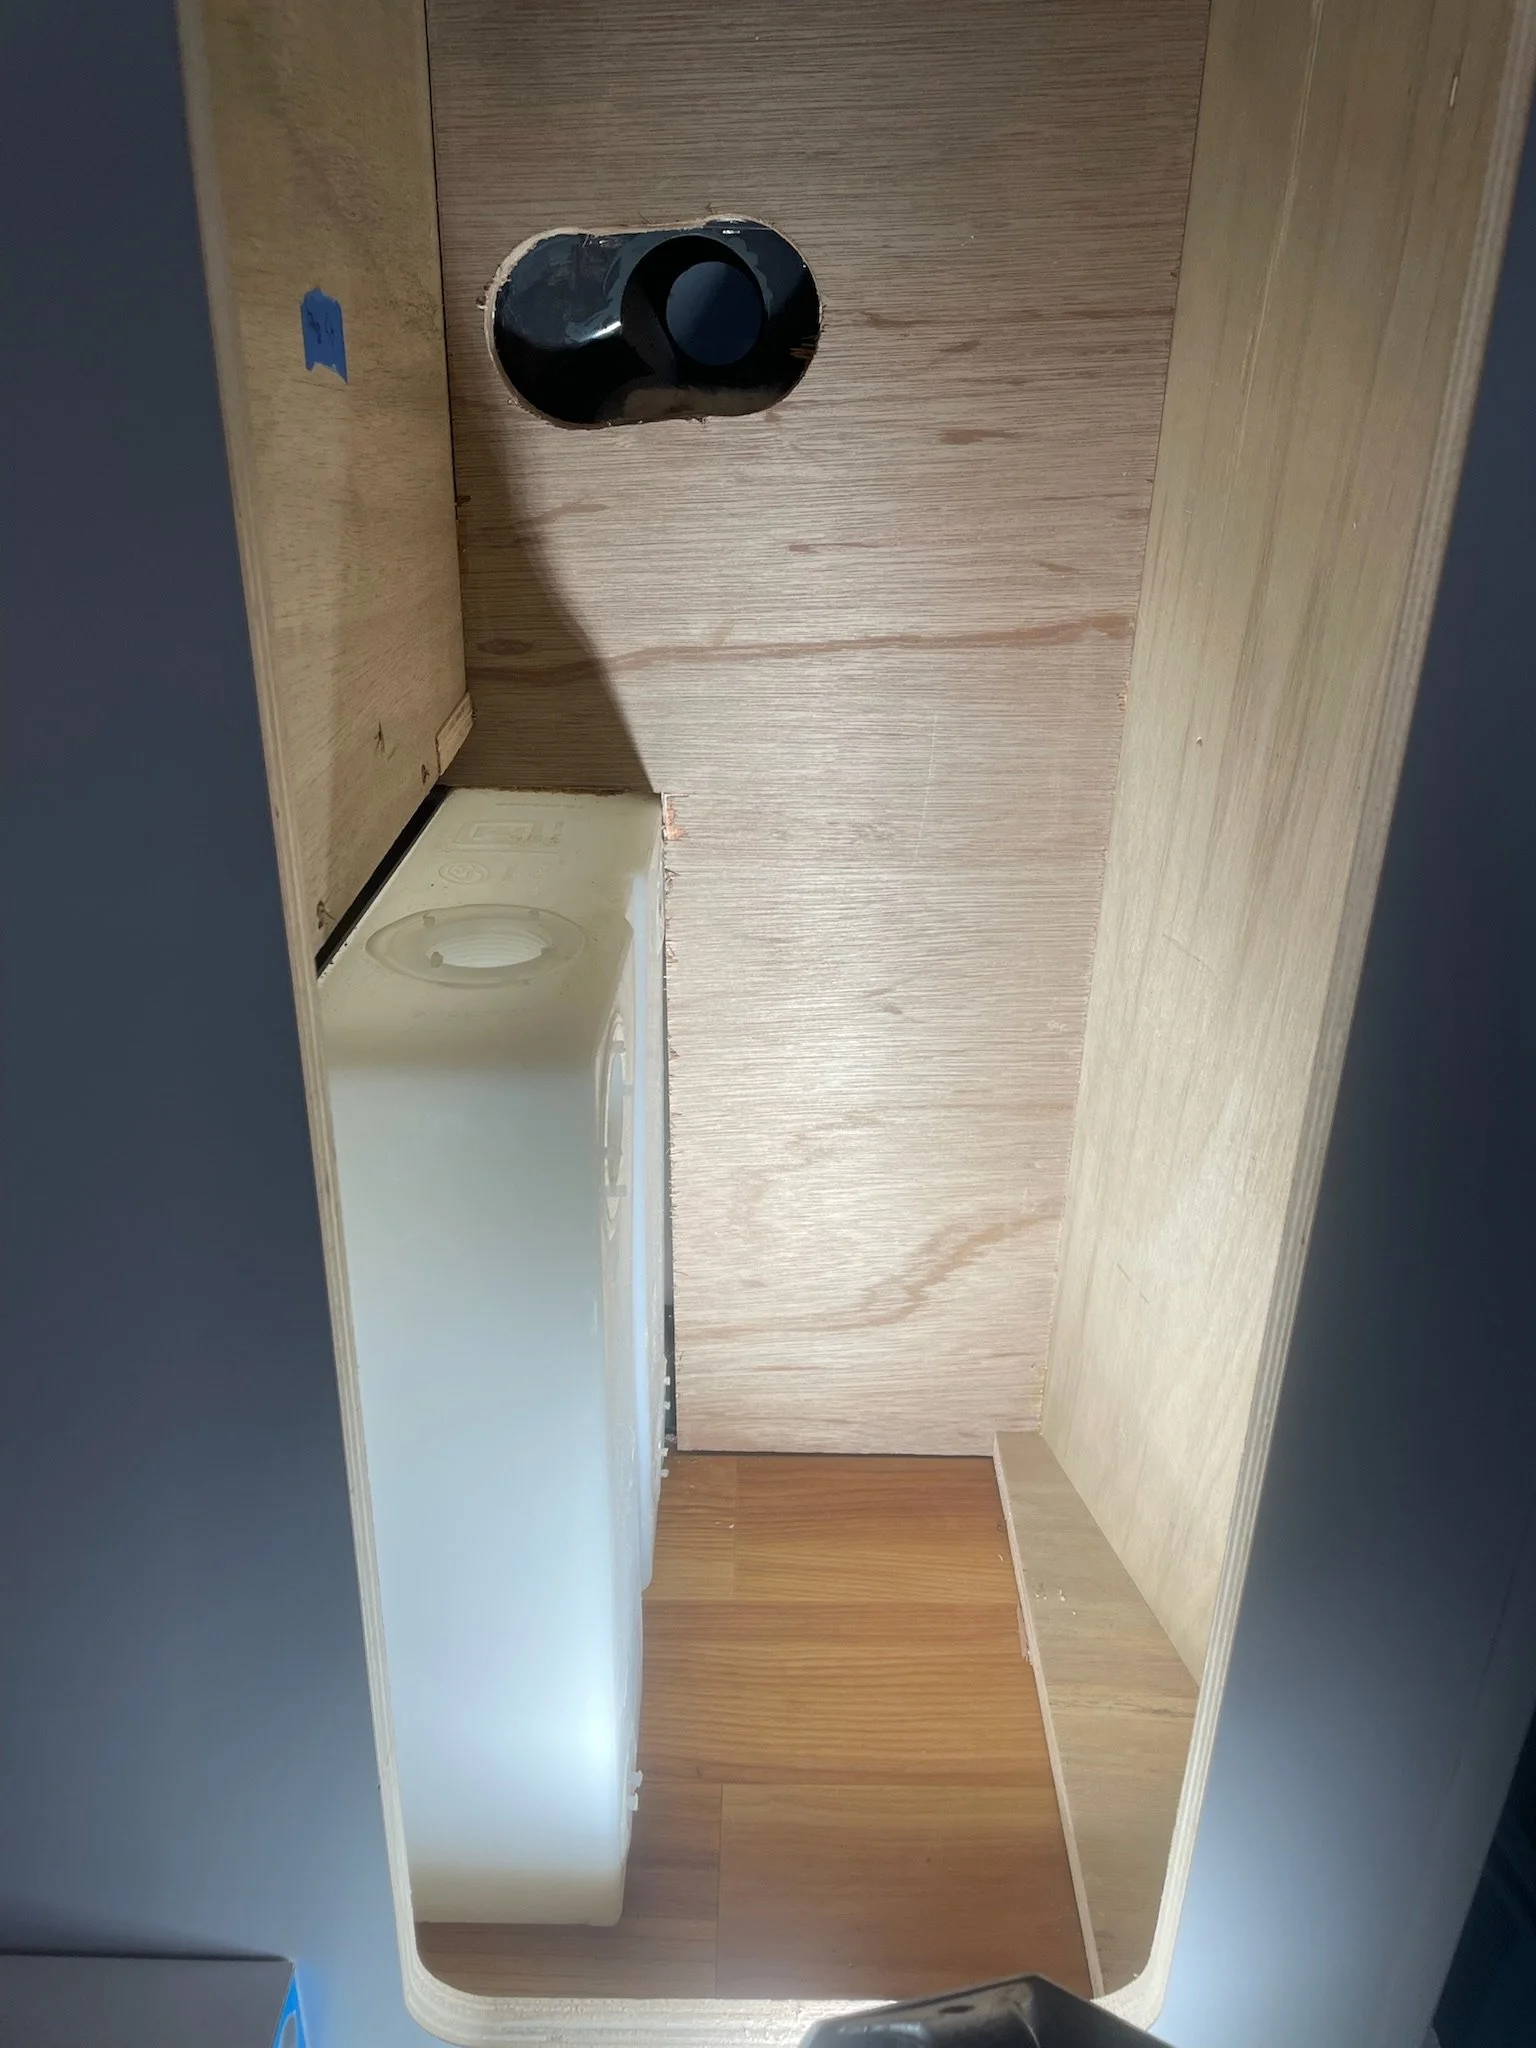
We installed 22 gallons of fresh water capacity and 22 gallons of gray water capacity onto this 144 Sprinter. We used the passenger side 22 gallon wheel well tank, and the driver side undercarriage tank, both from S&B filters as our holding tanks.
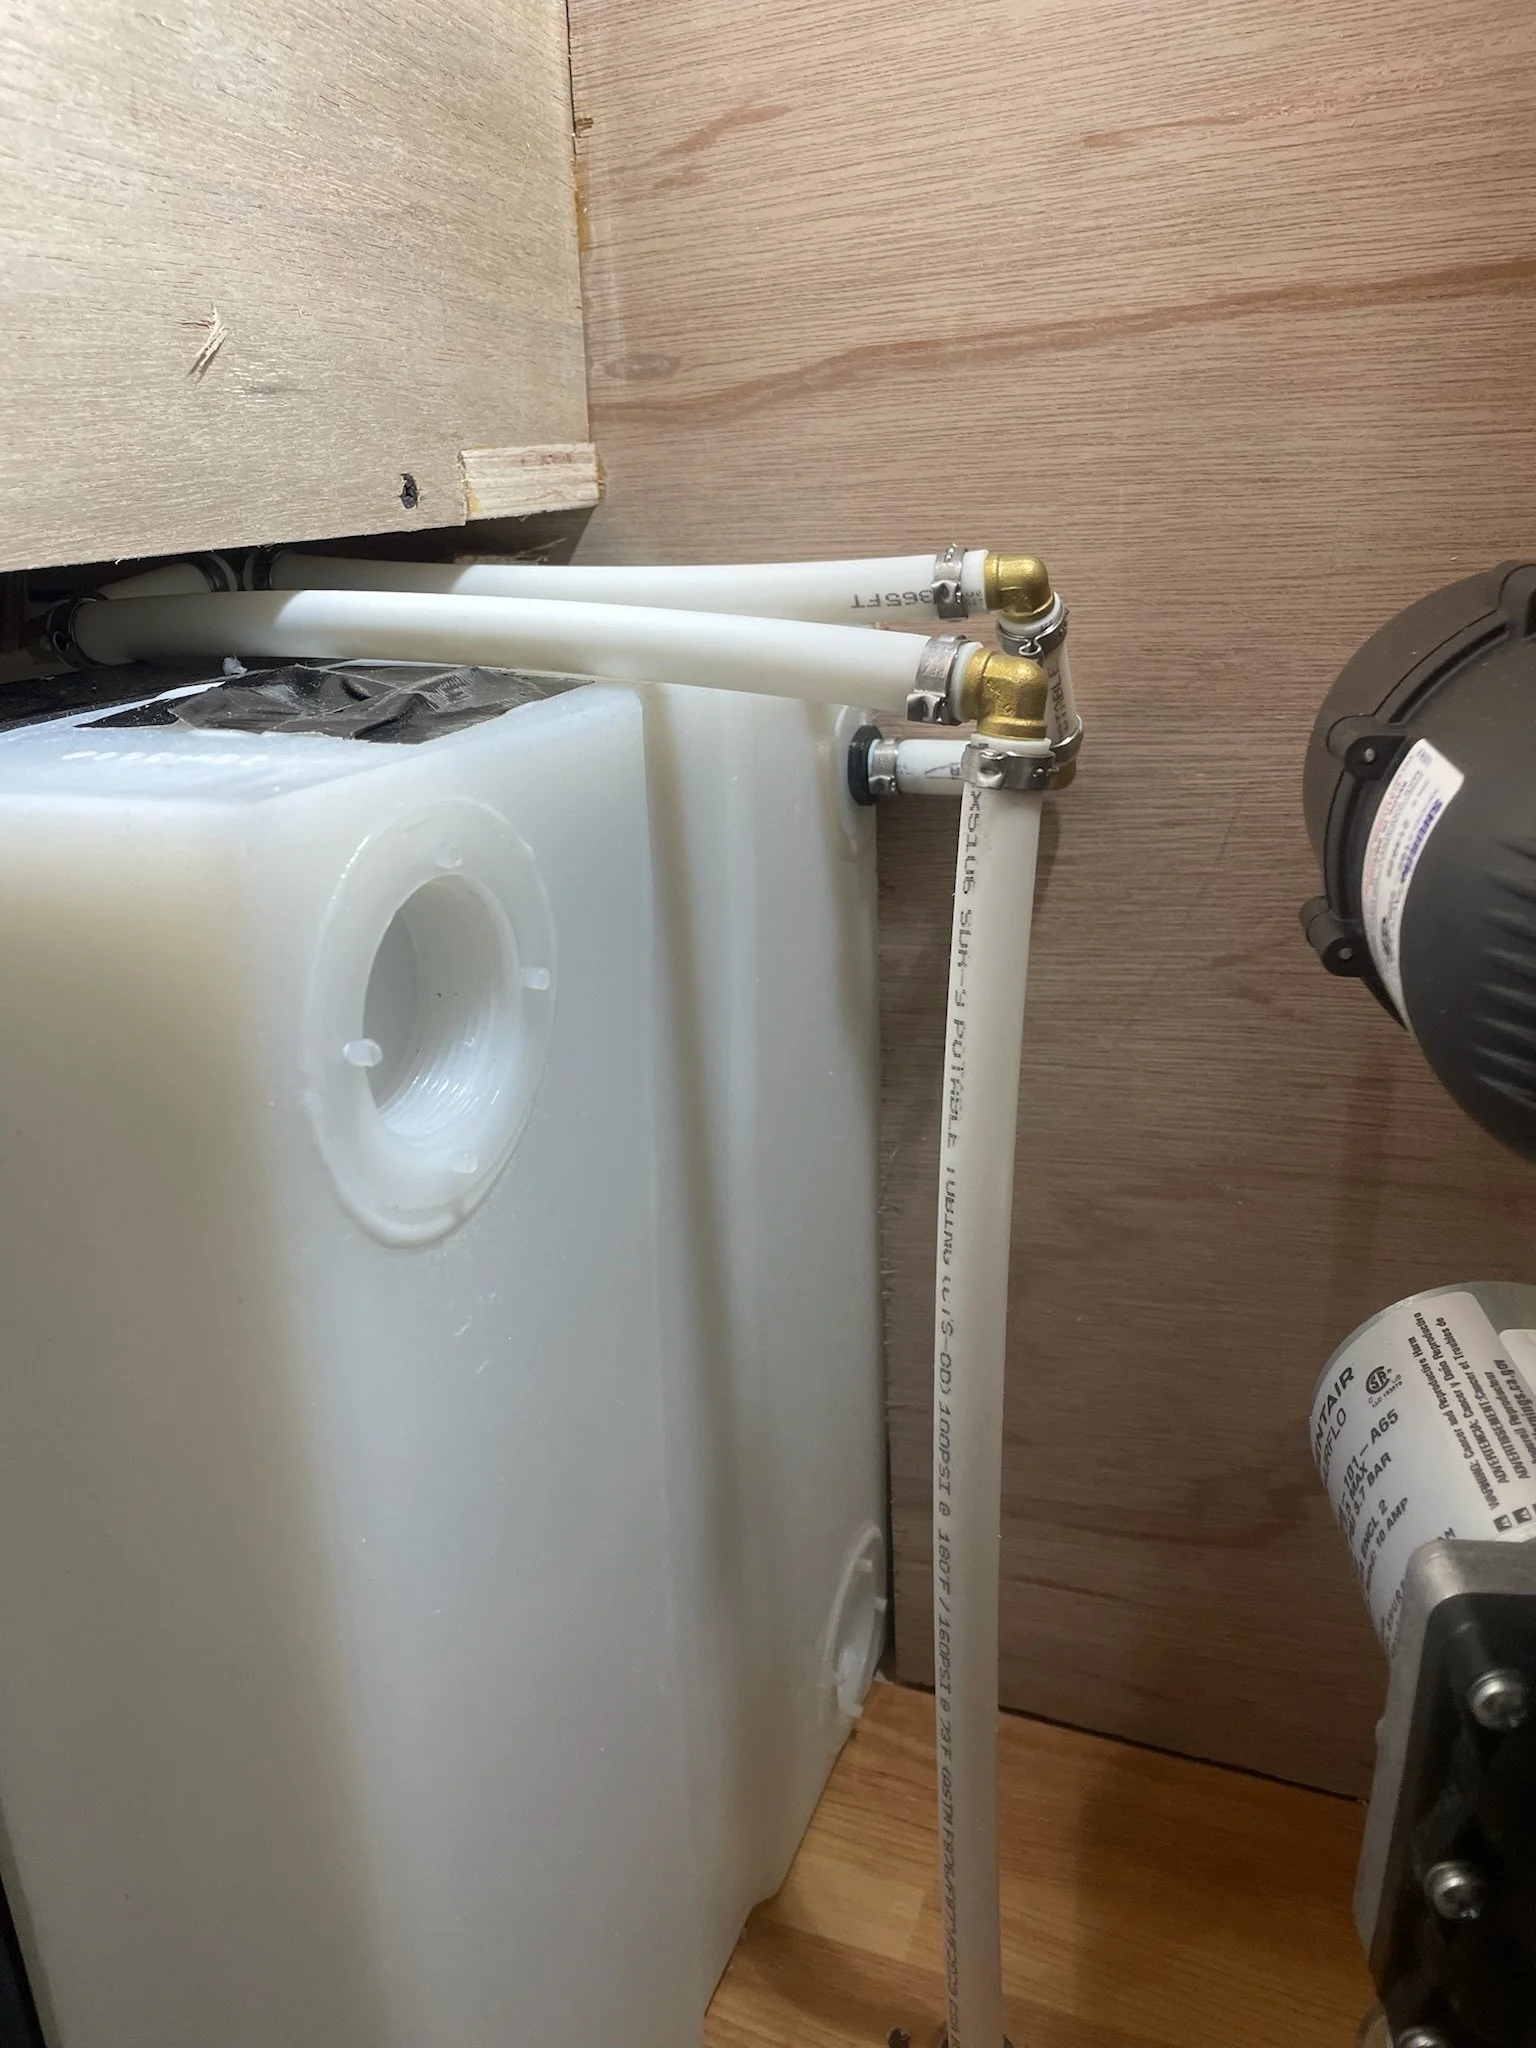
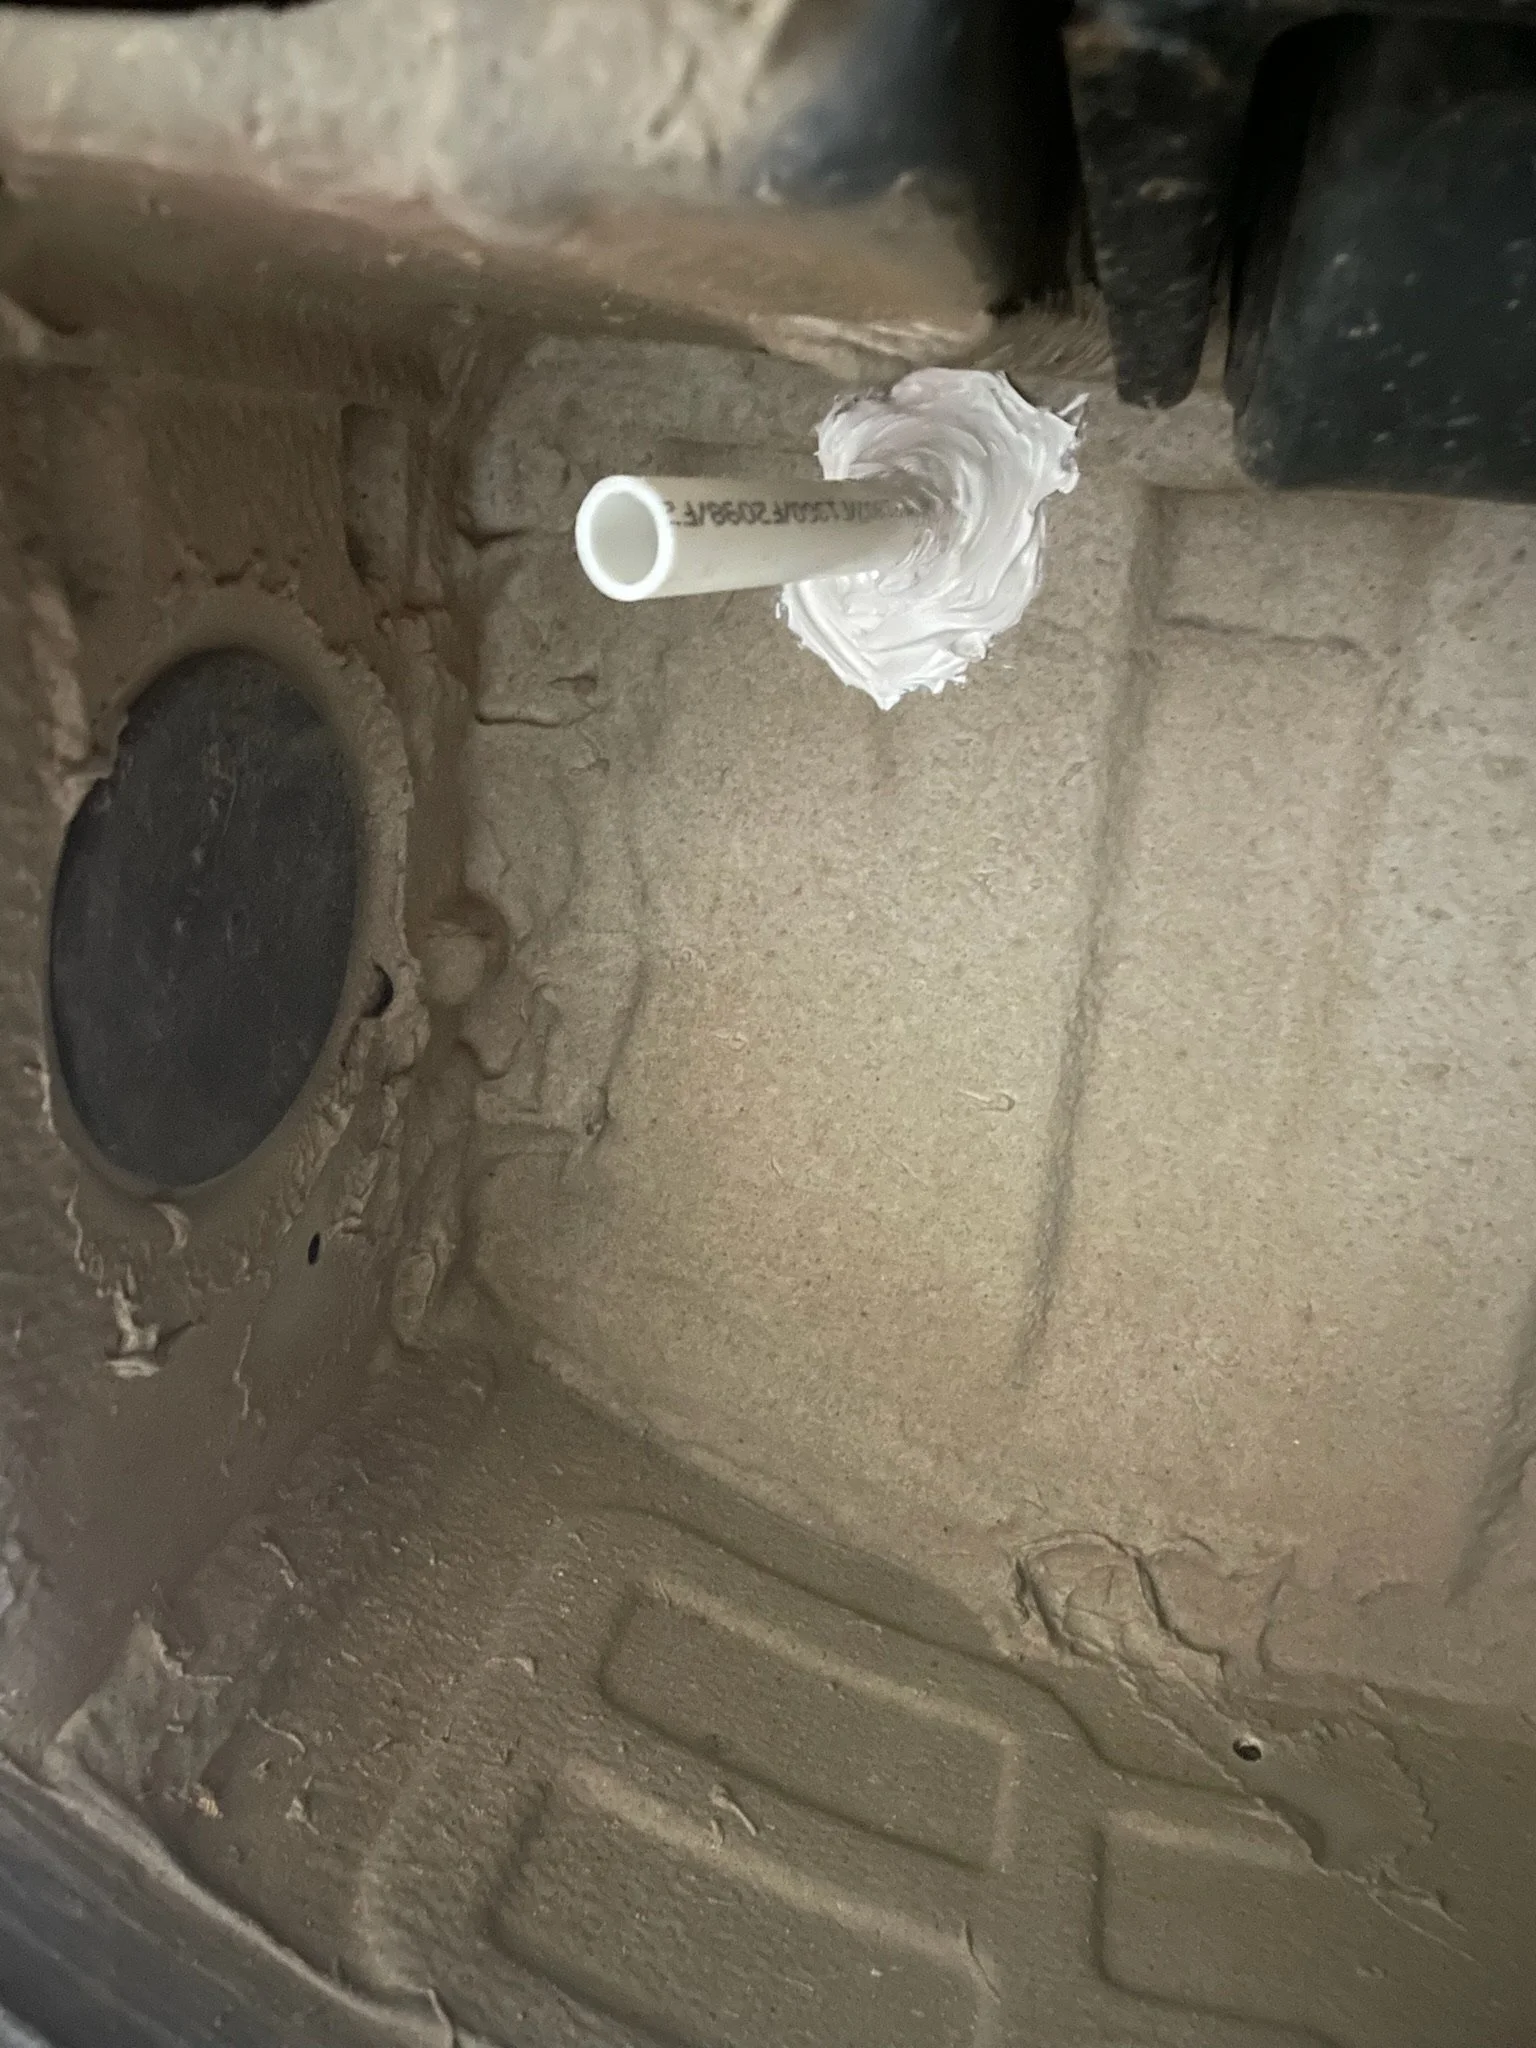
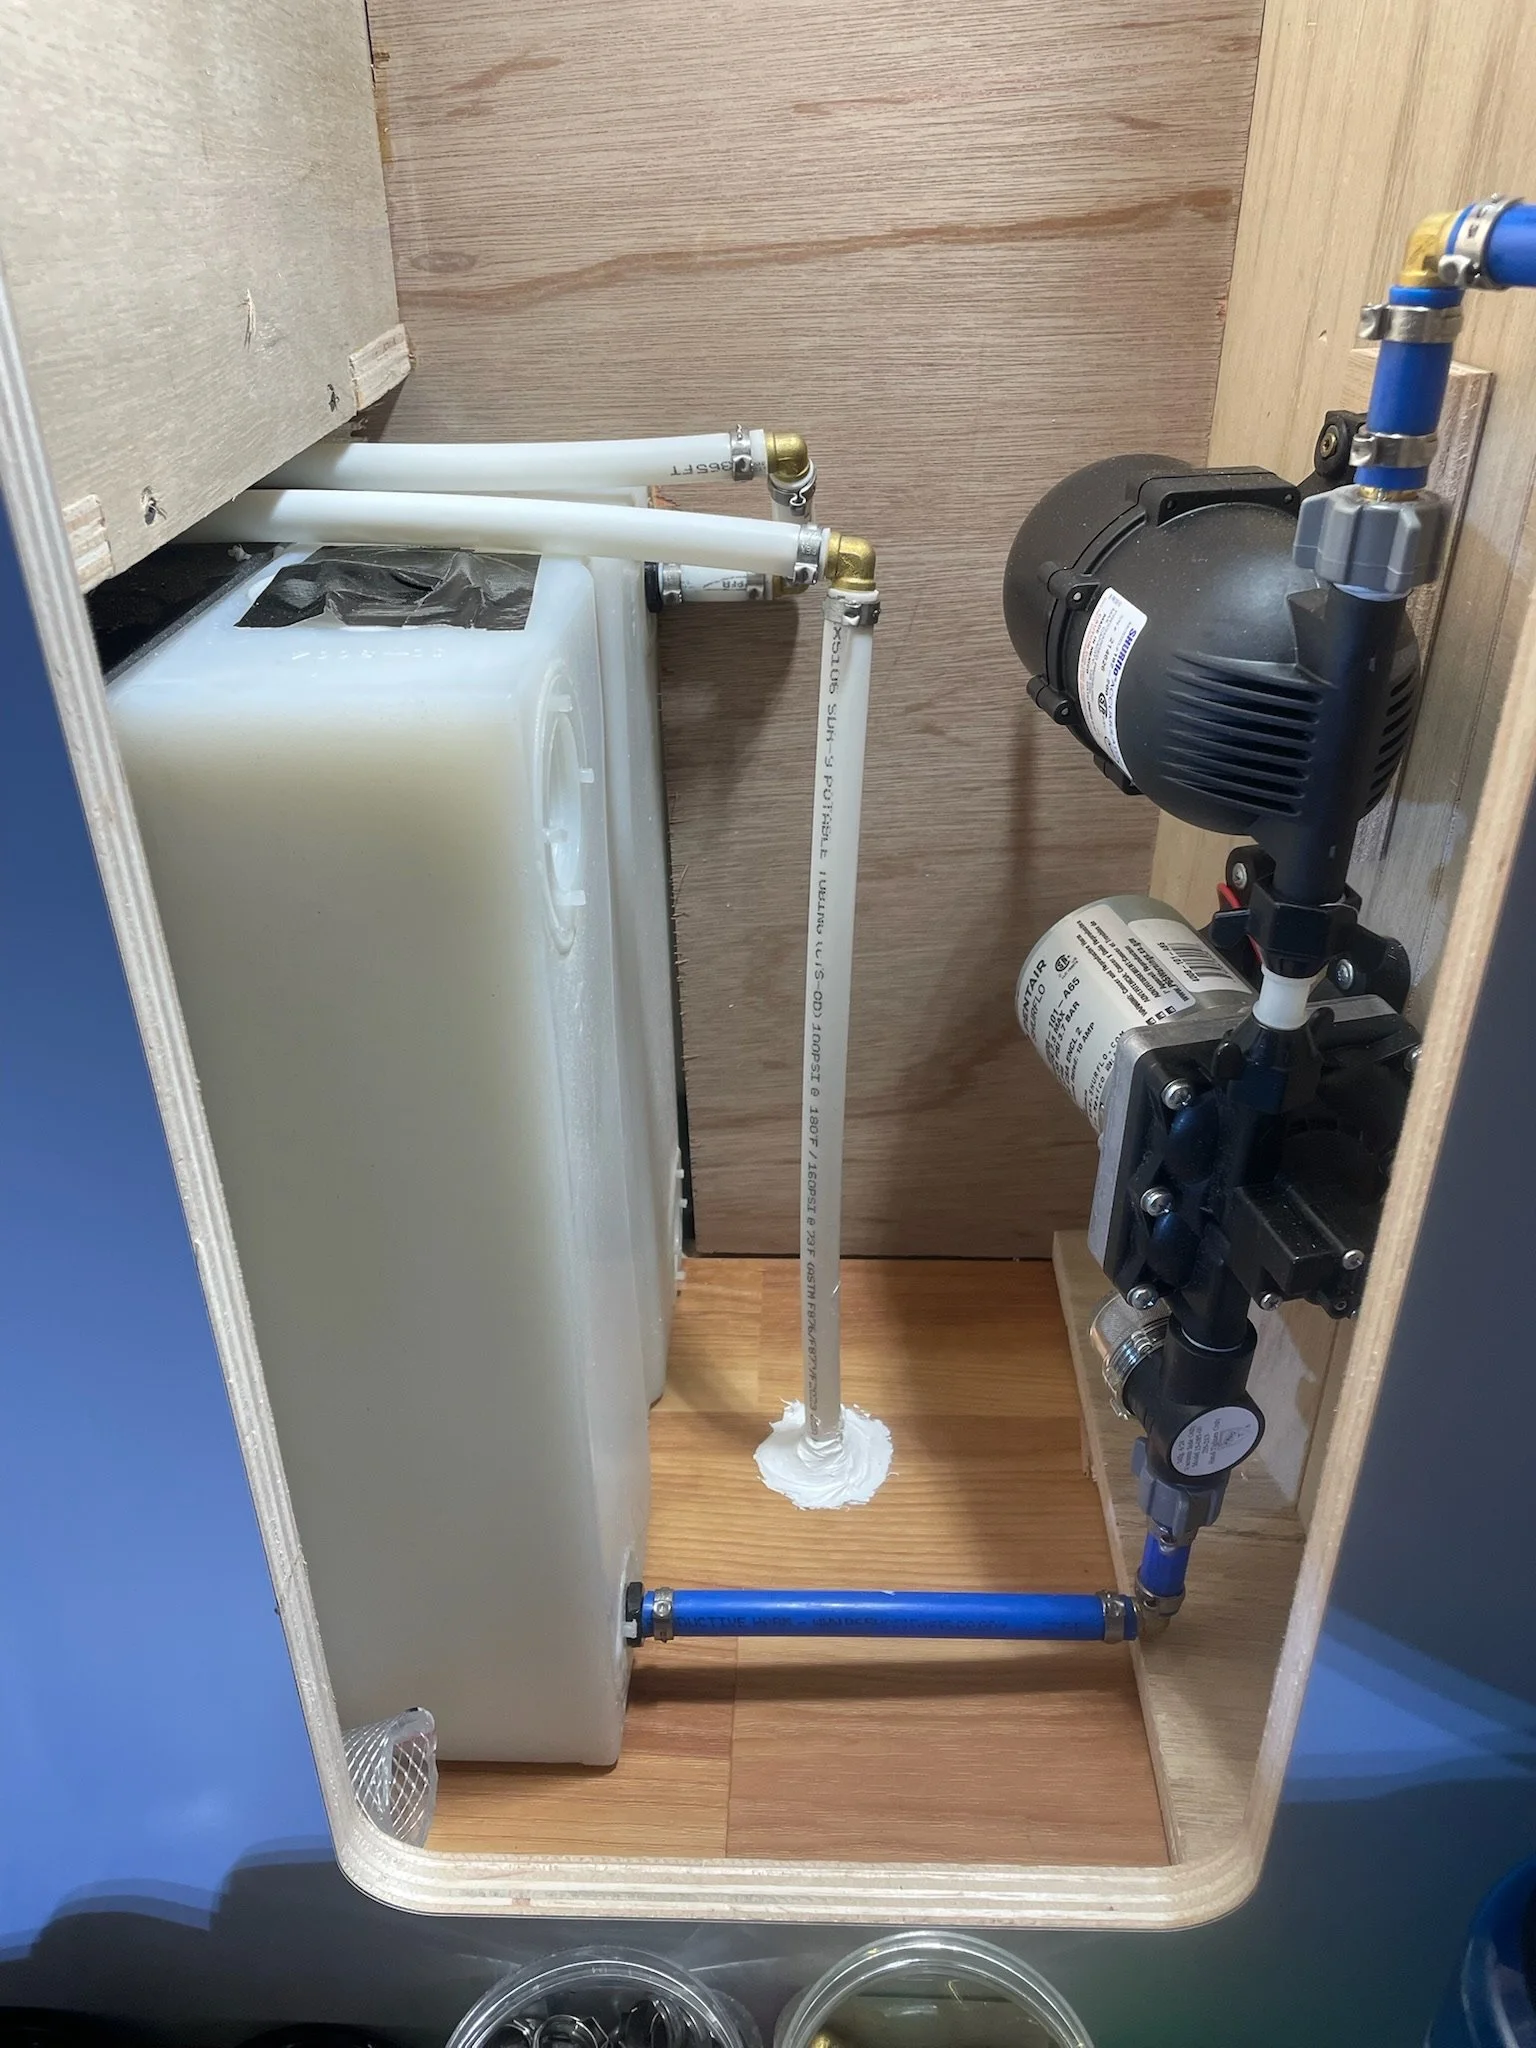
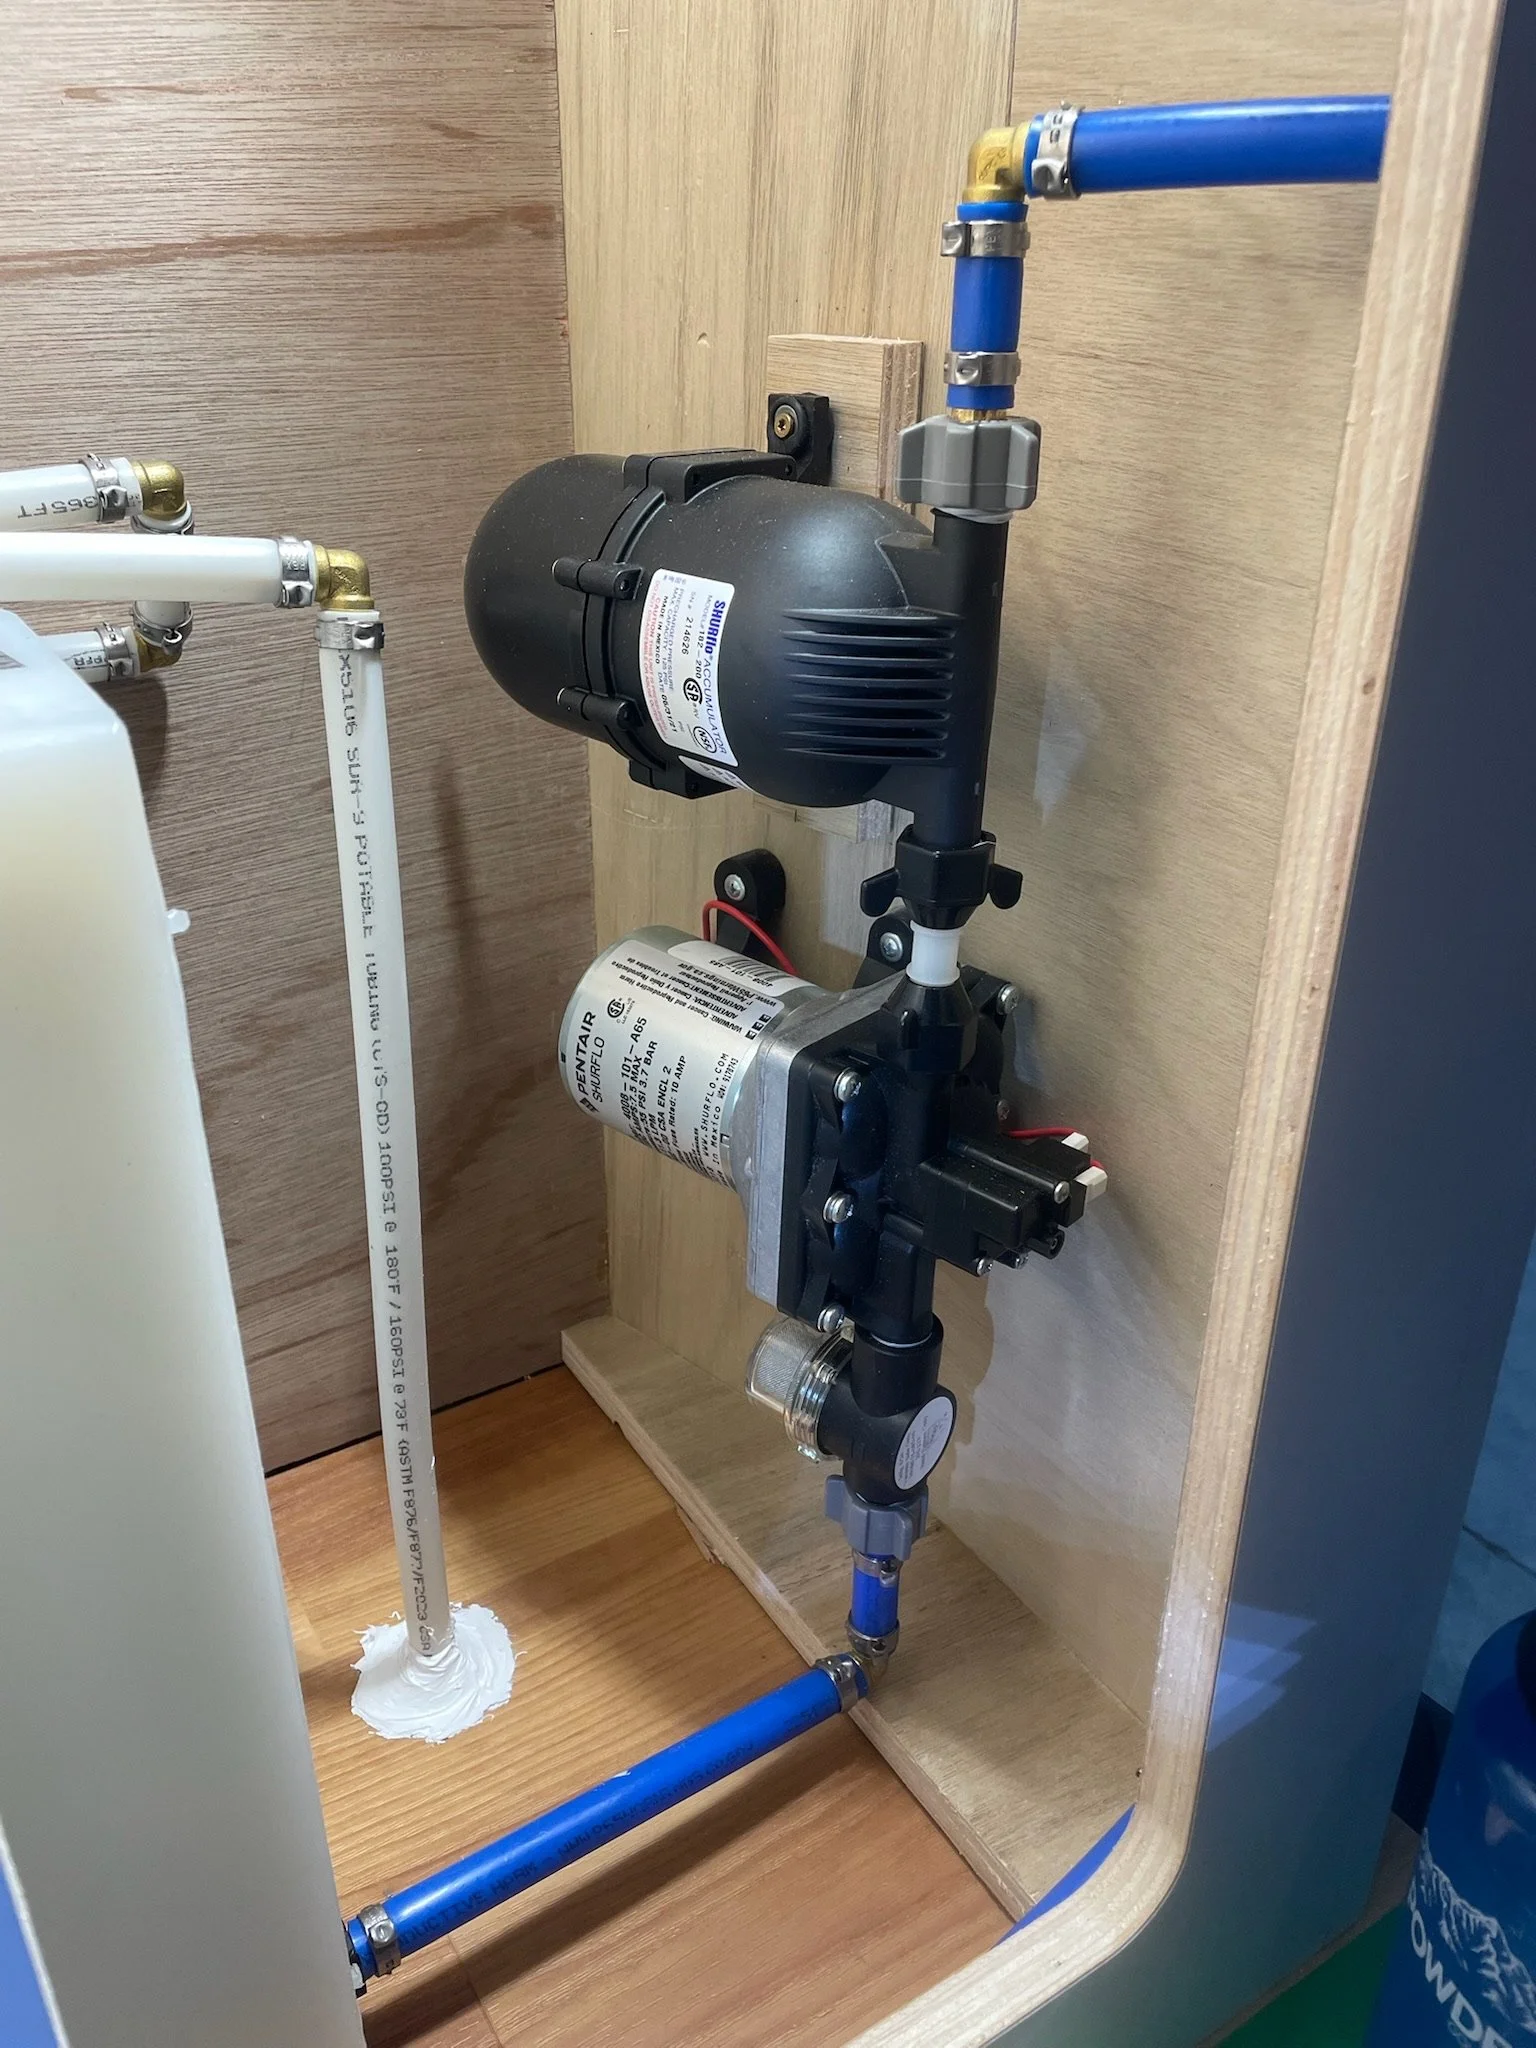
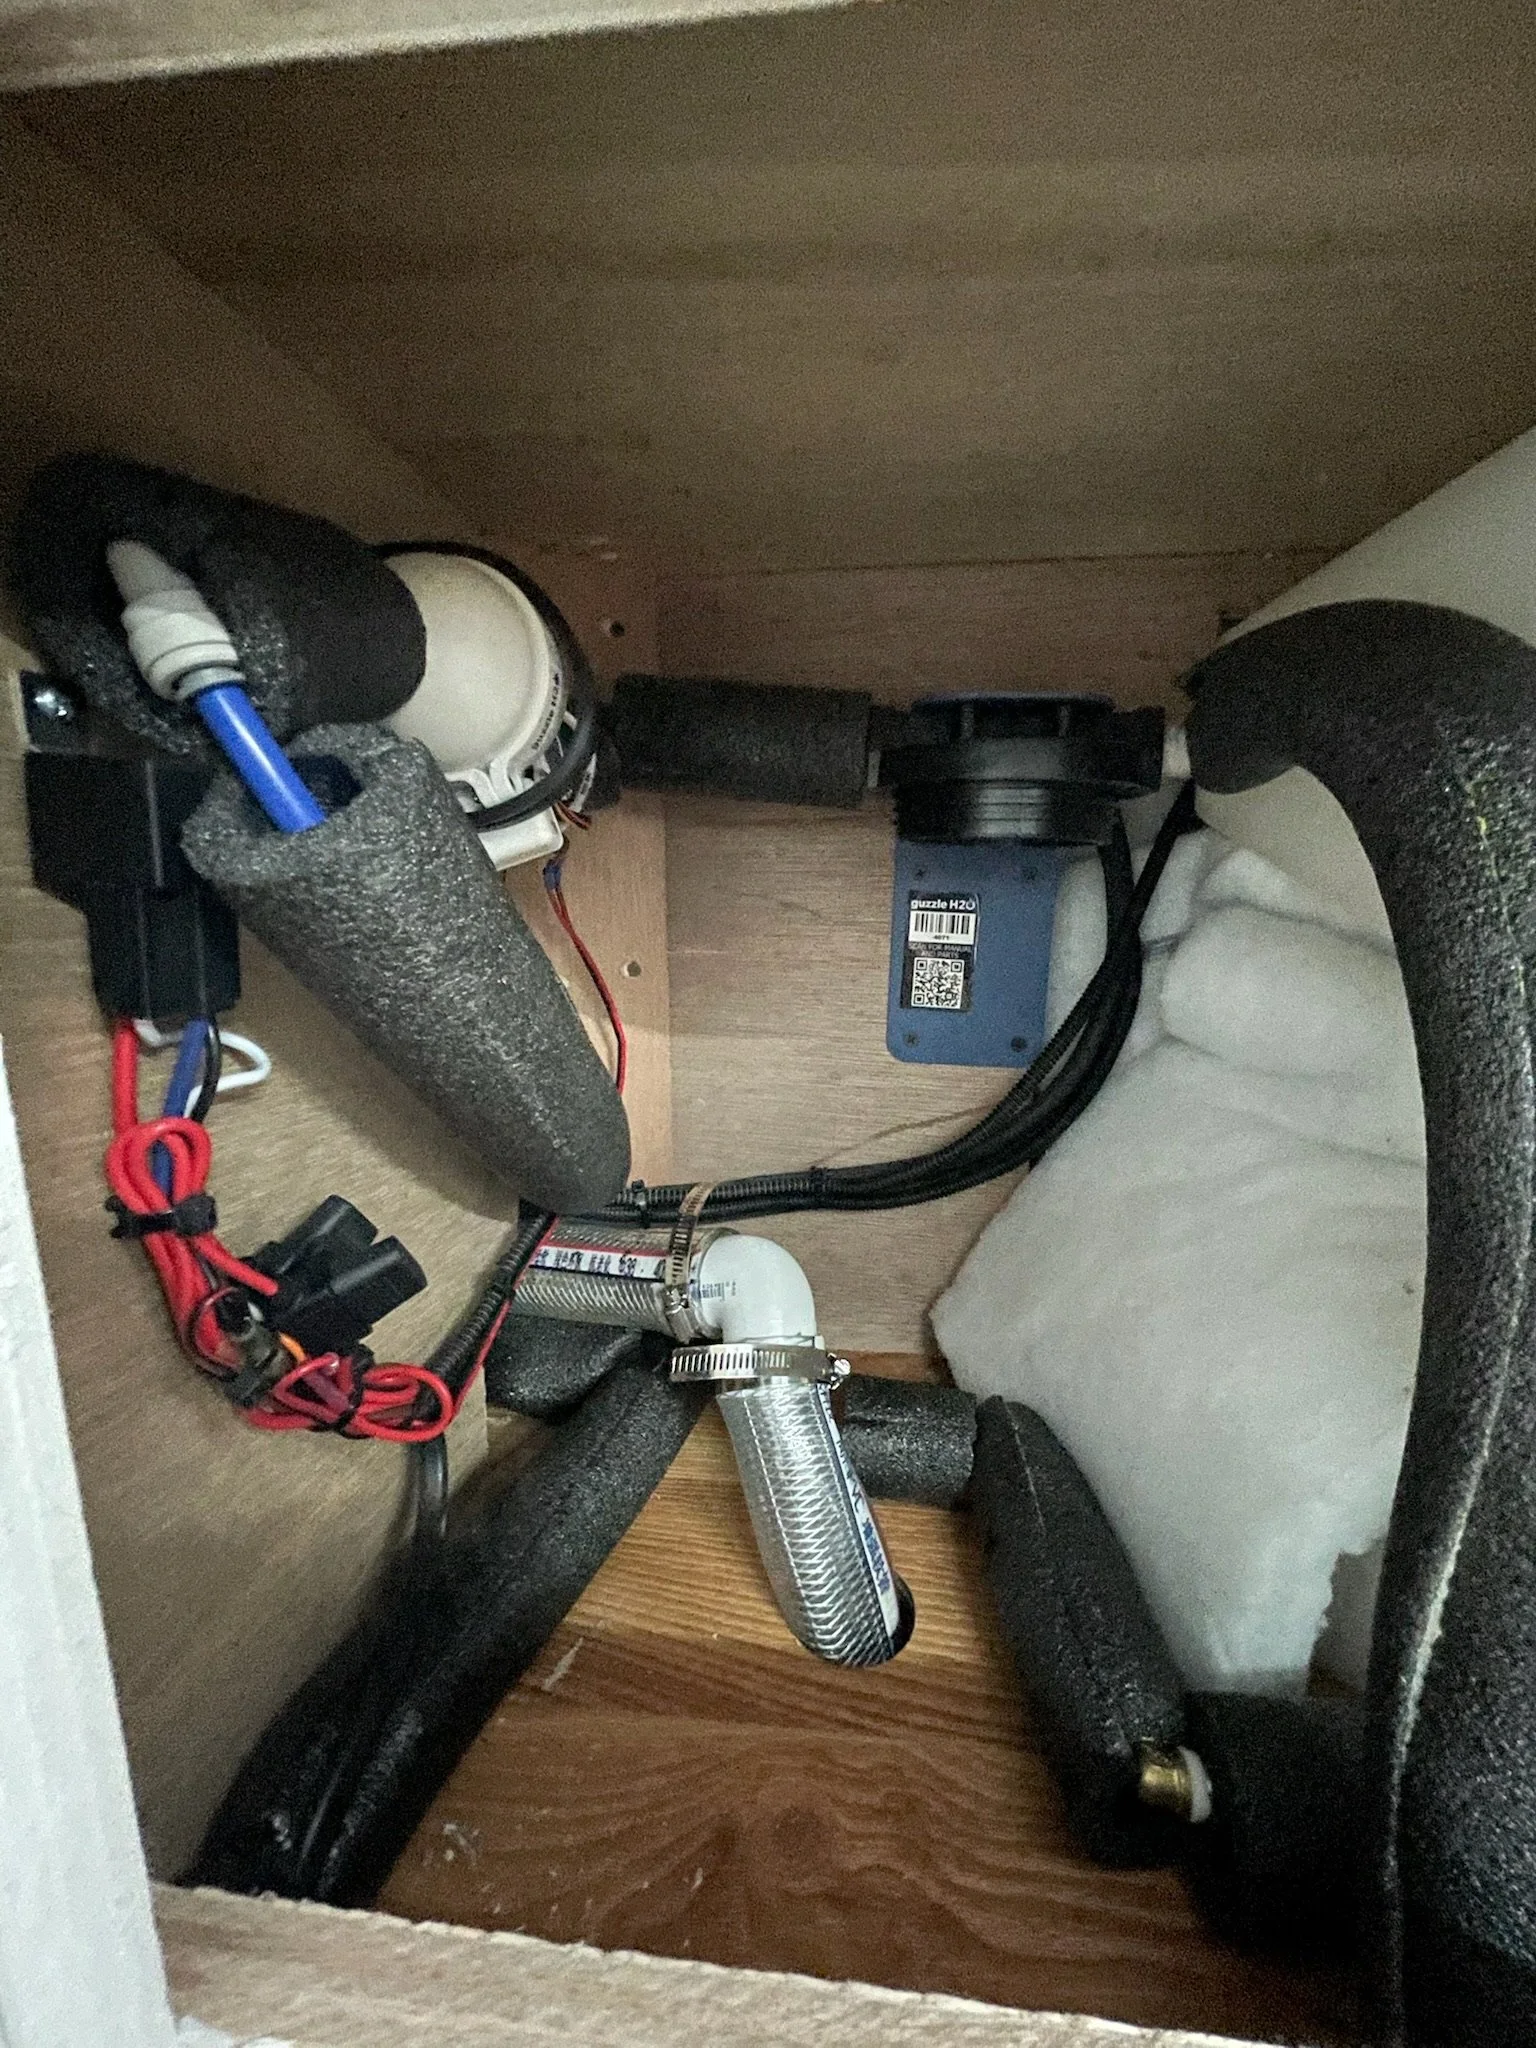

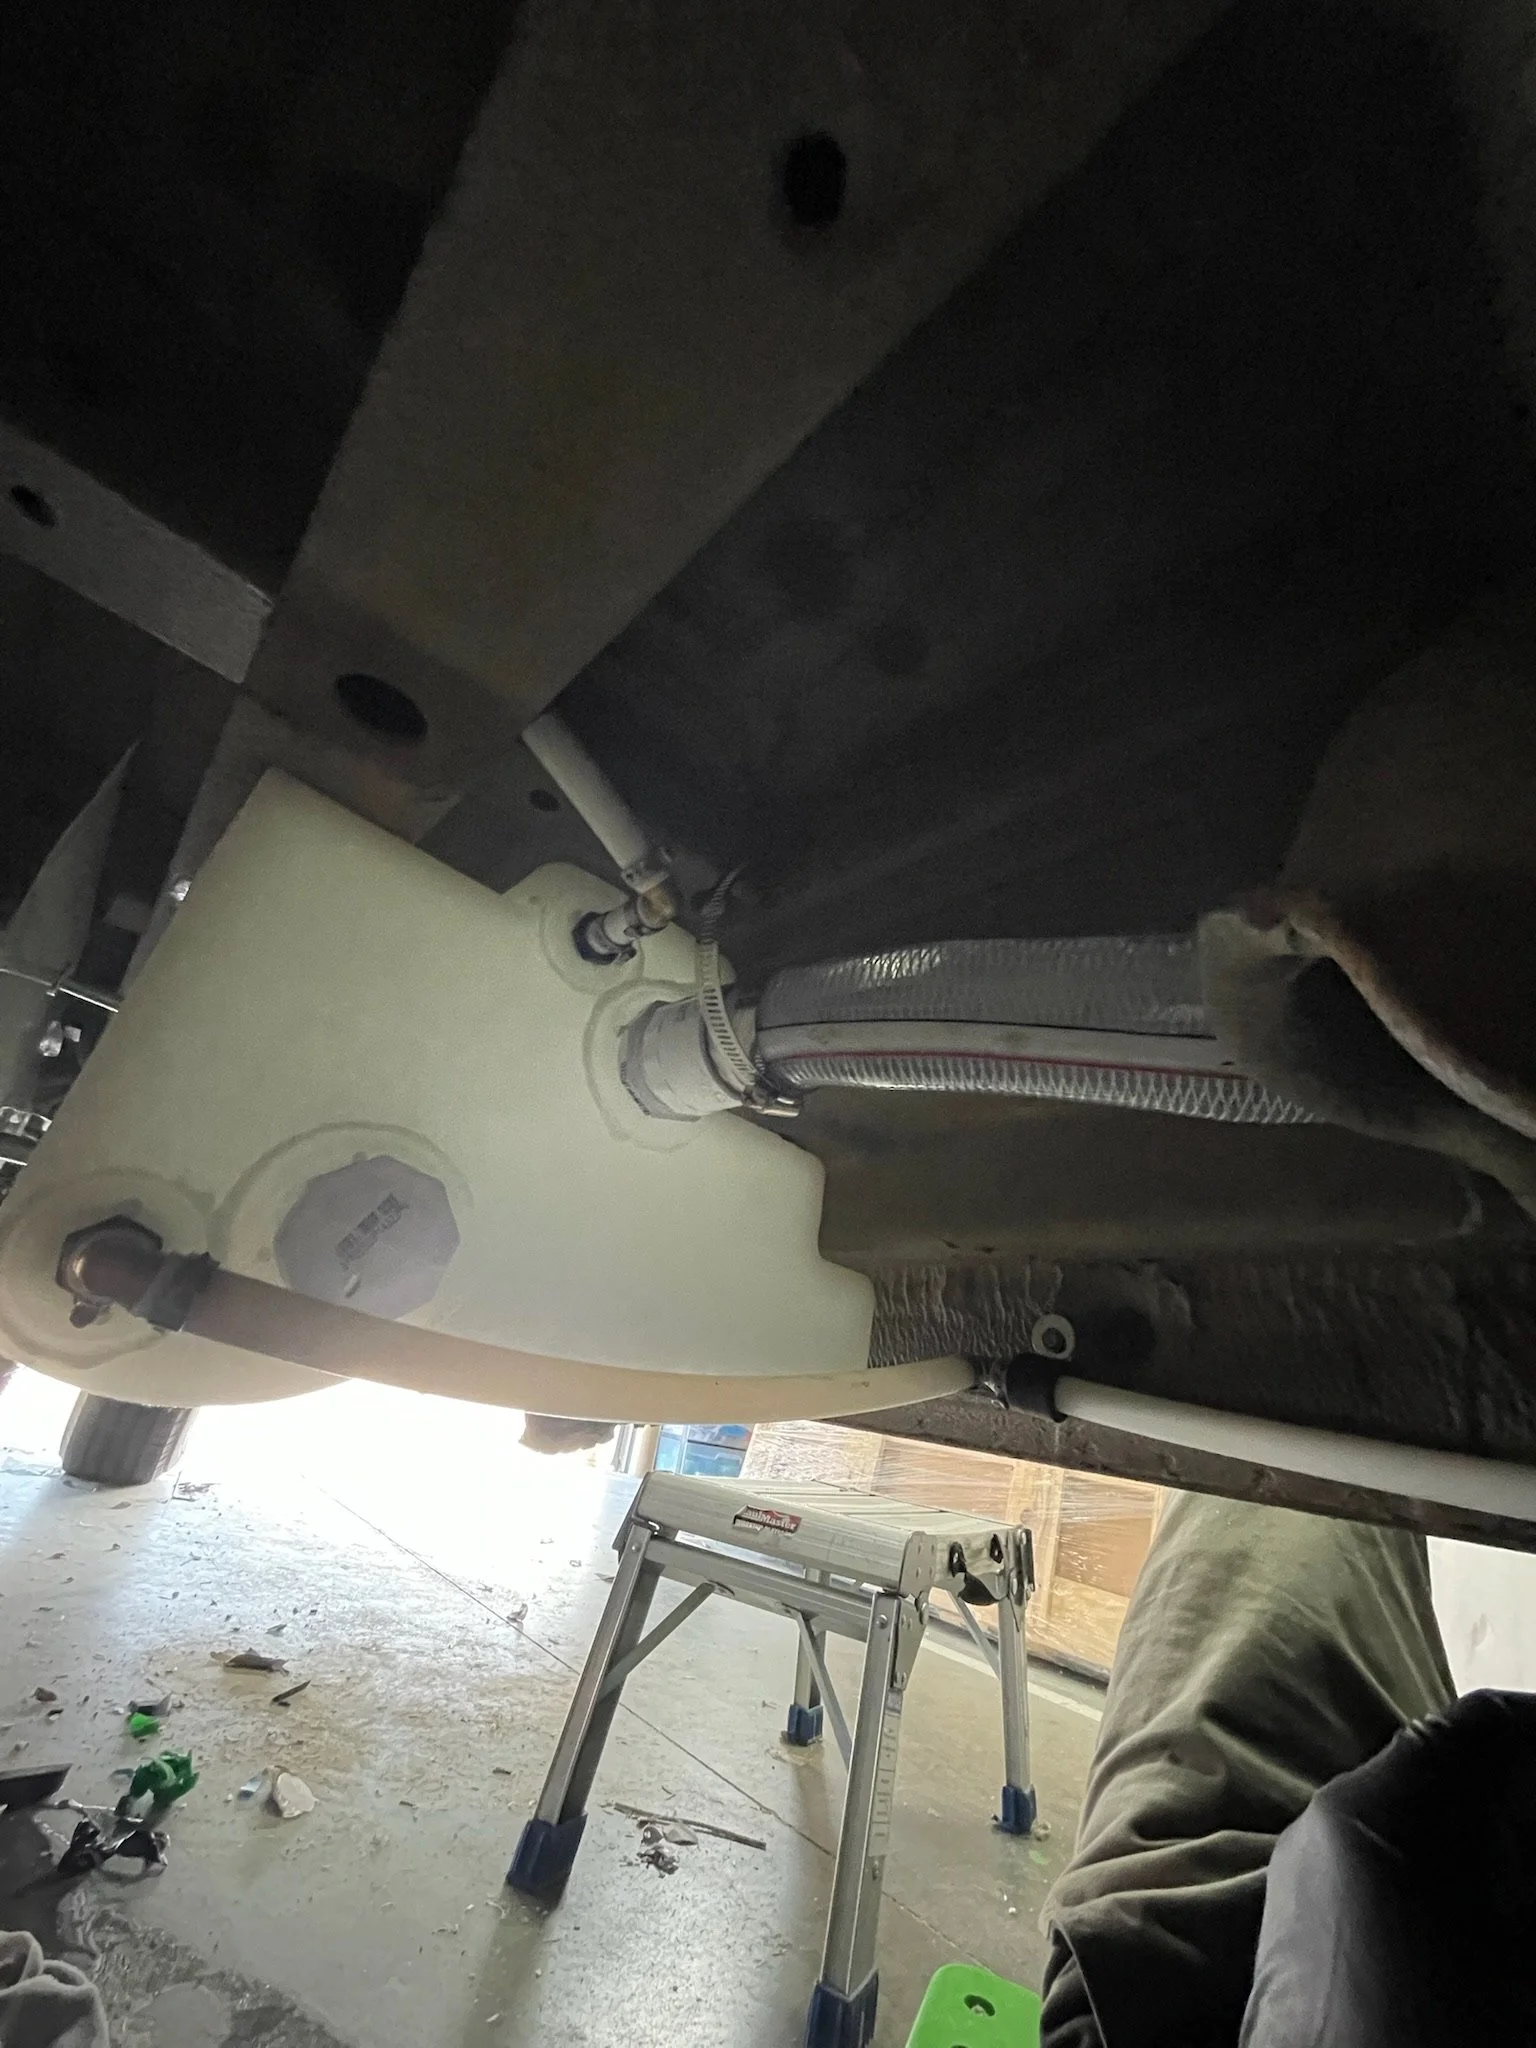
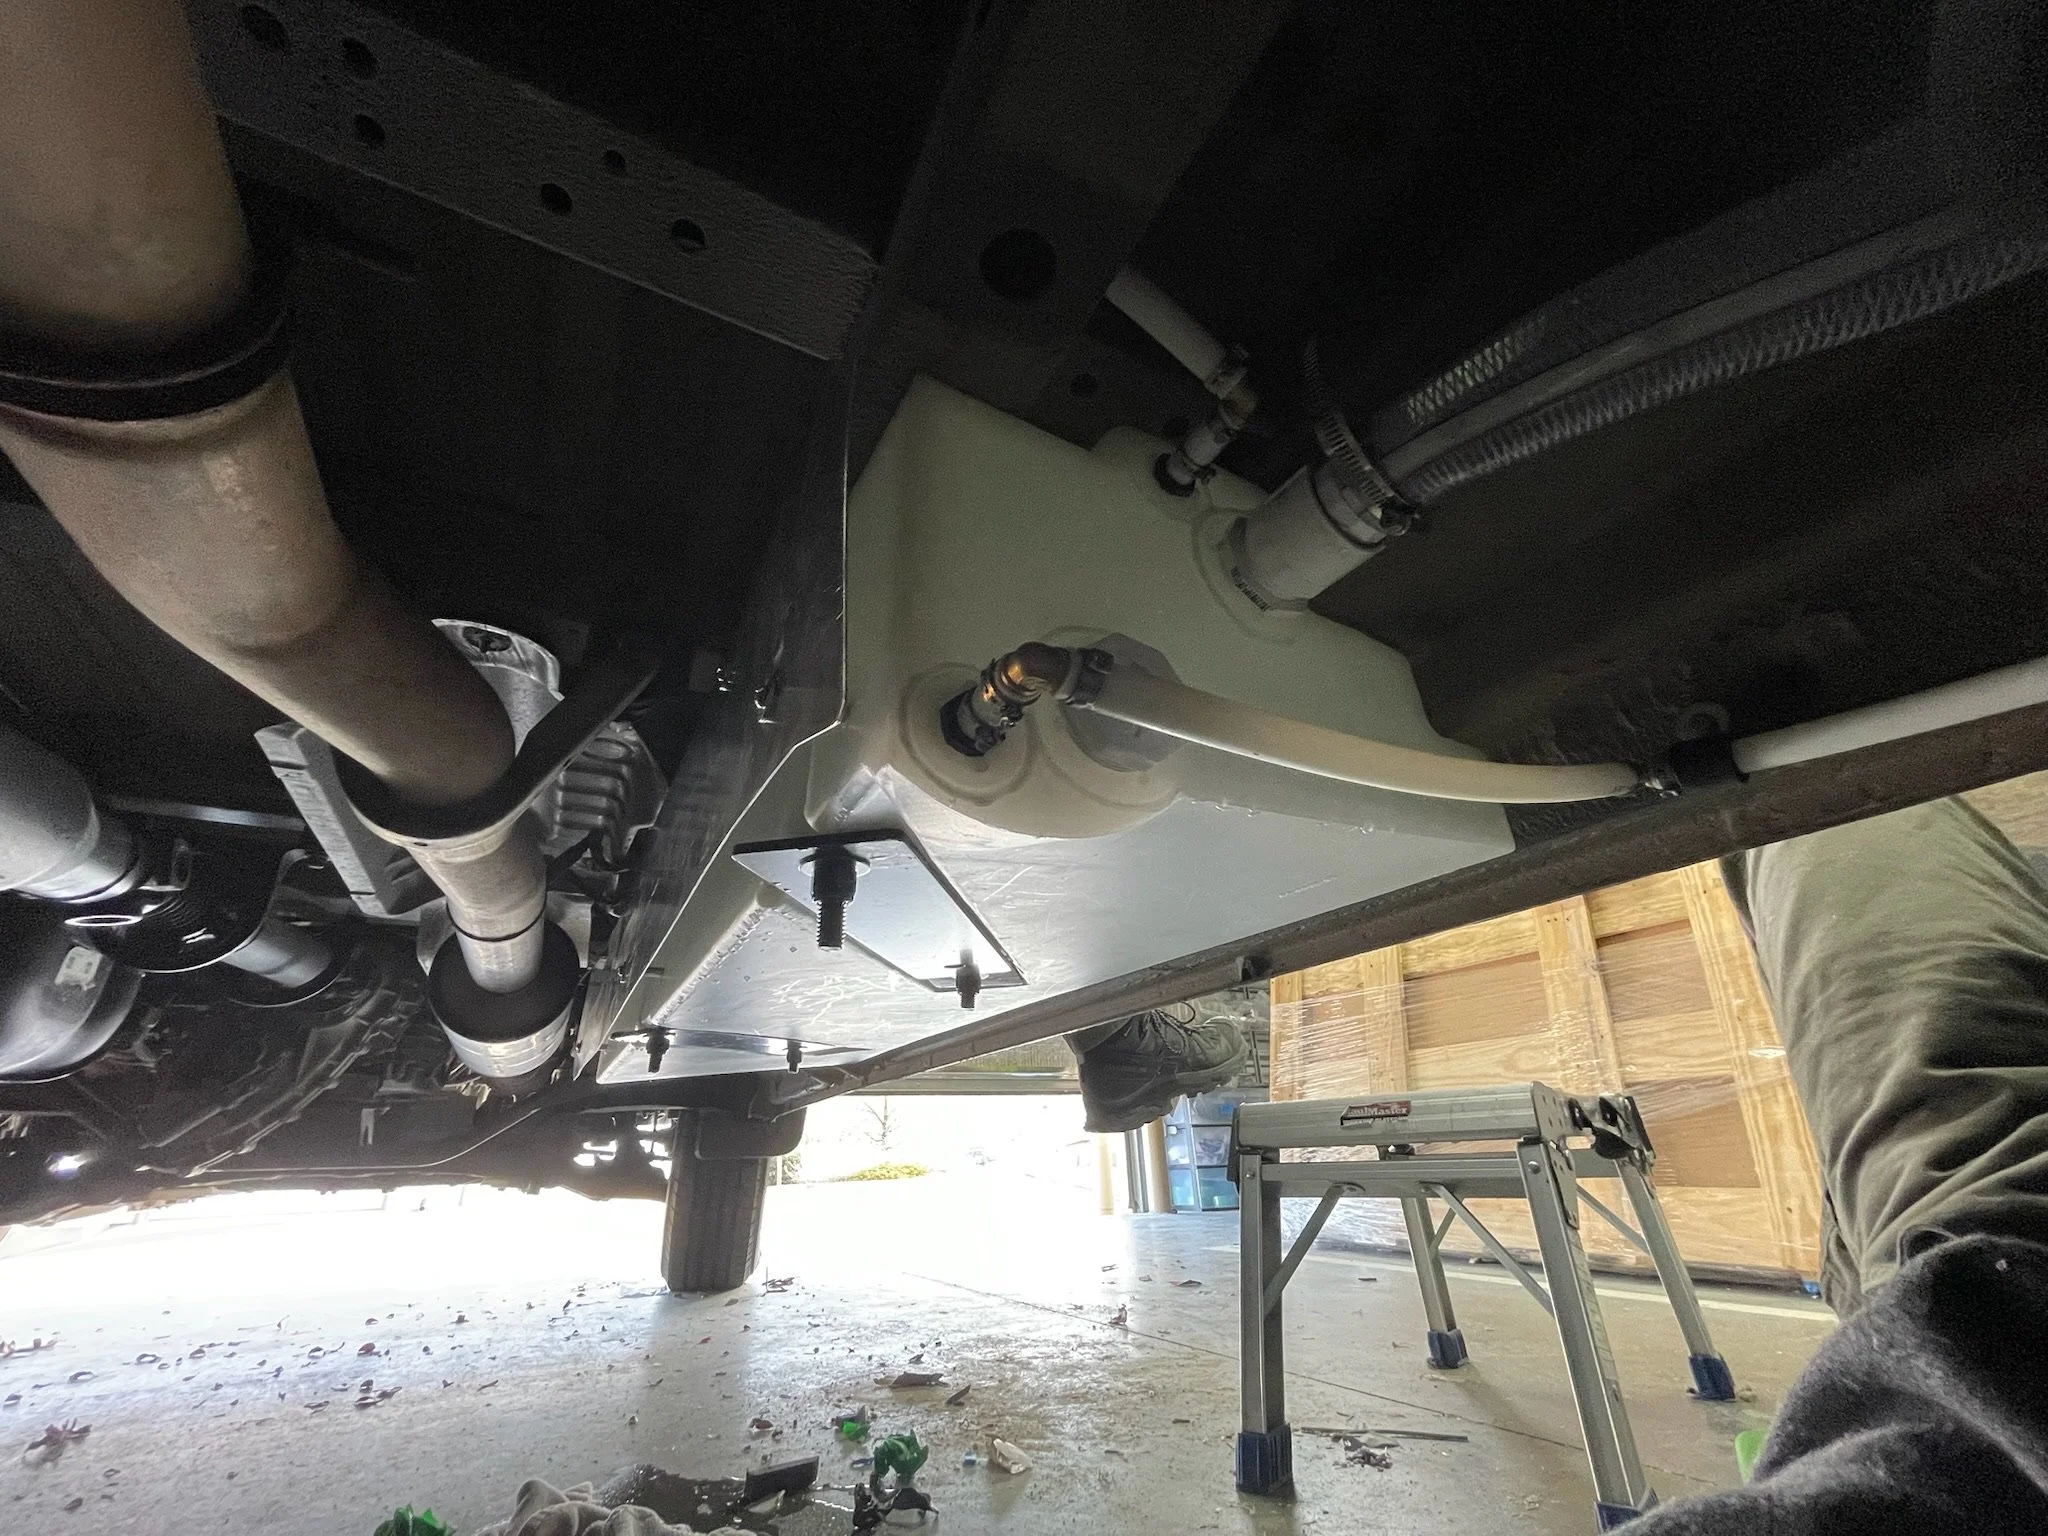
The pictures in the gallery above show the process of installing the water fill, venting the fresh water tank with an overflow drain that goes through the van floor, and running our fresh water plumbing. The water exits the fresh tank through the prethreaded hole at the bottom of the tank and we quickly routed this to our standard plumbing set up (check out our parts list for ideas putting together your system):
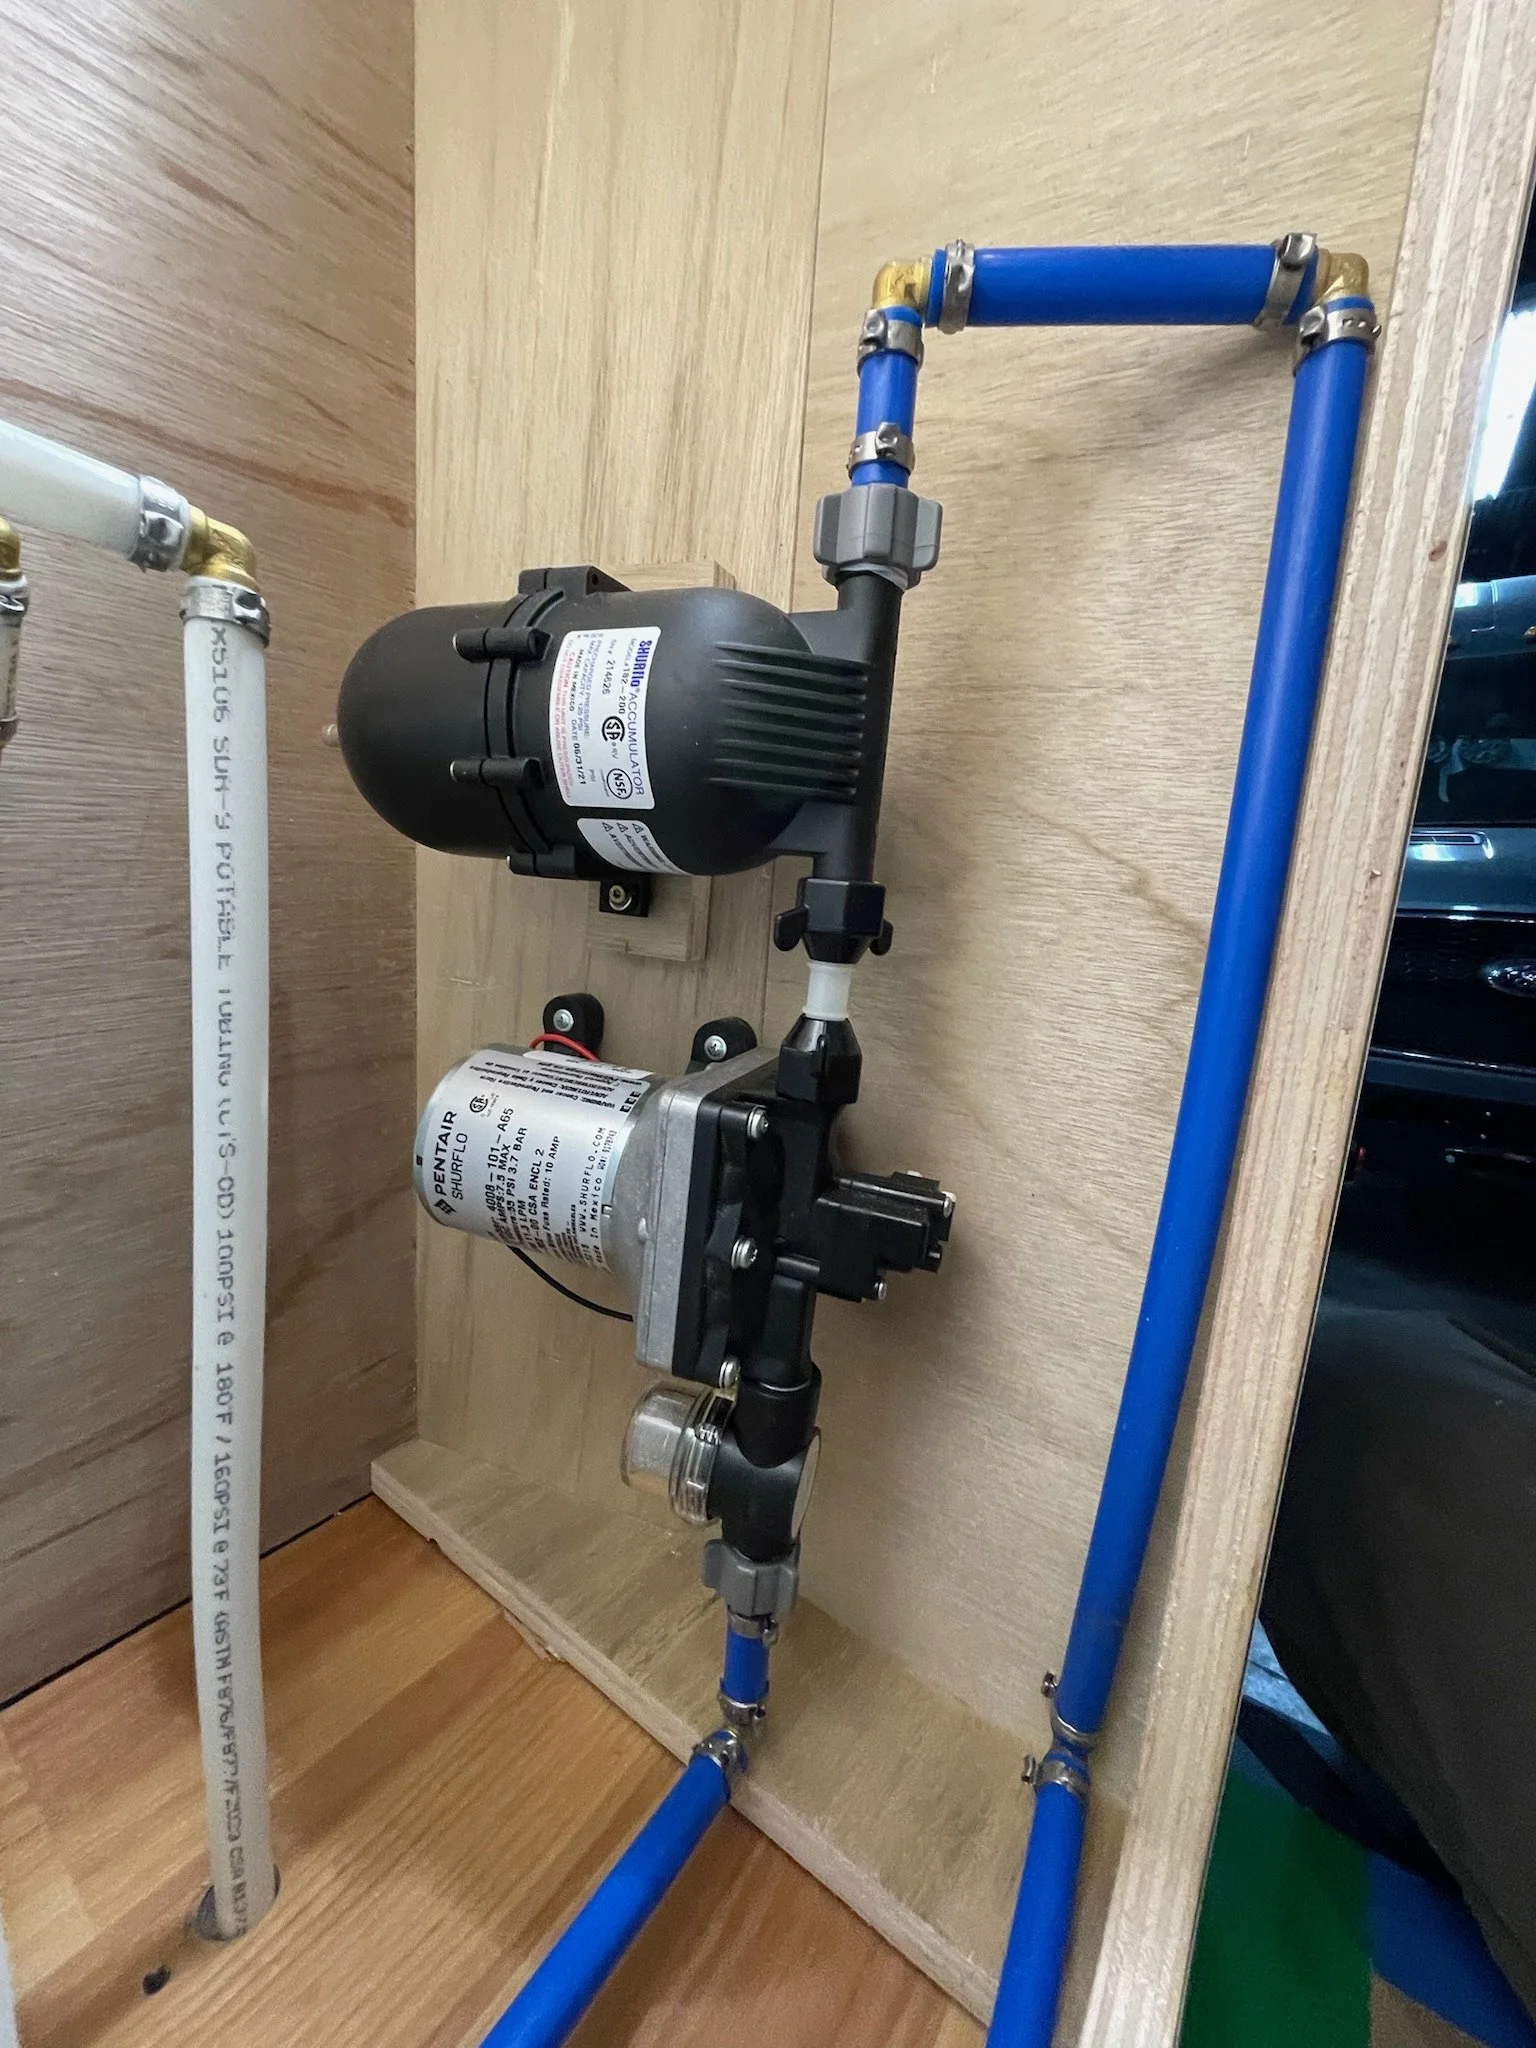
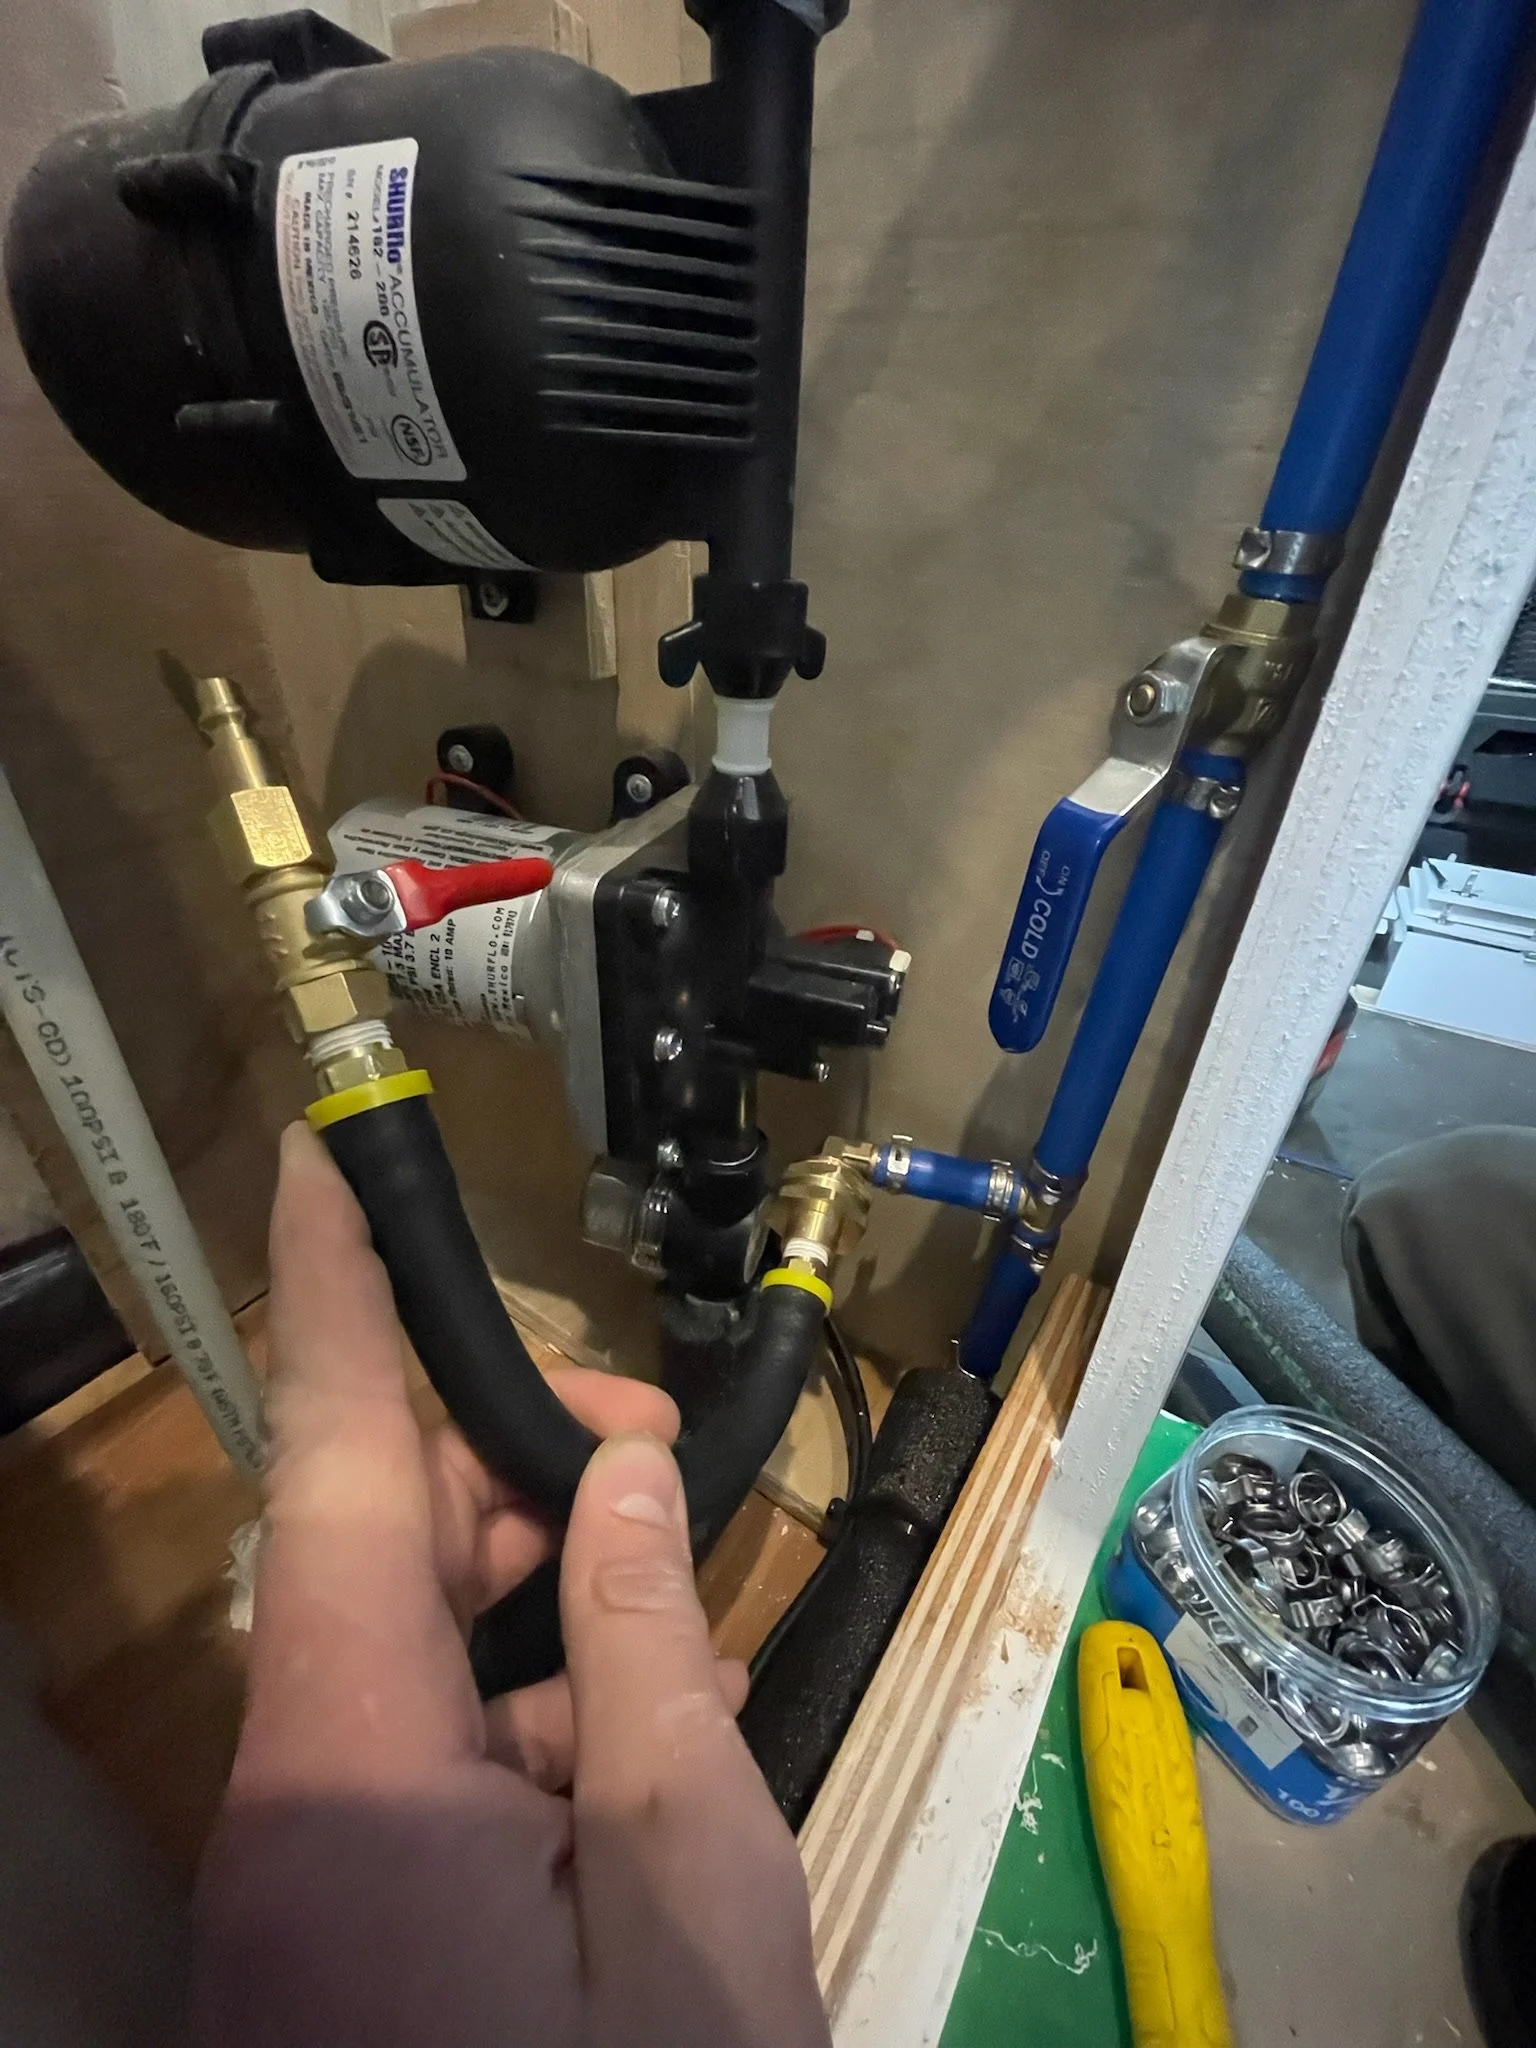
Shurflo Water Pump - to pressurize your system
Shurflo Accumulator Tank - to help maintain consistent pressure in the system
Shurflow water pump filter - to catch large particulates before they get to the pump
This van didn’t get hot water or an outdoor shower, so it was pretty much a straight shot from the pump to the sink. One thing that we like to include in our systems is a blow out valve for customers to winterize their systems without antifreeze. The only way to guarantee water won’t freeze is to use RV antifreeze, but with this piece installed, compressed air can be blown through the lines to force out any water that the pump is unable to move. We install a pex shut off valve in line with this so that the lines can be shut off after the pump (we don’t advise blowing compressed air through the pump).
For the water fill, we drilled out the pre threaded hole that was tapped into the tank and then we install this threaded elbow fitting to run to our water fill. We connected the water fill to the tank with this 1 1/2” ID Flexible tubing and tightened everything down with hose clamps.
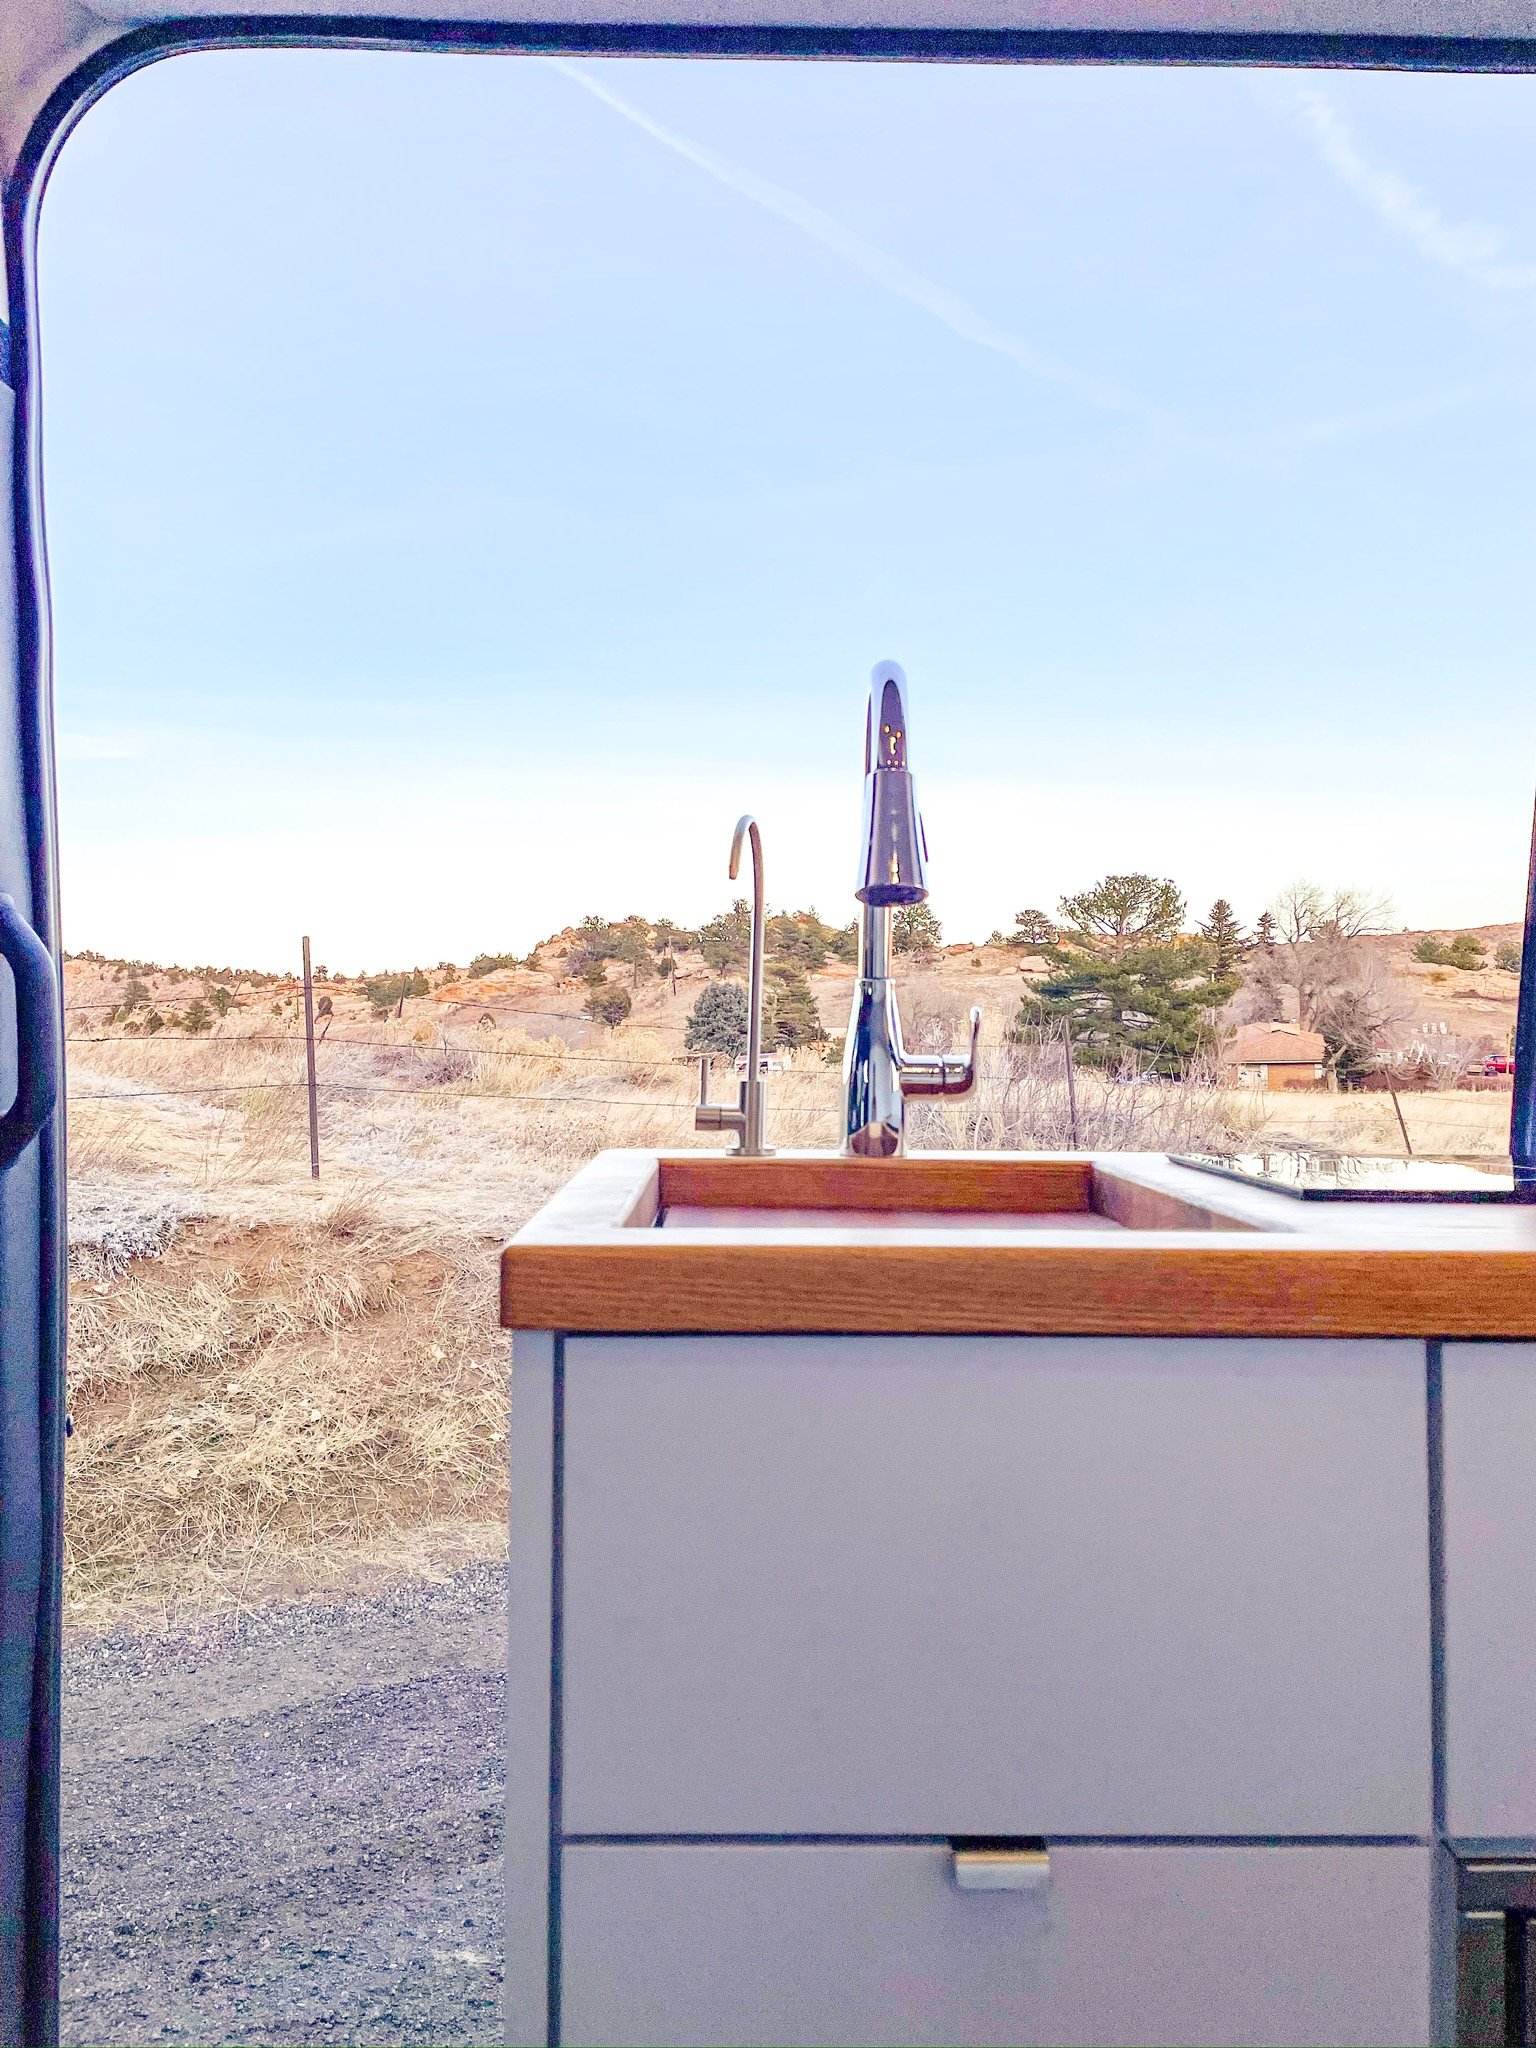
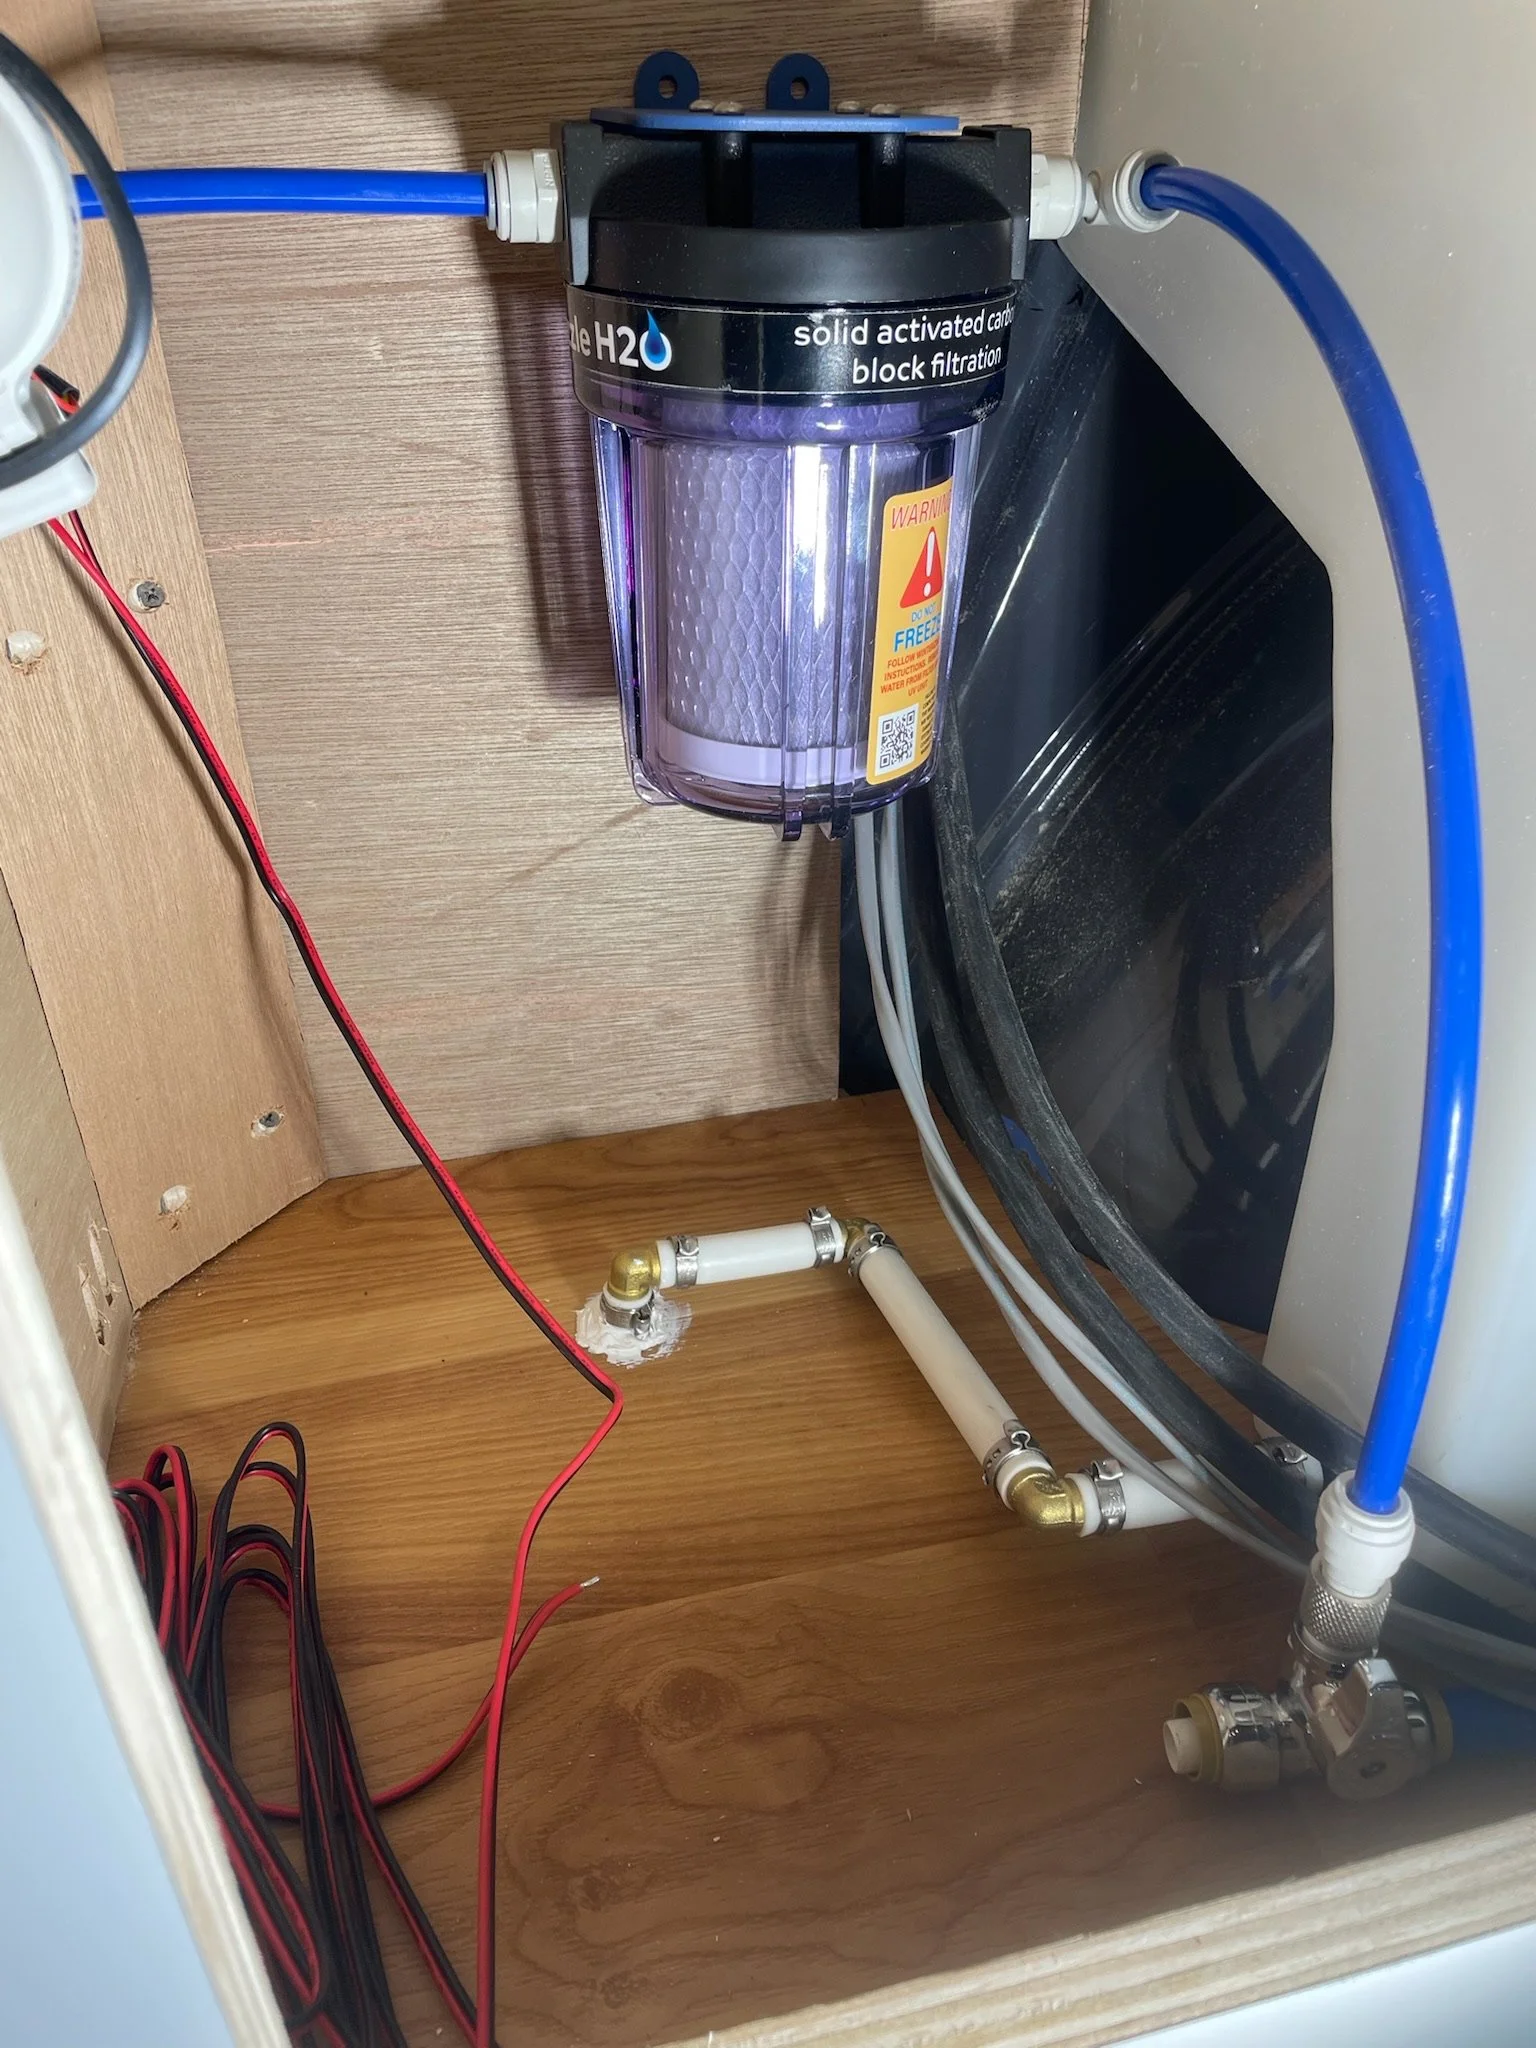
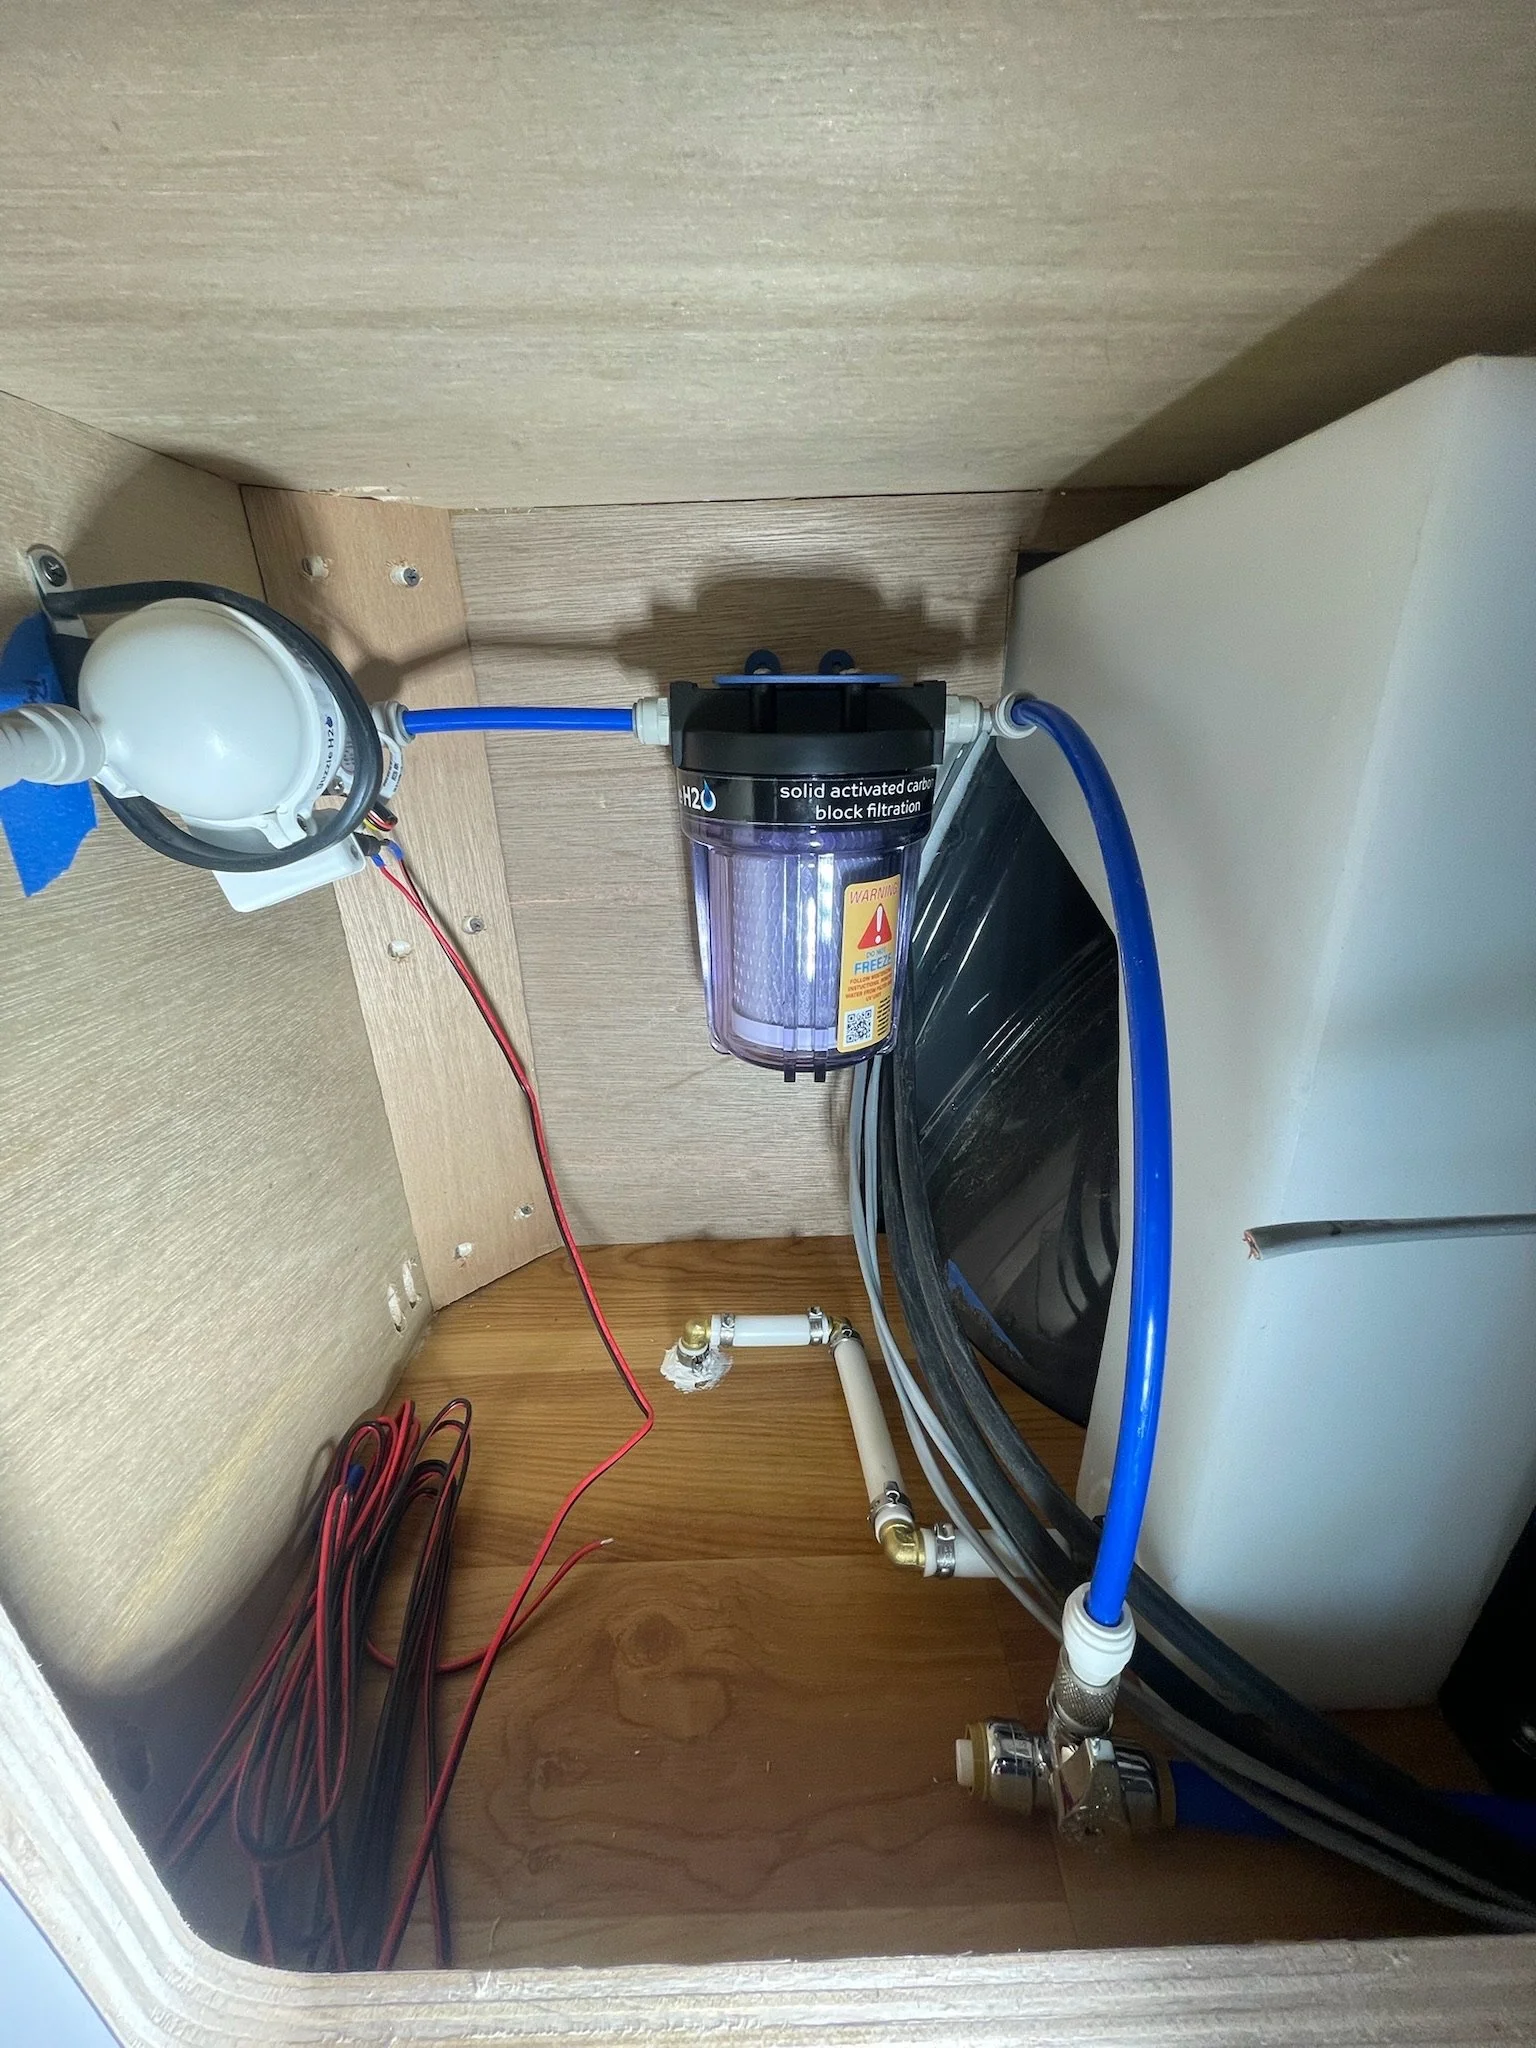
The final piece of Laura’s plumbing system was potable water. We used a Guzzle H20 Stealth Flex 5 that we sourced from Agile Offroad to get drinking water to the sink. The water filter kit from Agile came with a drinking water faucet, and then at the sink we used a Chrome Dura Faucet Pull-Down Kitchen Sink Faucet for the unfiltered water.
Once everything was hooked up, we added some additional insulation behind the water tank to keep it as warm in the plumbing cavity as possible. We also wrapped all of the pex with this insulated pipe sleeve for an additional layer of protection in cold temperatures.
Colorado Adventure Vans is an Upfitter based in Golden, Colorado.
Building out vans since 2017, we take great care with every build in our shop. Our focus is quality, not volume, aiming our attention to detail to ensure your adventure rig is ready for anything the road throws at you.

Follow us on social media
Head to your favorite social platform below to stay up to date on all things Colorado Adventure Vans. New vans, rental destinations, & more.
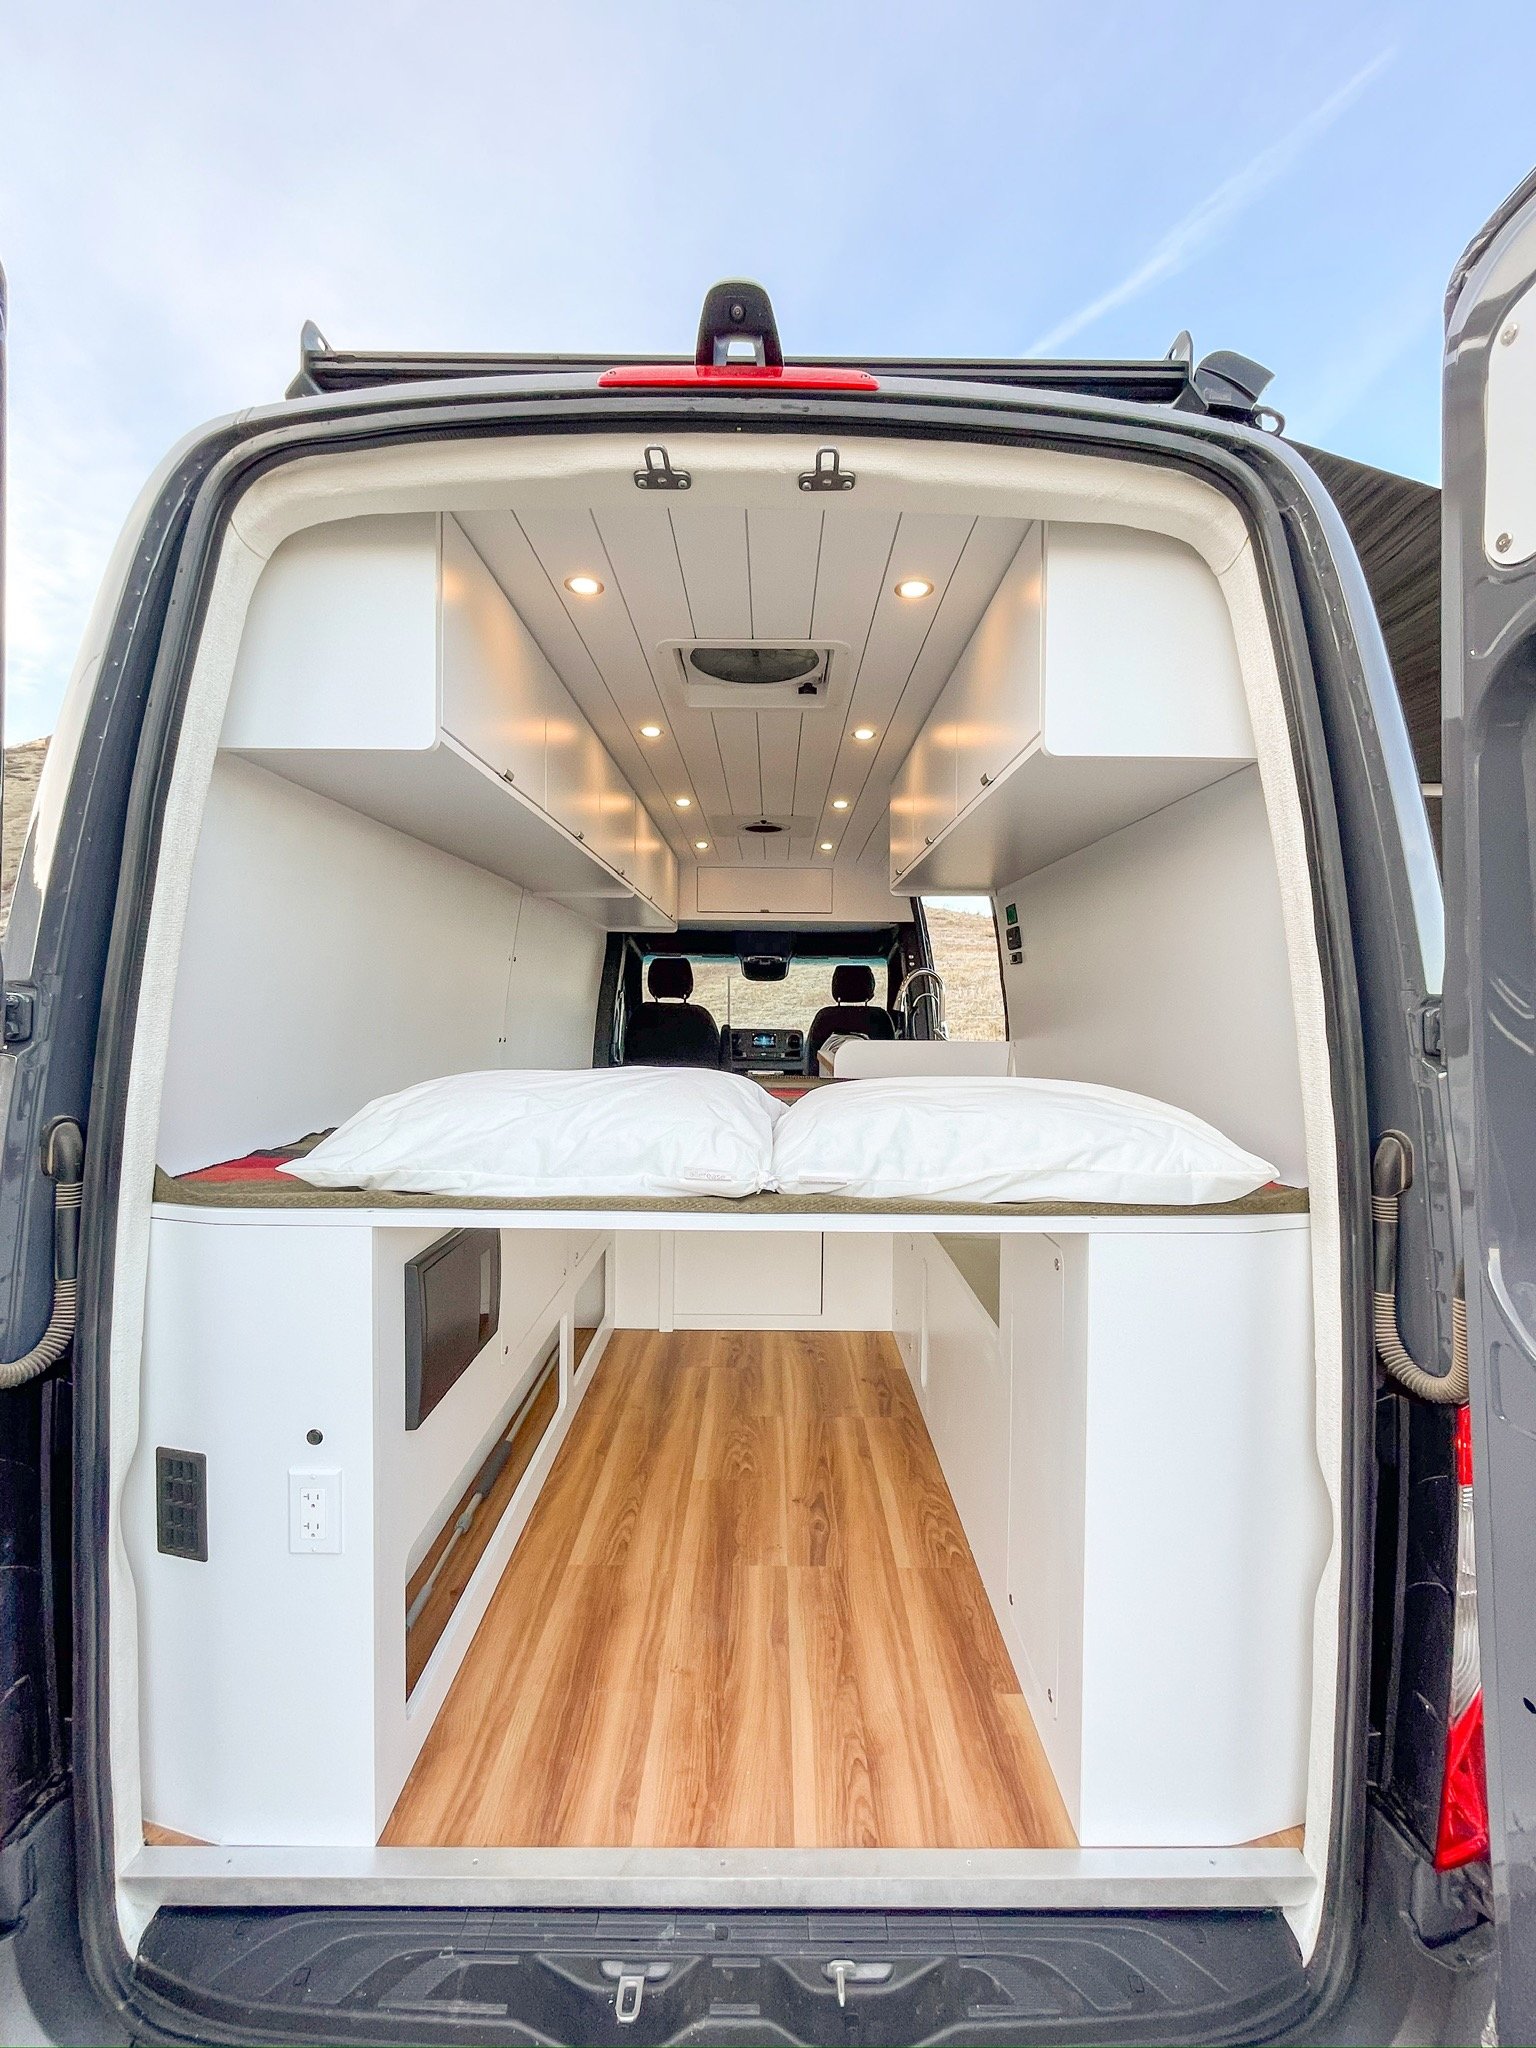
Cabinetry, Layout, & Interior Design
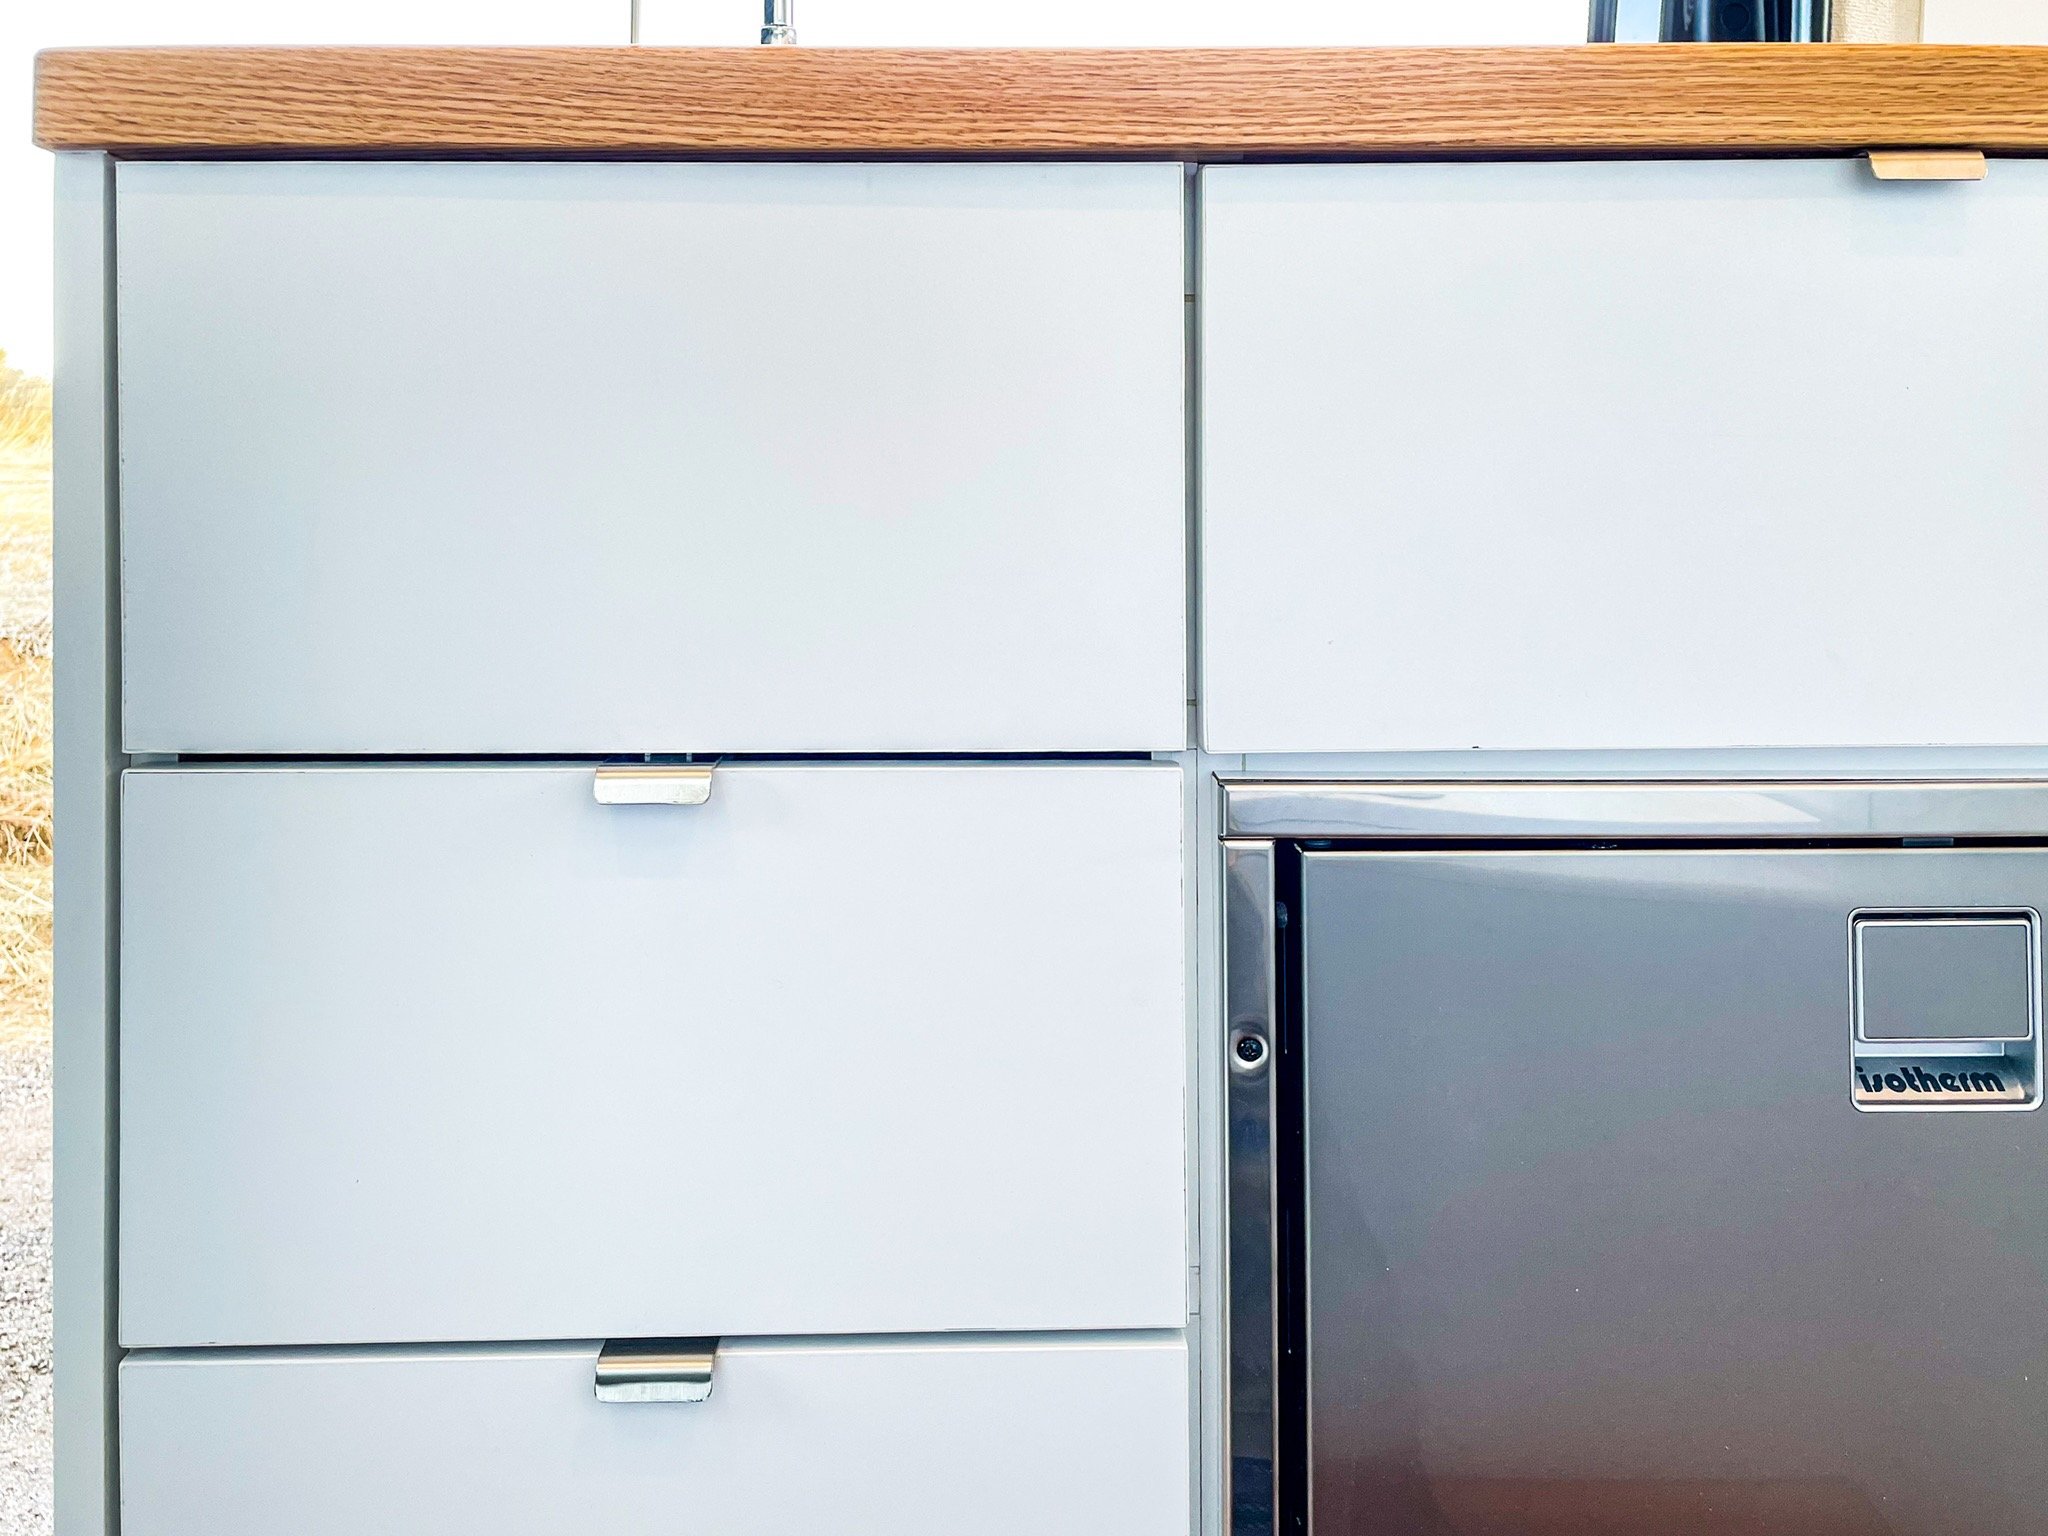
All of the cabinetry in this van was laminated light plywood. Just like the walls, we used Formica Brite White with Matte Finish for the laminate. All of the doors and drawers are latched with these RV Labs Locking Drawer Latches. For the front bench, we used these handles for something easy and low profile.
The galley was built out around an Isotherm Cruise 85 Stainless Steel fridge. Above the fridge, we mounted a NutriChef Induction Cooktop and we used an undermount sink with a Dura Faucet Chrome Faucet. The rest of the galley space around the fridge was used for drawers. We always use Blum Undermount Drawer Glides in our vans - these were 18”.
The countertop is Red Oak Butcher Block that we had custom milled for us by Hardwood Lumber Company. We also used this butcher block as a pull out desk that nests under the bed.

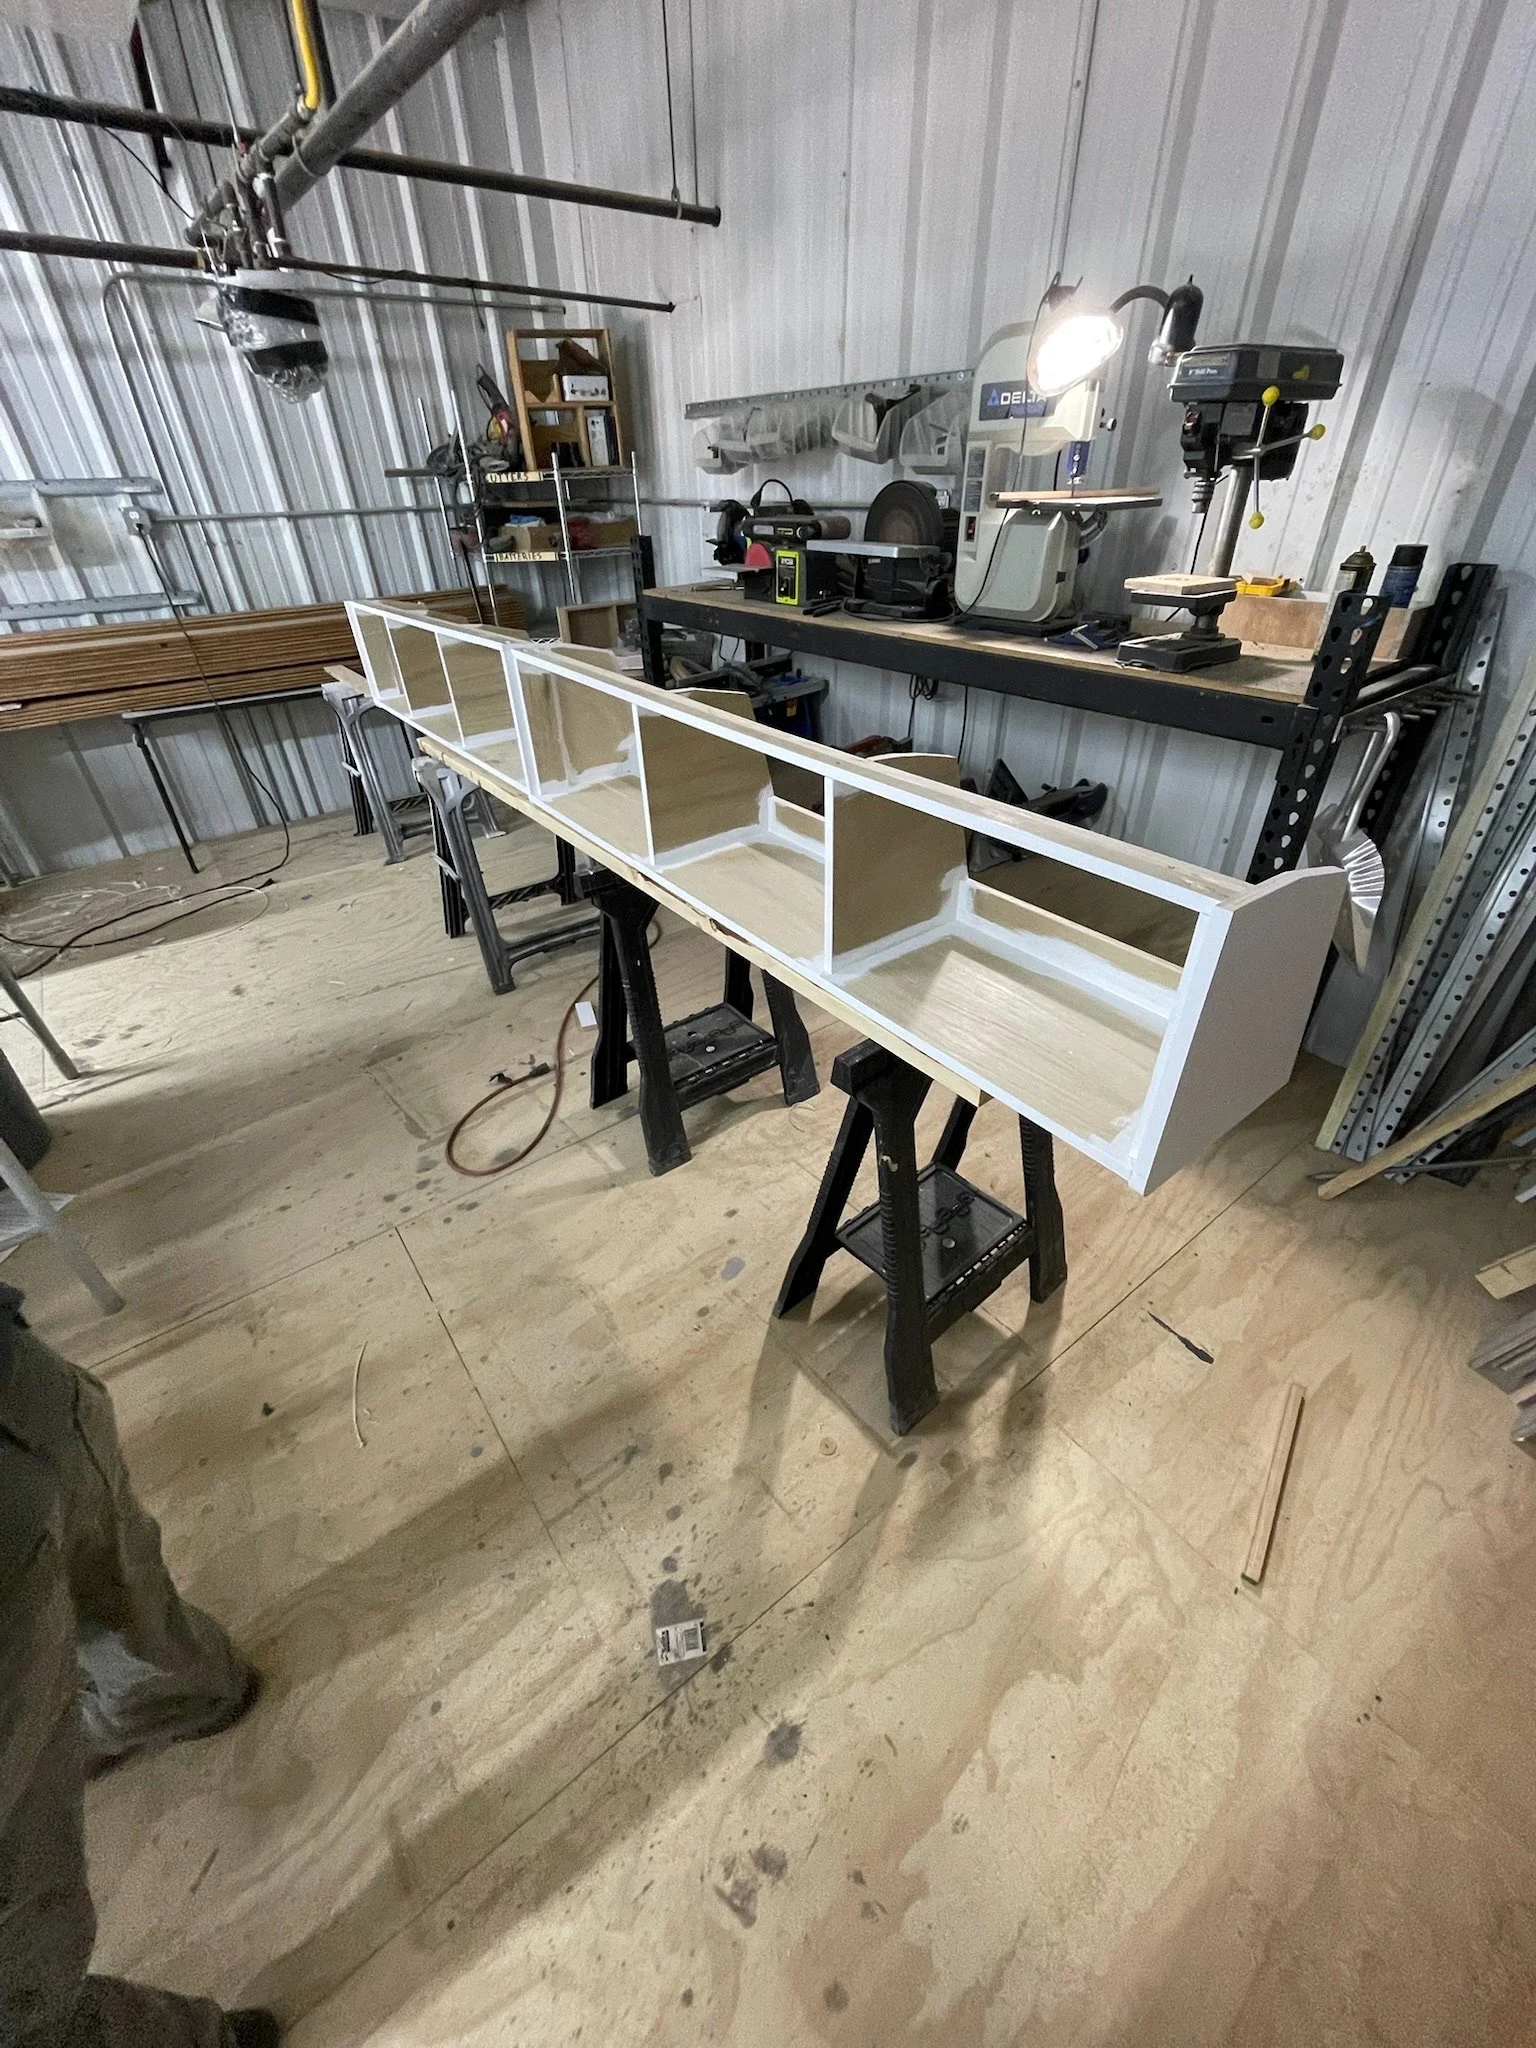
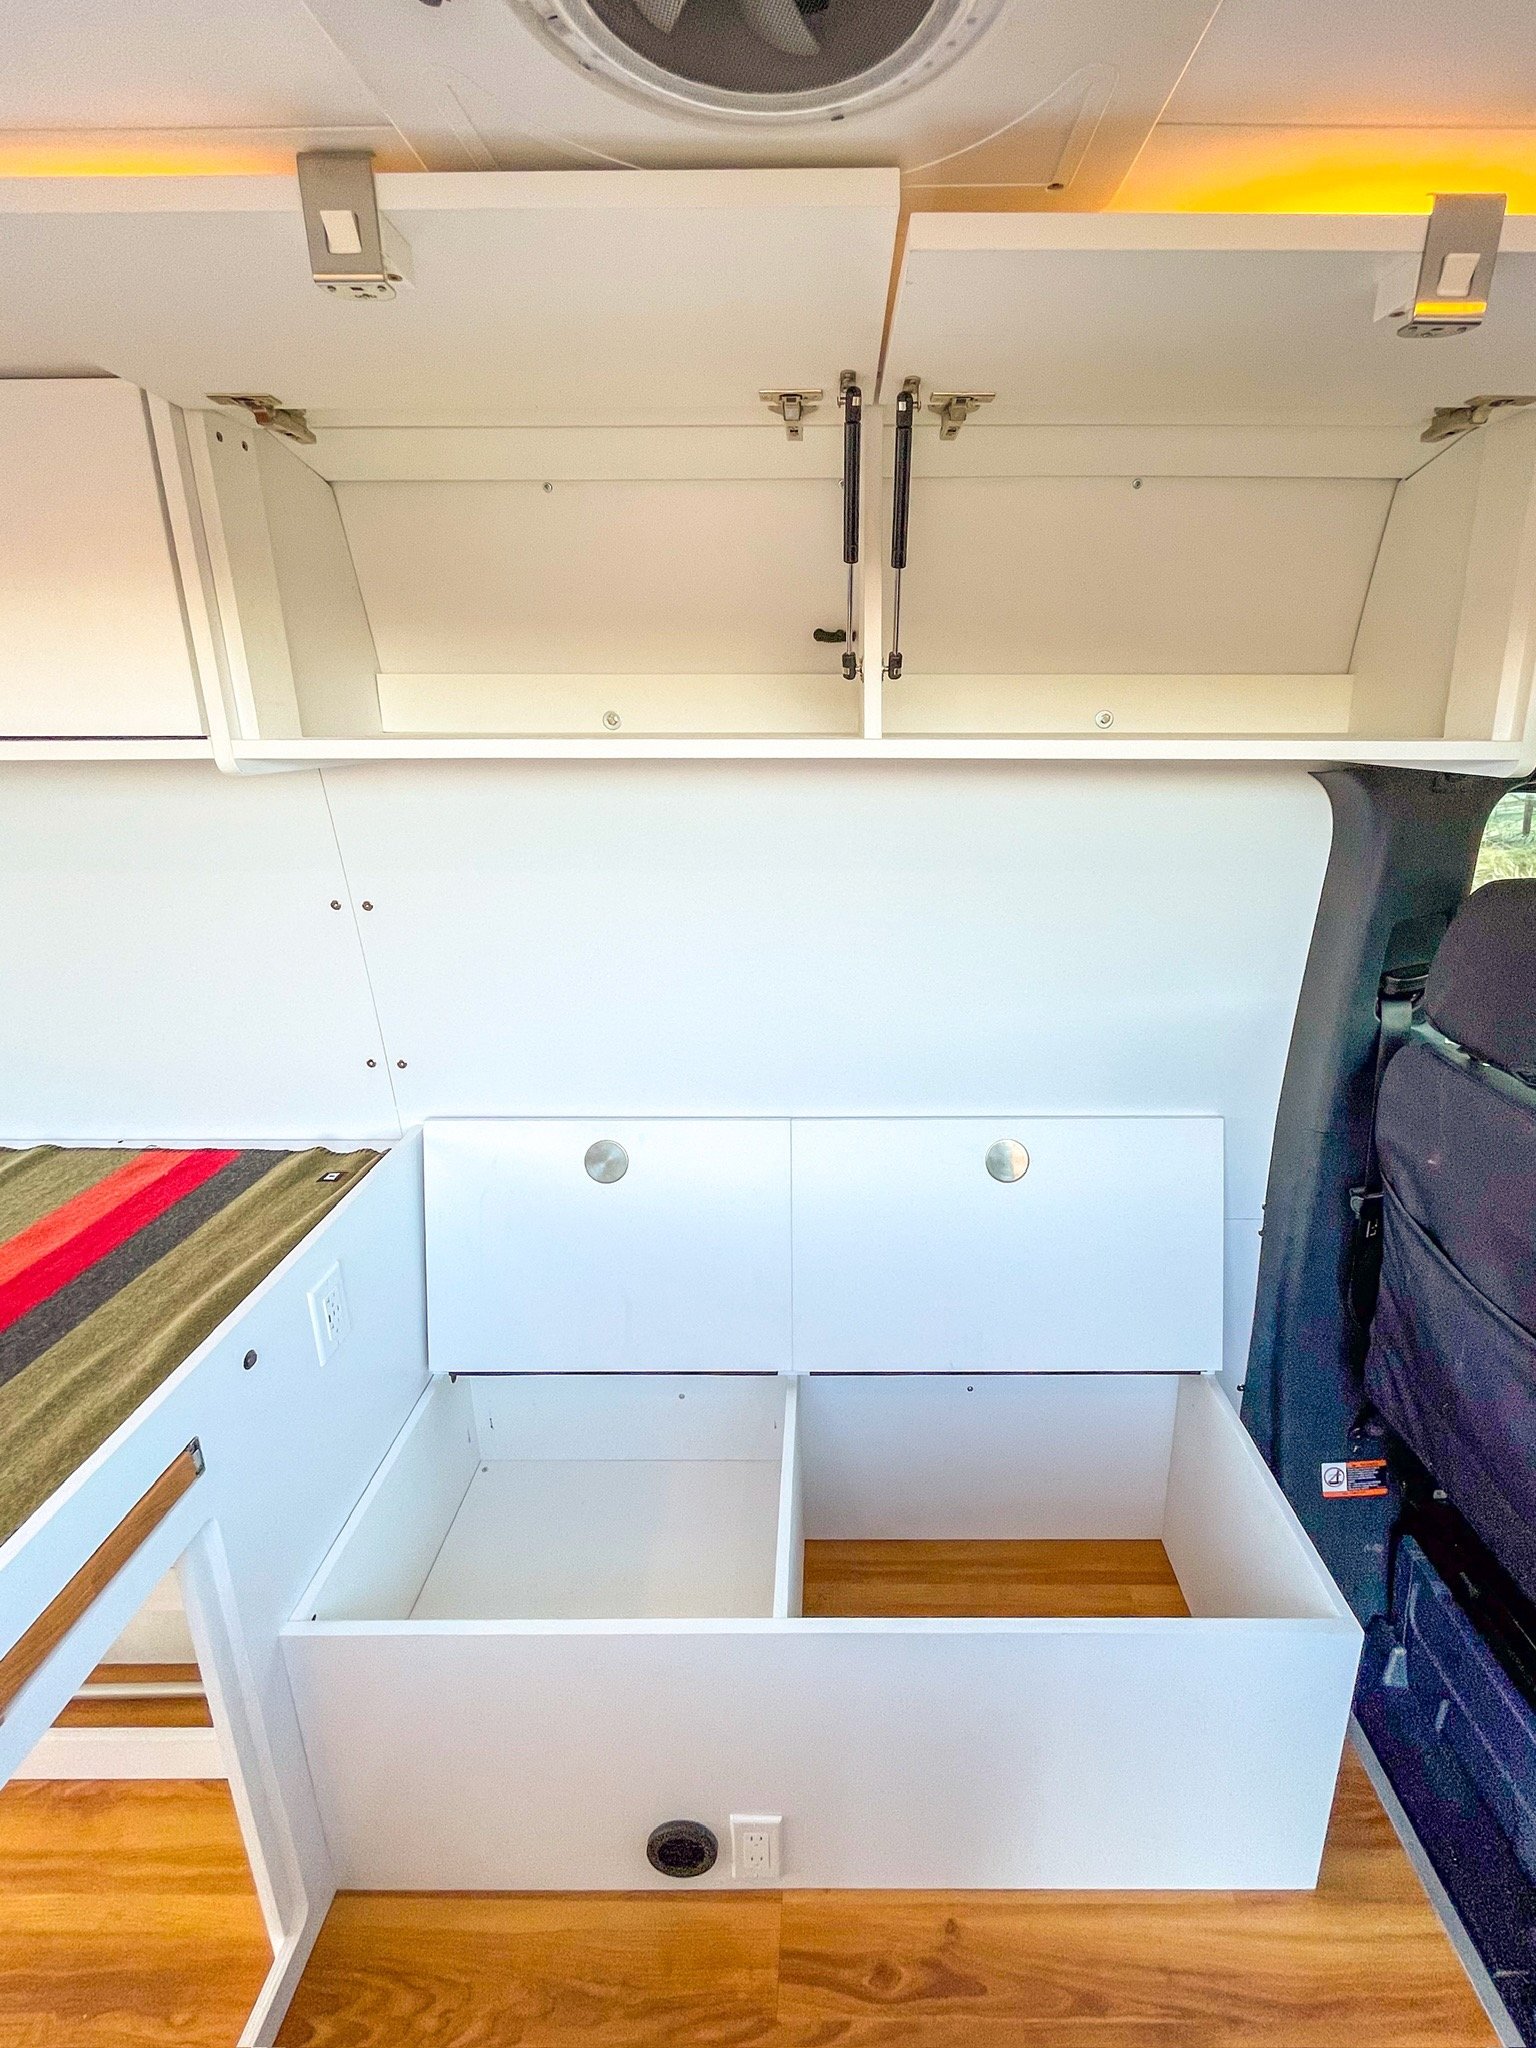
We added upper cabinetry storage everywhere that we could in the van. All of our upper cabinet doors stay open with the help of gas struts and stay closed with our RV Labs latches. All of these upper cabinet doors are hinged with Blum overlay cabinet hinges (over the years we have found Blum hinges to be the easiest to install and most functional for our van cabinetry).
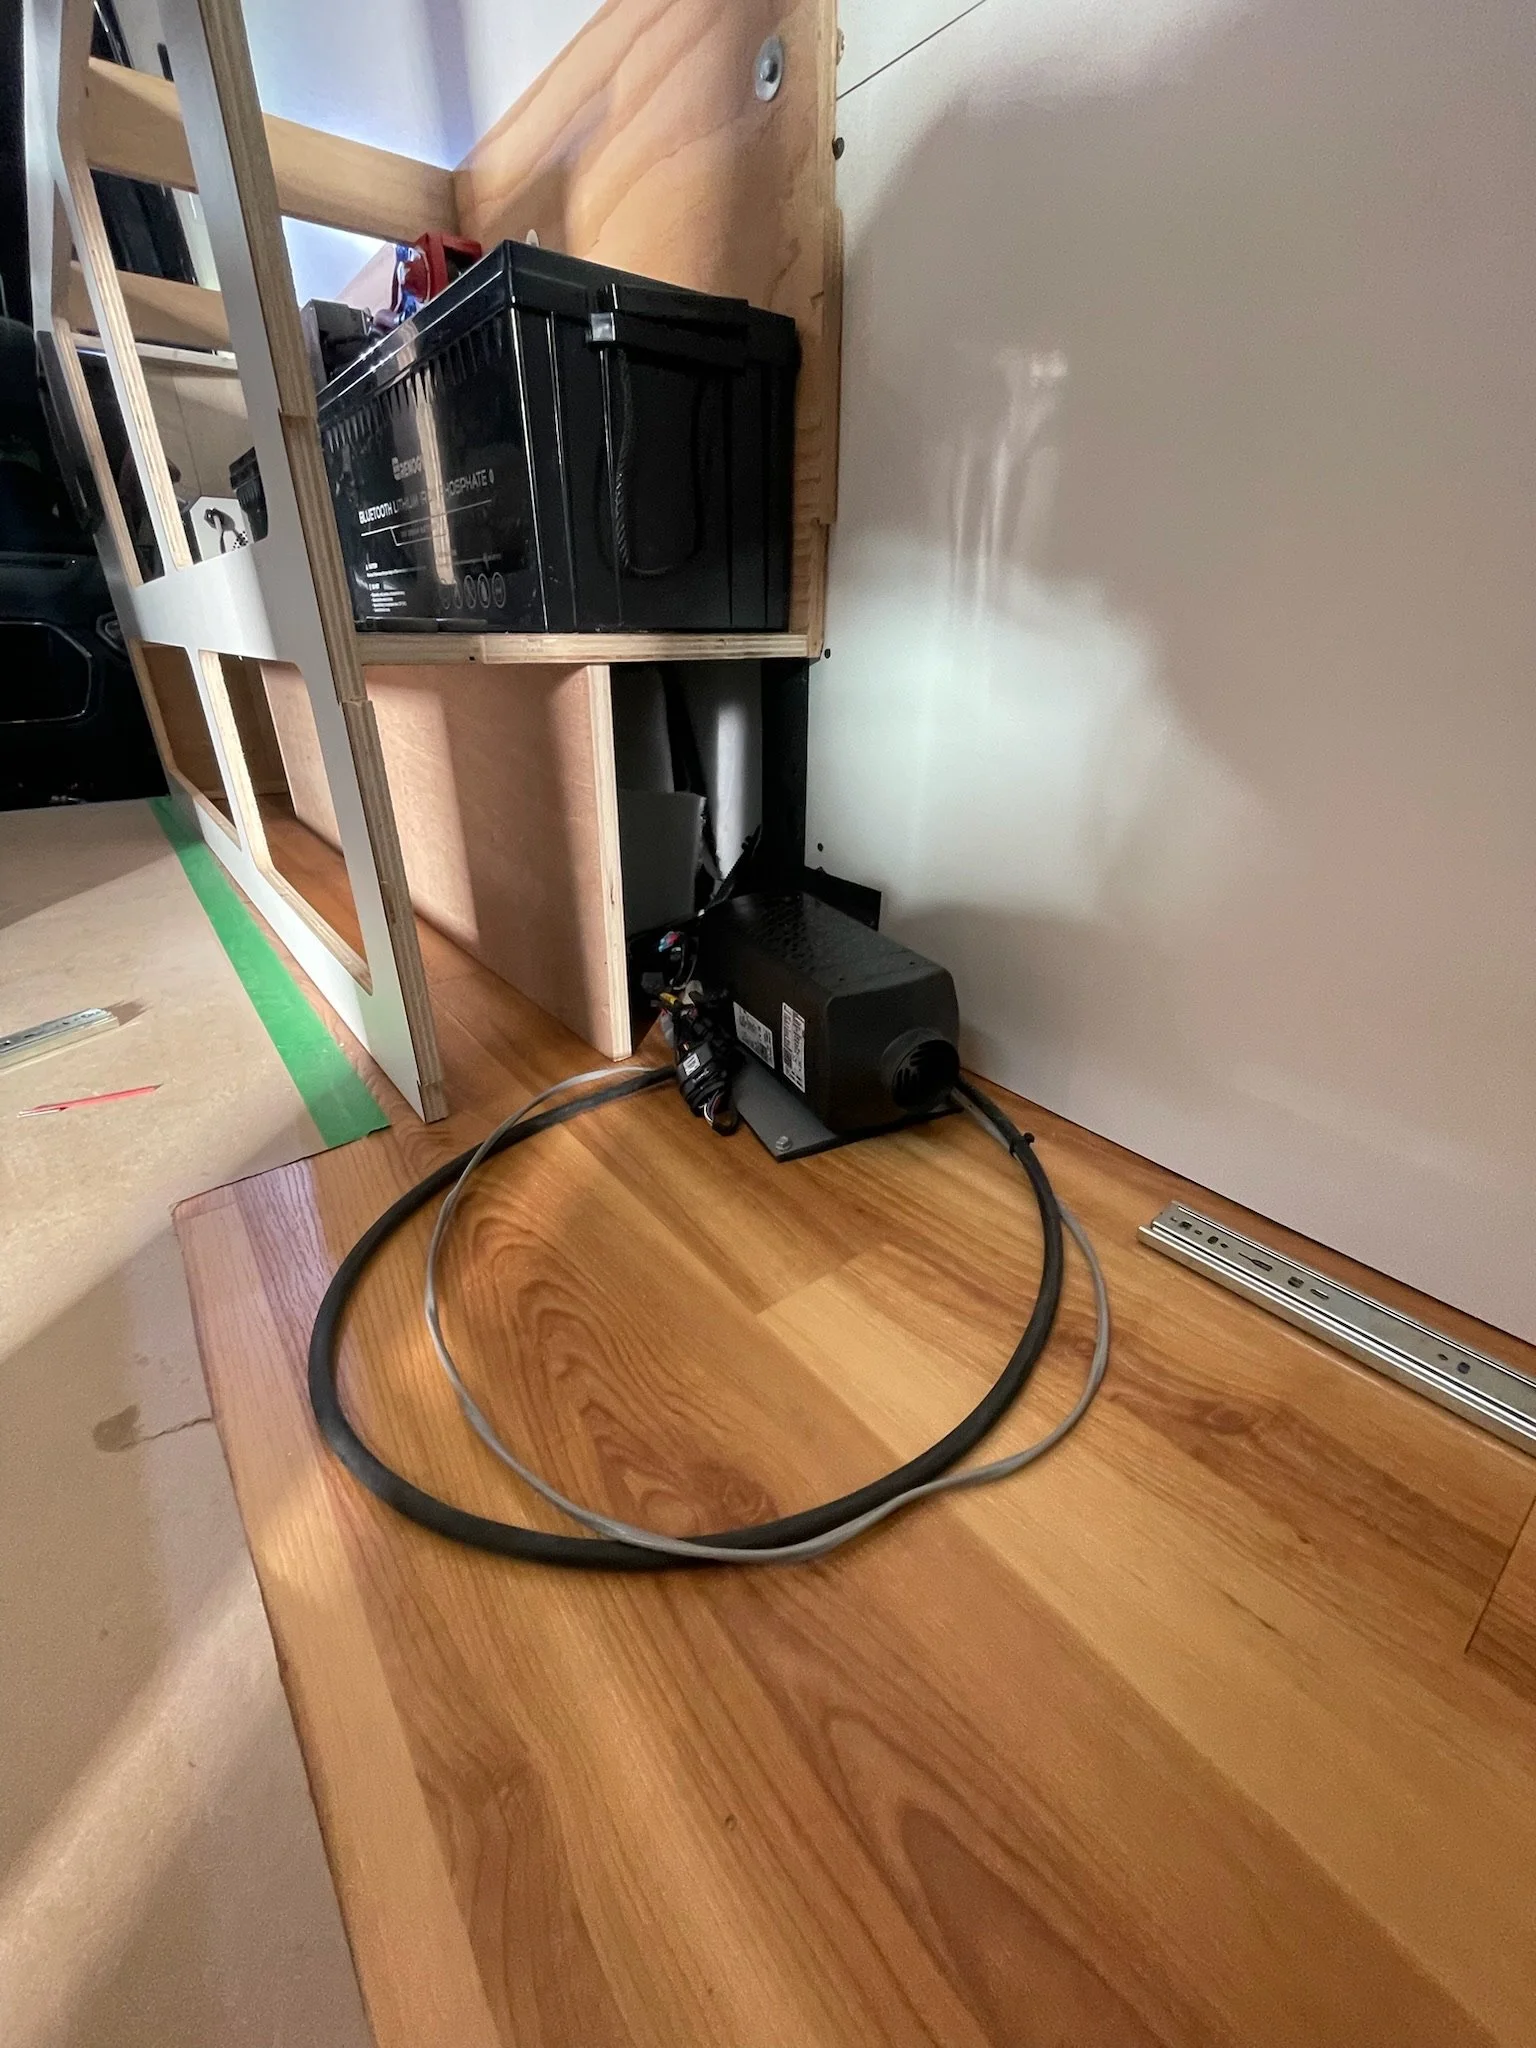
For the garage area, we utilized the space above the wheel well on the driver side to house our battery system and the passenger side box is home to all of the plumbing and some extra storage space.
We lit up the garage area with LED light tracks and LED strip lights installed on the top of both boxes and switched from both inside the van and the garage area.
Temperature Control Systems
We installed a Maxxair 7500K fan on the roof for airflow as well as a Maxxair single speed exhaust fan. The exhaust fan is in the front primarily for use while cooking. In the summer, these two fans can also be used to take in and push out air to keep things cool without an AC. We always use a roof adapter on these fan installations so that the fan sits nice and flat on the roof.
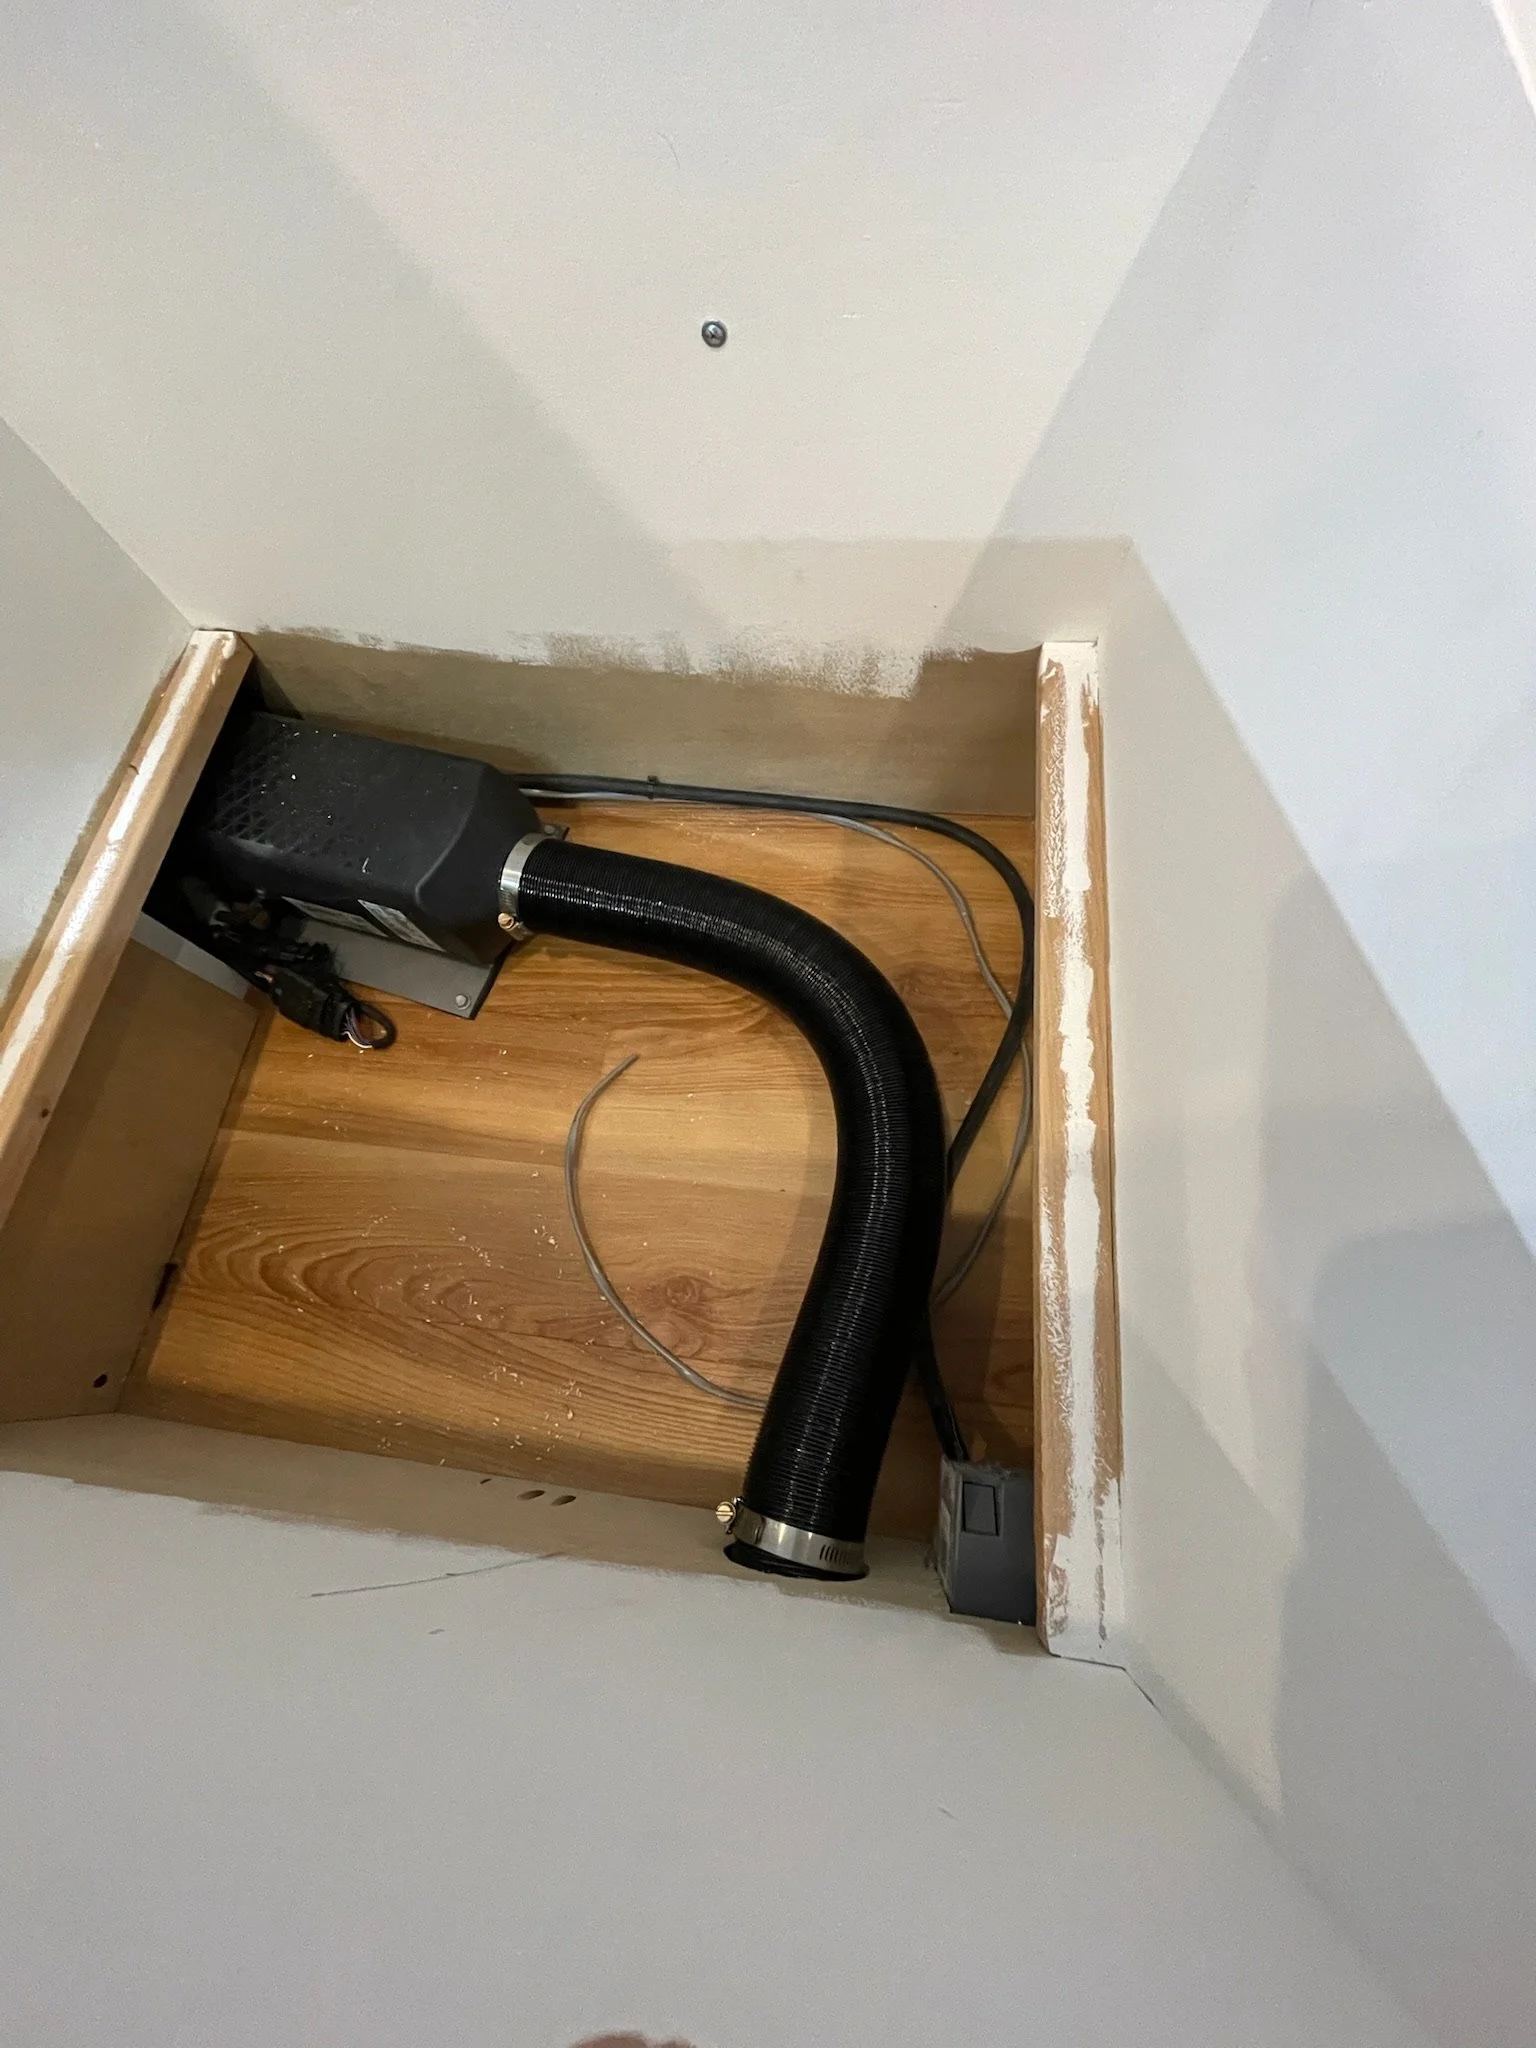
We also installed an Espar AS3 D2L Diesel Heater in the bench seat to keep the van nice and warm during cold weather excursions.

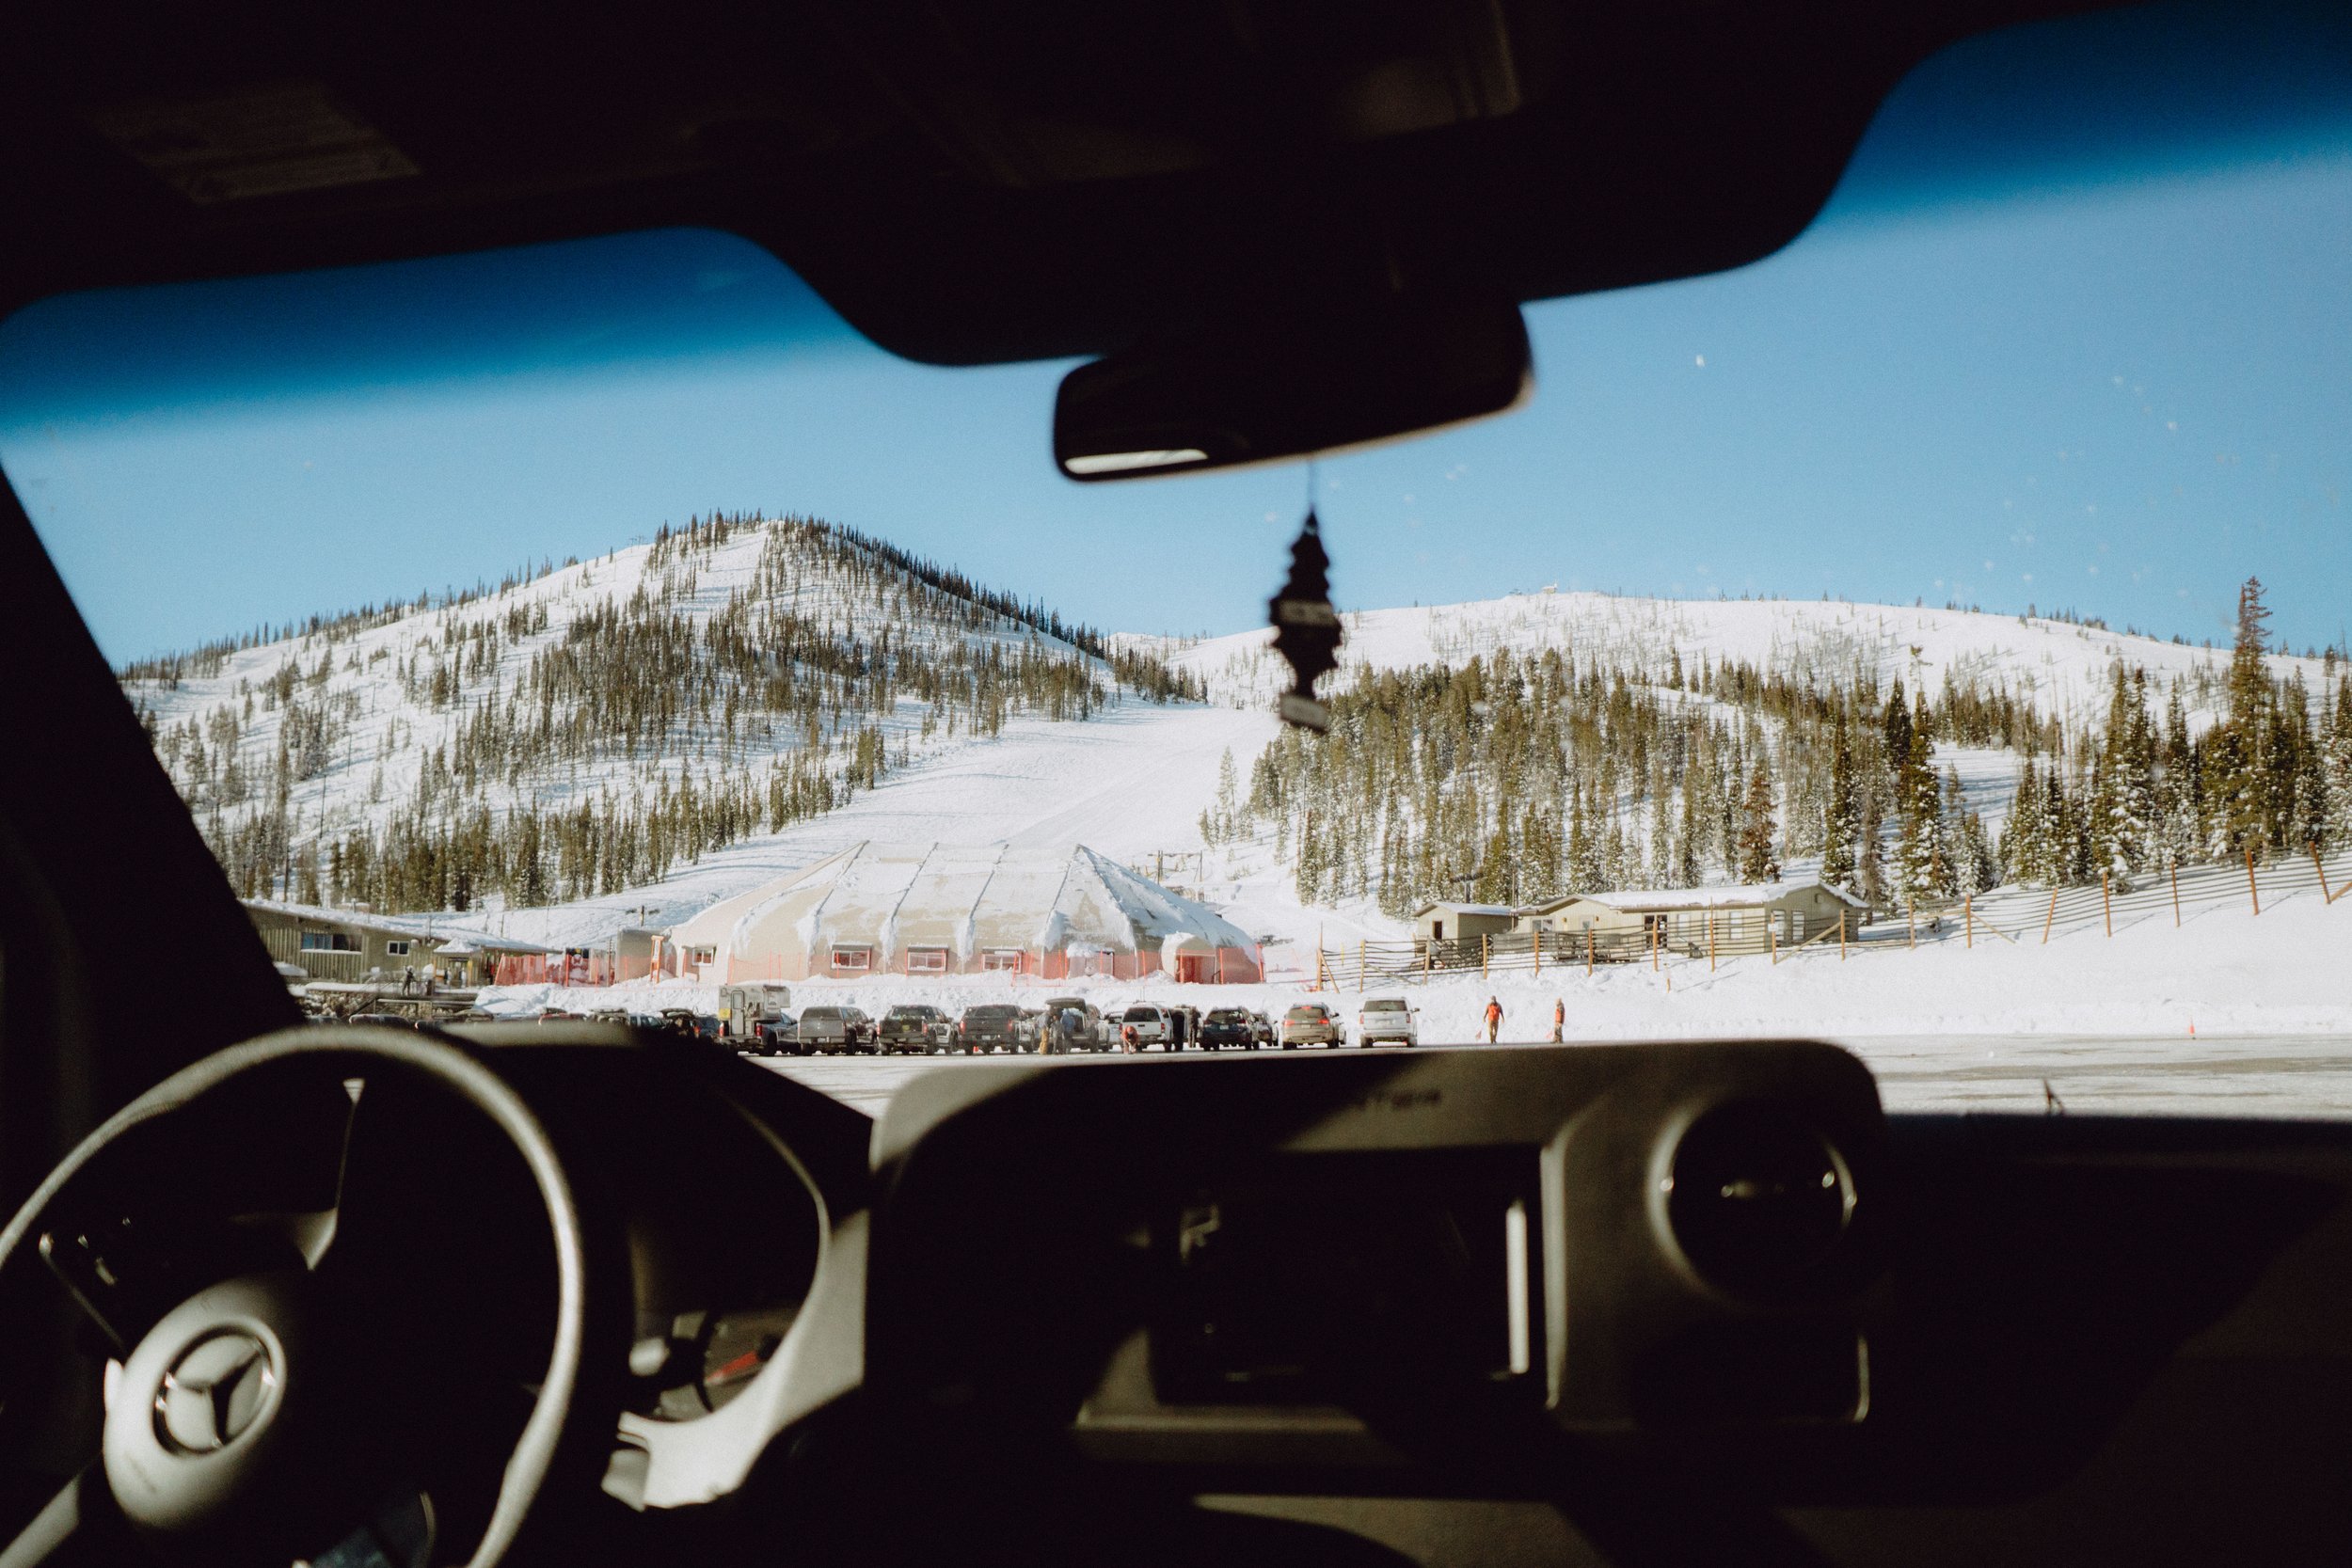
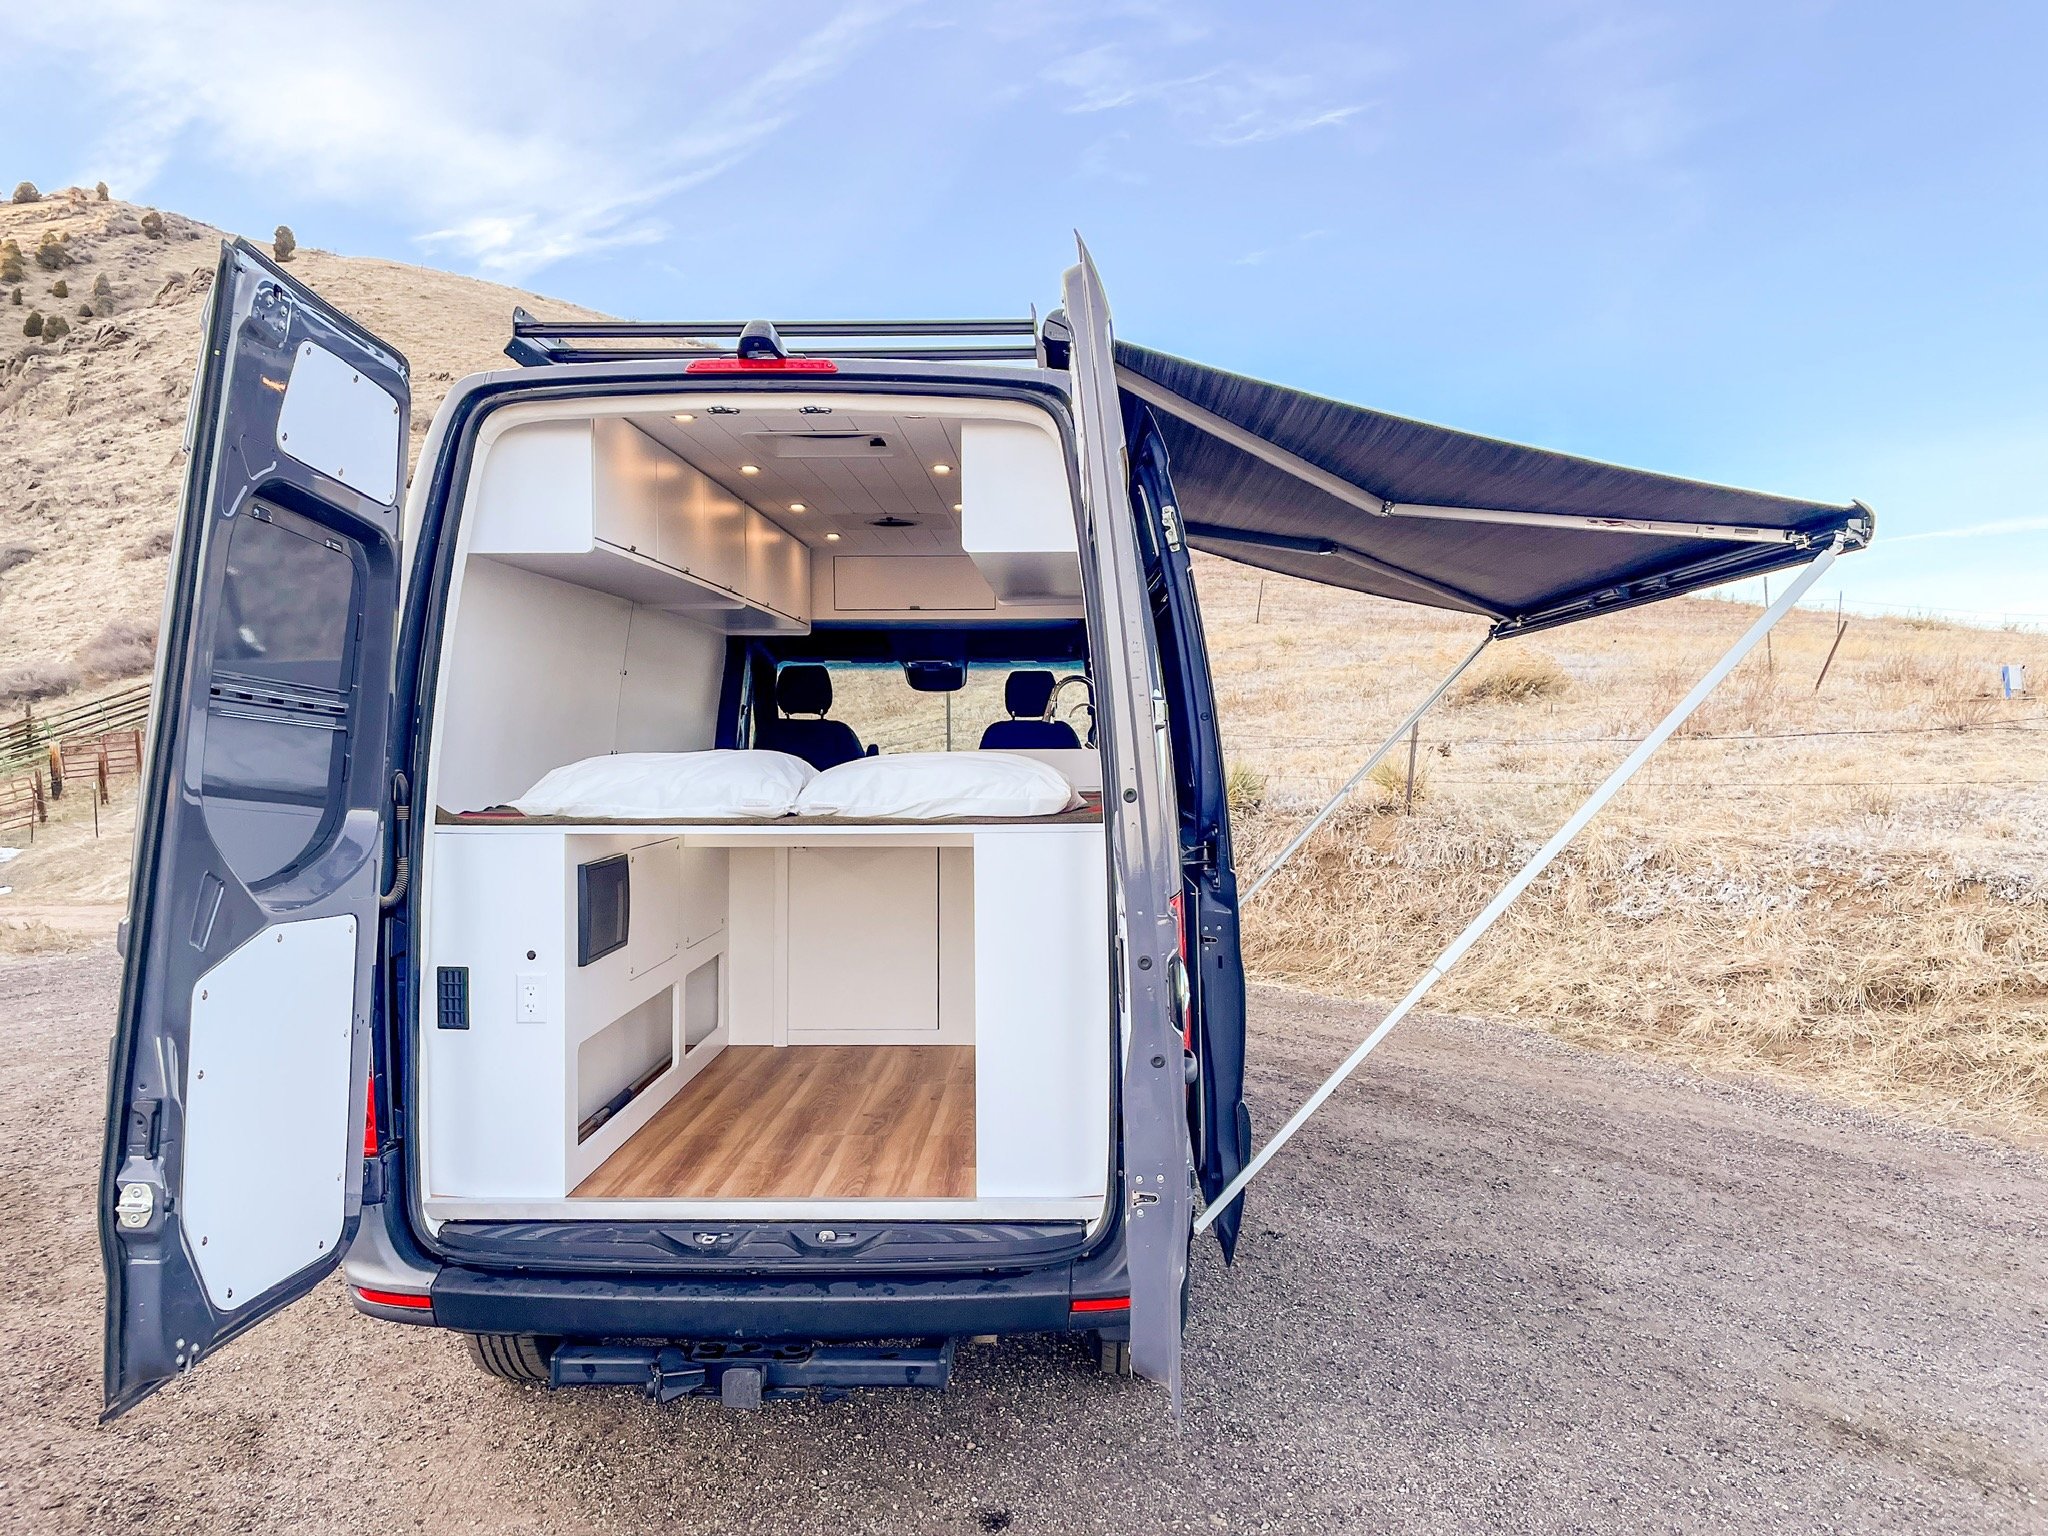
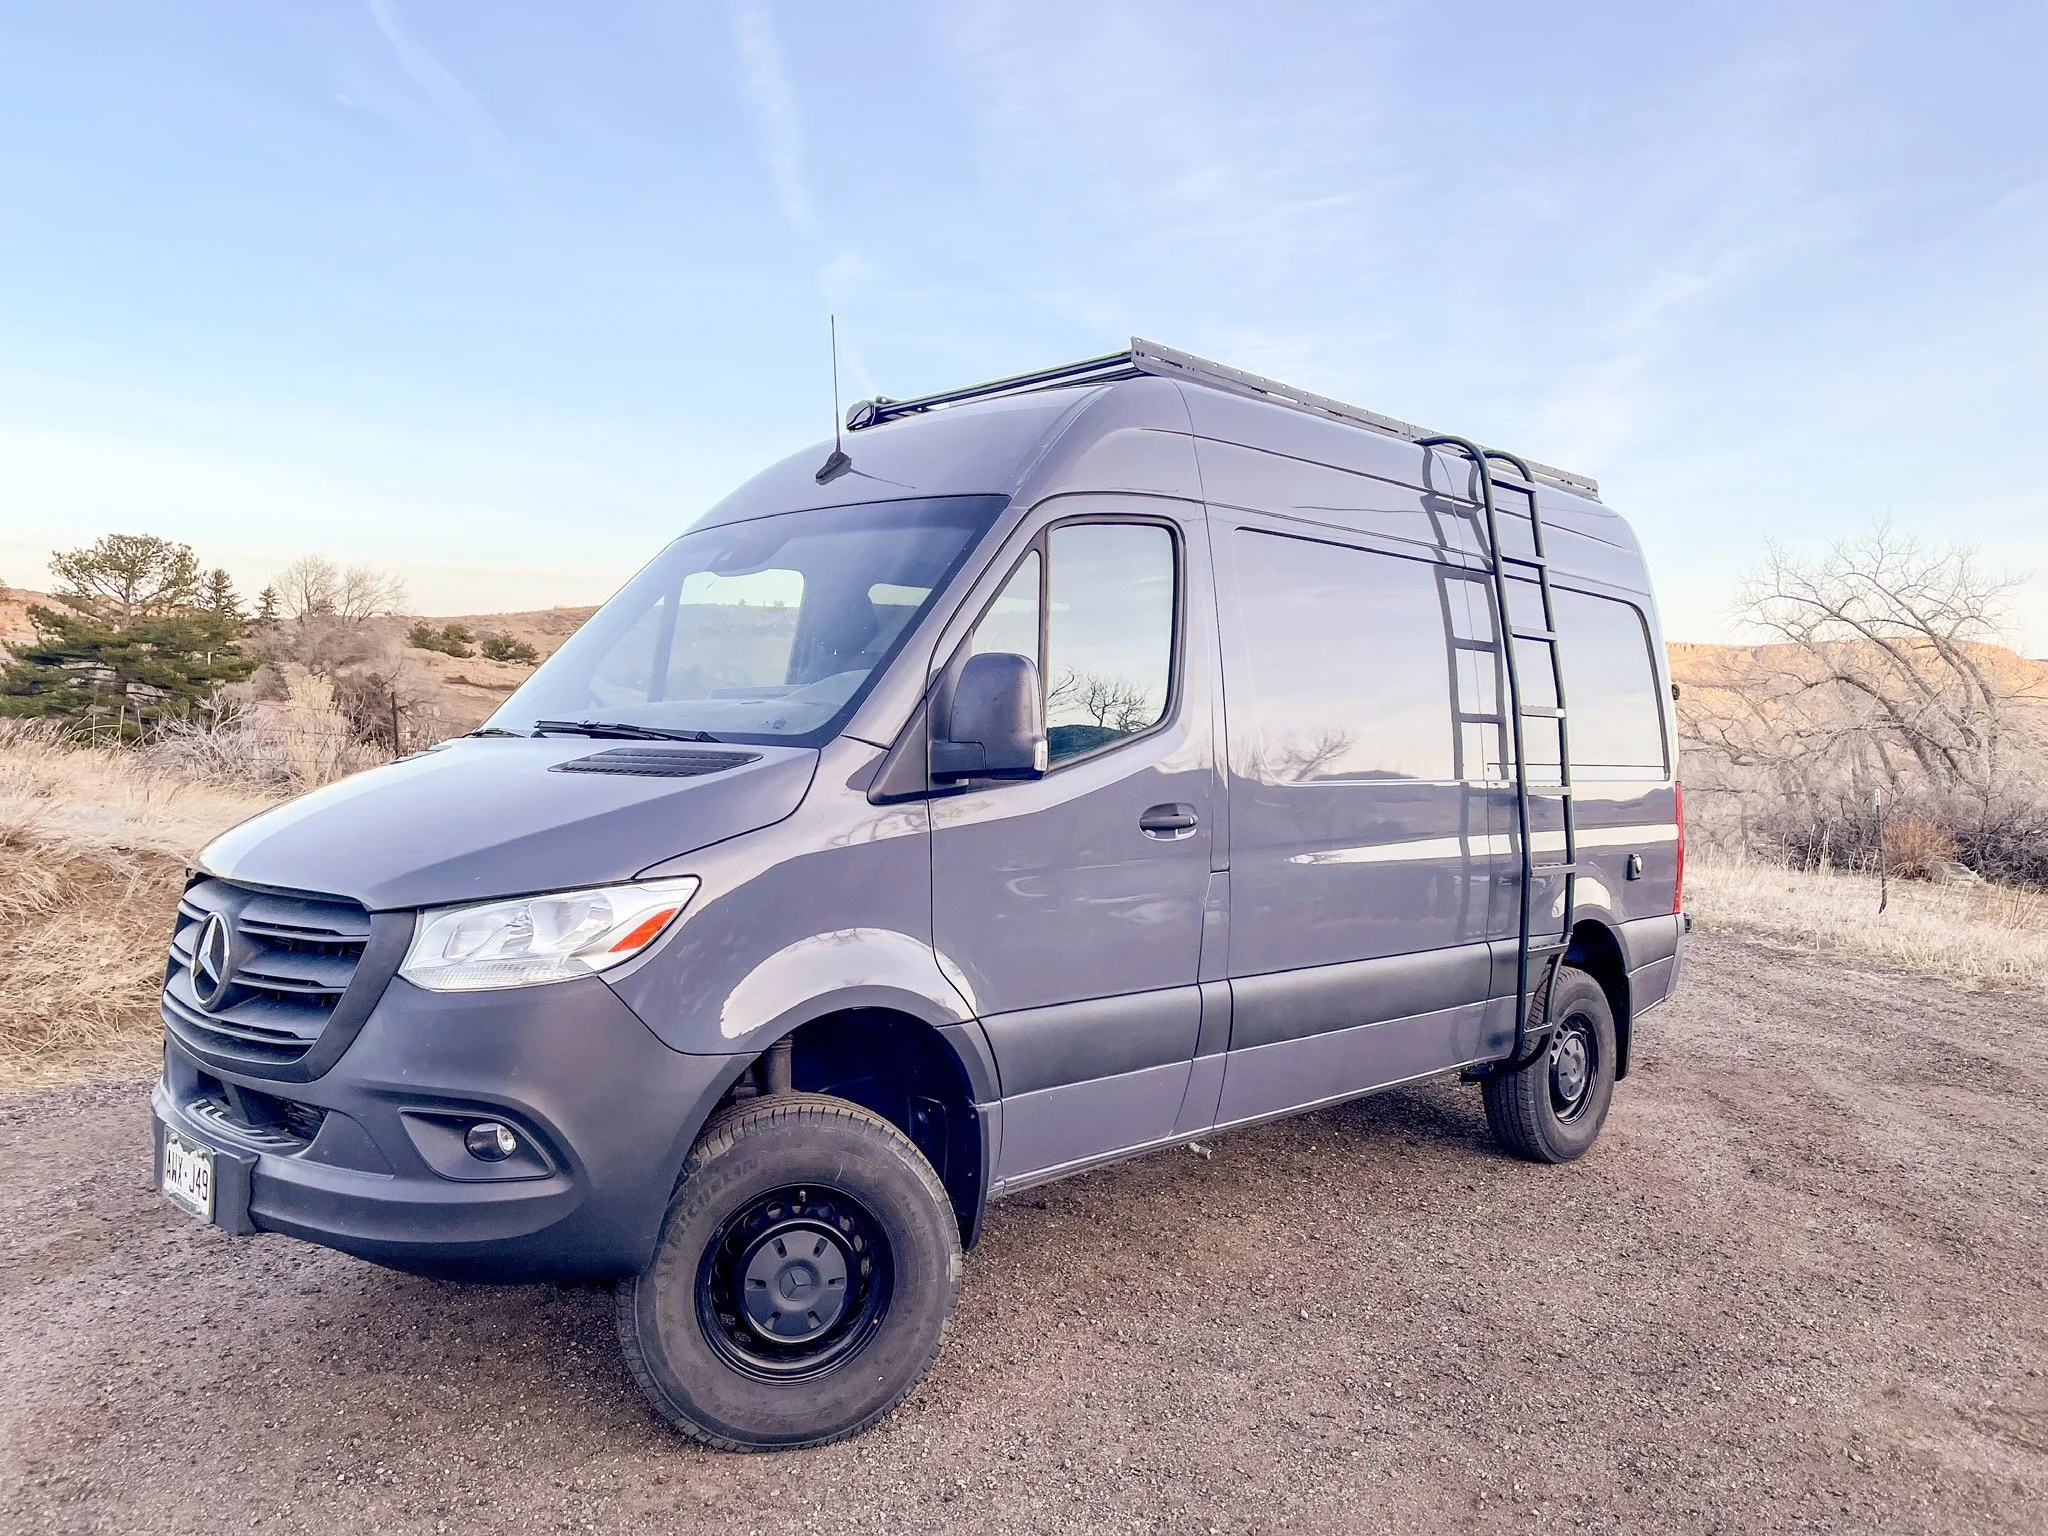
On the roof we installed a Flatline Van Co Low Pro Roof Rack with a side ladder. Flatline offers the option to get an F80 awning kit, so we did that and installed the Fiamma F80S awning (the 144” wheel base calls for the 320mm awning) to create an outside covered space.
Exterior Upgrades

Don’t hesitate to reach out to john@coadventurevans.com for DIY product recommendations, assistance with your project, or any other questions you might have. We’re always happy to help!